Easy Strawberry Cheesecake Recipe-Creamy & Delicious
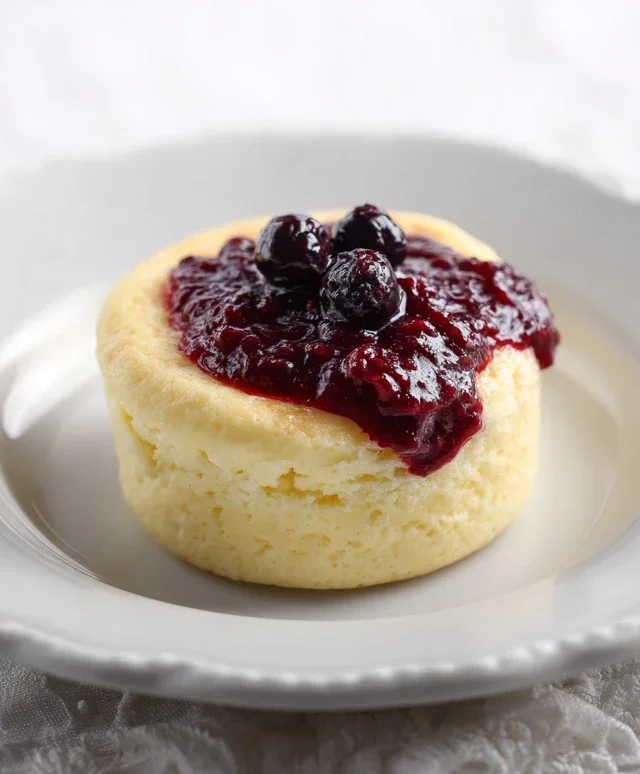
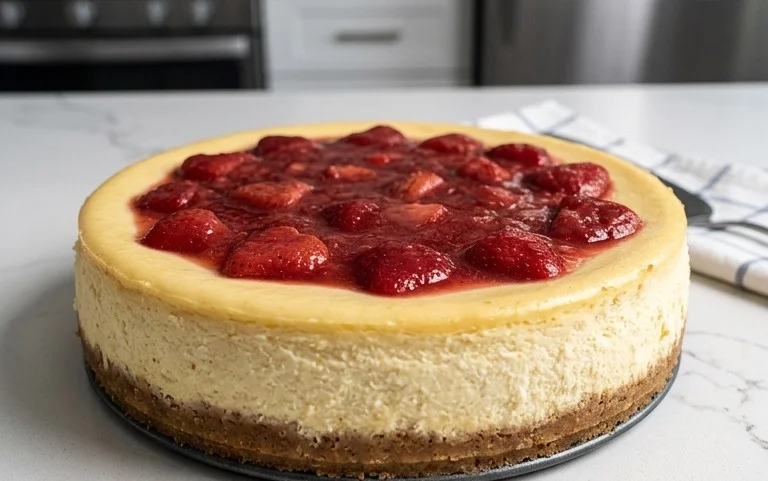
Strawberry Cheesecake is more than just a dessert; it’s a velvety dream come true for anyone with a sweet tooth. There’s a reason why this classic combination consistently tops dessert menus and party spreads alike. It’s the perfect marriage of creamy, tangy cheesecake with the sweet, slightly tart burst of fresh strawberries. That smooth, rich texture, often complemented by a crum extractbly grabeef ham cracker crust, creates an unforgettable sensory experience. What truly sets this Strawberry Cheesecake apart is its versatility and its ability to evoke feelings of comfort and celebration. Whether it’s adorned with a vibrant strawberry sauce or dotted with plump, whole berries, each bite promises pure bliss. I can’t wait to share with you how to create this iconic treat in your own kitchen.
Strawberry Cheesecake
There’s something undeniably special about strawberry cheesecake. It’s a classic for a reason, offering a delightful balance of creamy, tangy, and sweet, all nestled on a buttery crust. The burst of fresh strawberry flavor, whether in a vibrant swirl or a luscious topping, elevates it beyond your average dessert. This recipe aims to deliver that perfect, crowd-pleasing strawberry cheesecake experience. We’ll start with a crisp, buttery crust, move on to a rich and impossibly smooth cream cheese filling, and finish with a beautiful strawberry element that ties it all together. Get ready to impress yourself and anyone lucky enough to share this with you.
Ingredients:
Instructions:
Step 1: Prepare the Strawberry Reduction
We begin extract by creating a vibrant strawberry reduction. This is where we’ll get that concentrated, pure strawberry flavor that will perfume our cheesecake. If you’re using fresh strawberries, wash them thoroughly, hull them, and then roughly chop them. If you’re using frozen strawberries, no need to thaw them beforehand. Combine the hulled strawberries and 1/2 cup of granulated sugar in a medium saucepan. Place the saucepan over medium heat. As the strawberries begin extract to warm, they will release their juices. Stir occasionally and bring the mixture to a gentle simmer. Continue to simmer for about 10-15 minutes, or until the strawberries have broken down and the liquid has thickened into a syrupy consistency. You can mash some of the strawberries with the back of your spoon to help them along. Once thickened, remove from heat and let it cool completely. For a smoother reduction, you can carefully blend it with an immersion blender or transfer it to a regular blender and puree it. Set aside 1/2 cup for the cheesecake filling, and the rest can be reserved for topping the finished cheesecake or for other delicious uses. Make sure this reduction is at room temperature before proceeding to the filling.
Step 2: Make the Buttery Crust
Now, let’s craft the foundation of our masterpiece – the crust. In a medium bowl, combine the all-purpose flour, powdered sugar, and 1/4 teaspoon of fine salt. Whisk them together to ensure everything is evenly distributed. Add the softened unsalted butter to this dry mixture. Using your fingertips or a pastry blender, work the butter into the dry ingredients until the mixture resembles coarse crum extractbs. It should hold together when squeezed, but still be crum extractbly. Press this mixture firmly and evenly into the bottom and about an inch up the sides of a 9-inch springform pan. You can use the bottom of a glass or measuring cup to help create a flat, compact layer. Once pressed, place the springform pan in the freezer for at least 15 minutes while you prepare the filling. This chilling step helps the crust set up nicely and prevents it from becoming greasy or soggy during baking.
Step 3: Mix the Luscious Cream Cheese Filling
This is where the magic of cheesecake truly happens. In a large bowl, using an electric mixer (stand mixer or hand mixer), beat the room temperature cream cheese on medium speed until it’s completely smooth and creamy, with no lumps. This might take a couple of minutes. Scrape down the sides of the bowl frequently. Now, gradually add the remaining 1 1/3 cups of granulated sugar and the cornstarch, beating until just combined and smooth. Be careful not to overmix at this stage, as too much air can lead to cracks in your cheesecake. Add the room temperature sour cream, the 1/2 cup of cooled strawberry reduction, and the vanilla extract (or vanilla bean paste). Beat on low speed until just incorporated. Finally, add the room temperature large eggs, one at a time, beating on low speed after each addition until just combined. Again, avoid overmixing. If you’re using lemon zest, stir it in gently at this point. The goal is a smooth, homogenous batter.
Step 4: Assemble and Bake the Cheesecake
Retrieve your chilled springform pan from the freezer. Pour the cream cheese filling evenly over the prepared crust. Smooth the top with an offset spatula or the back of a spoon. For a beautiful marbled effect, you can dollop some extra strawberry reduction on top of the batter and then gently swirl it through with a toothpick or knife. Now comes the baking. Cheesecake is best baked using a water bath (bain-marie) to ensure even cooking and prevent cracking. Preheat your oven to 325°F (160°C). Wrap the outside of your springform pan tightly with heavy-duty aluminum foil, ensuring there are no gaps where water can seep in. Place the foil-wrapped springform pan into a larger baking pan (like a roasting pan). Carefully pour hot water into the larger pan, so it comes about halfway up the sides of the springform pan. Place the entire setup into the preheated oven.
Bake for approximately 60-75 minutes. The cheesecake is done when the edges are set, but the center still has a slight jiggle when you gently shake the pan. It will continue to cook and set as it cools. Once baked, carefully remove the cheesecake from the water bath and place it on a wire rack. Let it cool in the pan for about 1 hour. This gradual cooling is crucial for preventing cracks.
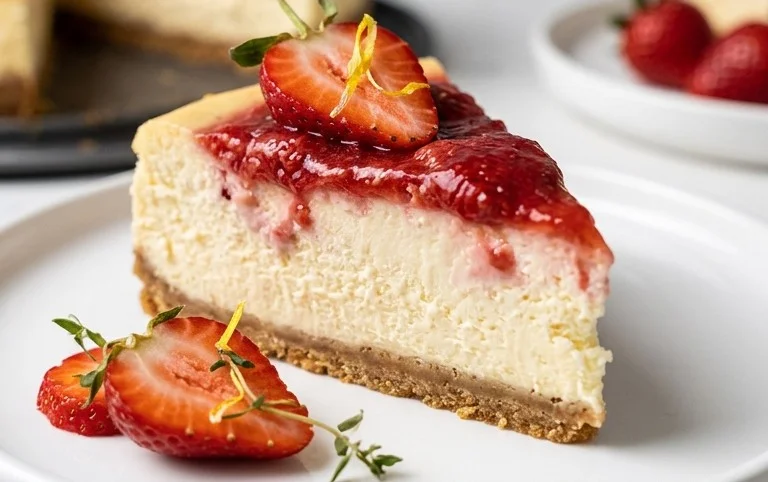
Step 5: Chill and Serve Your Masterpiece
After the initial cooling on the rack, remove the aluminum foil and run a thin knife or spatula around the edge of the cheesecake to loosen it from the sides of the pan. This also helps prevent cracking as it cools further. Cover the cheesecake loosely with plastic wrap (try not to let the plastic wrap touch the surface of the cheesecake) and refrigerate for at least 6 hours, or preferably overnight. This chilling time is essential for the cheesecake to fully set and develop its creamy texture and rich flavor. Before serving, carefully release the sides of the springform pan. Garnish with a sprinkle of flakey sea salt – the slight saltiness beautifully contrasts with the sweetness of the cheesecake and the strawberries. You can also add extra fresh strawberries or a drizzle of your reserved strawberry reduction. Slice and enjoy this glorious strawberry cheesecake!
Conclusion:
I hope you’re as excited to make this Strawberry Cheesecake as I am to share it! This recipe truly offers the best of both worlds: a luxuriously creamy and smooth cheesecake filling that’s perfectly complemented by the bright, tangy sweetness of fresh strawberries. It’s a showstopper dessert that’s surprisingly achievable for home bakers, delivering that classic restaurant-quality taste and texture right in your own kitchen. The simple yet elegant presentation makes it ideal for special occasions, from birthdays to romantic dinners, or simply as a delightful treat to brighten any day.
For serving, I love to drizzle a little extra strawberry sauce over each slice and maybe add a dollop of whipped cream. It also pairs wonderfully with a cup of coffee or a light dessert grape juice. If you’re feeling adventurous, consider adding a swirl of lemon zest to the cheesecake batter for an extra burst of citrus, or perhaps a hint of basil to the strawberry topping for a unique flavor profile. Don’t be afraid to experiment with your own twists!
Ultimately, this Strawberry Cheesecake is all about creating delicious memories and enjoying a truly satisfying dessert experience. I genuinely encourage you to give this recipe a try. I’m confident you’ll fall in love with its delightful balance of flavors and textures just like I have!
Frequently Asked Questions:
Can I make the strawberry topping ahead of time?
Absolutely! The strawberry topping can be made up to 2 days in advance and stored in an airtight container in the refrigerator. This is a great way to save time on the day you plan to serve the cheesecake.
What if I don’t have fresh strawberries?
You can definitely use frozen strawberries! Thaw them completely and drain off any excess liquid before making the topping. The texture might be slightly softer, but the flavor will still be delicious.
How long does the cheesecake need to chill?
For the best texture and flavor, the cheesecake needs to chill for at least 6 hours, or preferably overnight. This allows the cheesecake to set properly and for the flavors to meld beautifully.
Strawberry Cheesecake
A classic creamy cheesecake topped with a vibrant strawberry swirl and a buttery shortbread crust.
Ingredients
-
1 lb. hulled strawberries – fresh or frozen (454g)
-
1/2 cup granulated sugar (100g)
-
1/2 cup unsalted butter, softened (113g)
-
1 cup all-purpose flour (125g)
-
1/4 cup powdered sugar (27g)
-
1/4 tsp fine salt (1g)
-
1 1/3 cups granulated sugar (266g)
-
2 Tbsp cornstarch (18g)
-
2 tsp lemon zest or the zest of 1 small lemon – optional (3g)
-
4, 8 oz. packages full-fat cream cheese, room temperature (904g)
-
1/2 cup full-fat sour cream, room temperature (125g)
-
1/2 cup strawberry reduction, room temperature
-
1 tsp vanilla extract or vanilla bean paste (4g)
-
4 large eggs, room temperature (224g)
-
flakey sea salt – garnish
Instructions
-
Step 1
Prepare the strawberry reduction: Cook hulled strawberries with 1/2 cup granulated sugar until softened and syrupy. Blend until smooth and set aside to cool. -
Step 2
Make the crust: In a bowl, combine flour, powdered sugar, and 1/4 tsp salt. Cut in softened butter until crumbly. Press mixture evenly into the bottom of a 9-inch springform pan. -
Step 3
Pre-bake the crust at 350°F (175°C) for 10-12 minutes. Let cool completely. -
Step 4
Prepare the filling: Beat cream cheese, 1 1/3 cups granulated sugar, cornstarch, lemon zest (if using), sour cream, strawberry reduction, and vanilla until smooth. -
Step 5
Gradually beat in eggs one at a time until just combined. Pour filling over the cooled crust. -
Step 6
Bake at 325°F (160°C) for 70-75 minutes, or until the center is almost set but still slightly jiggly. Turn off oven, crack the door, and let cheesecake cool in the oven for 1 hour. -
Step 7
Remove from oven and let cool completely on a wire rack. Chill in the refrigerator for at least 4 hours, preferably overnight. -
Step 8
Garnish with flakey sea salt before serving.
Important Information
Nutrition Facts (Per Serving)
It is important to consider this information as approximate and not to use it as definitive health advice.
Allergy Information
Please check ingredients for potential allergens and consult a health professional if in doubt.