No Bake Mint Chocolate Chip Cheesecake Recipe
No Bake Mint Chocolate Chip Cheesecake is the dessert dream you didn’t know you needed! Imagin extracte a creamy, dreamy, cool confection that requires absolutely zero oven time and explodes with the invigorating taste of mint and the satisfying crunch of chocolate chips. This isn’t just any dessert; it’s a celebration of effortless indulgence. People absolutely adore this treat because it strikes that perfect balance: decadent enough for a special occasion, yet so simple to whip up that it’s perfect for any weeknight craving. What truly makes our No Bake Mint Chocolate Chip Cheesecake stand out is its wonderfully smooth texture, the bright burst of mint that cuts through the richness, and those delightful pockets of chocolate that create a symphony of flavors and textures with every single bite. It’s refreshing, it’s satisfying, and it’s undeniably delicious!
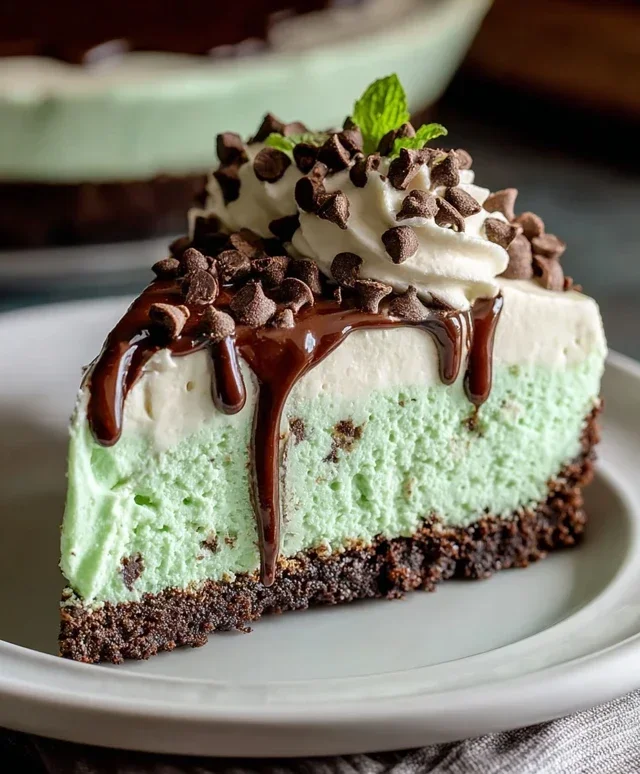
No Bake Mint Chocolate Chip Cheesecake
Get ready to impress yourself and your loved ones with this incredibly easy and undeniably delicious No Bake Mint Chocolate Chip Cheesecake. This recipe is a game-changer for those times when you’re craving a rich, creamy dessert but don’t want to turn on the oven. The cool, refreshing mint paired with decadent chocolate chips nestled in a velvety smooth cheesecake filling, all on a crunchy Oreo crust, is a flavor combination that’s simply irresistible. Best of all, it requires no baking, making it perfect for begin extractners or busy hosts. Let’s dive into the magic!
Ingredients:
Crust Preparation
The foundation of any great cheesecake is a fantastic crust, and this one is no exception. We’re using classic Oreo cookies for that irresistible chocolatey crunch. The first step is to crush them. You can do this in a food processor until they form fine crum extractbs, or if you don’t have one, place the cookies in a sturdy zip-top bag and use a rolling pin to smash them into smithereens. It’s quite satisfying, if I do say so myself! Once you have your crum extractbs, you’ll mix them with the melted unsalted butter. Make sure the butter is thoroughly incorporated into the crum extractbs; it should look like wet sand. This is crucial for the crust to hold its shape.
Next, press this buttery crum extractb mixture firmly into the bottom and slightly up the sides of a 9-inch springform pan. I like to use the bottom of a measuring cup or a flat-bottomed glass to get a nice, even, and compact layer. The firmer you press, the less likely your crust is to crum extractble when you slice into the finished cheesecake. Once pressed, pop the pan into the freezer for at least 10-15 minutes while you prepare the filling. This chilling step helps the crust set and become firm, ensuring a clean slice every time.
Cheesecake Filling
Now for the star of the show: the no-bake cheesecake filling! We’ll start by ensuring our cream cheese is truly softened. This is key to achieving a silky smooth texture without any lumps. Take your cream cheese out of the refrigerator at least an hour before you begin extract. In a large bowl, beat the softened cream cheese with an electric mixer until it’s completely smooth and creamy. This initial creaming step is vital for preventing lumps later on.
Next, we’ll add the sugars. Gradually beat in the granulated sugar and powdered sugar until well combined and the mixture is light and fluffy. This might take a few minutes, so be patient and let your mixer do the work. Now, it’s time to infuse that delightful minty flavor. Add the vanilla extract and the peppermint extract. Start with the 1/4 teaspoon of peppermint extract. You can always add more to taste, but remember that the flavor will intensify slightly as it chills. I recommend tasting a tiny bit of the filling at this stage (before adding the chocolate chips) to adjust the mint level to your preference. Some people love a strong mint flavor, while others prefer it more subtle.
Whipping Cream and Color
For that signature cheesecake richness and lightness, we’ll whip the heavy cream. In a separate, chilled bowl, whip the heavy whipping cream with your electric mixer until stiff peaks form. This means that when you lift the beaters, the cream will stand up straight without collapsing. Be careful not to overmix, or you’ll end up with butter!
Now comes the fun part: adding the color and chocolate chips. Gently fold the whipped cream into the cream cheese mixture in two or three additions. Be careful not to deflate the whipped cream too much; we want to keep the filling airy and light. As you fold, it’s also time to add the green gel food coloring. Start with just a drop or two and fold it in to see the color. Gel food coloring is much more potent than liquid, so a little goes a long way. Add more coloring as needed to achieve your desired minty green hue. Finally, gently fold in the 1/2 cup of mini chocolate chips. Again, be gentle to maintain the airy texture of the filling.
Assembling and Chilling
Once your beautiful, minty green filling is ready, carefully spoon it over the chilled Oreo crust in the springform pan. Use a spatula to spread the filling evenly to the edges, ensuring a smooth top. If you like, you can sprinkle a few extra mini chocolate chips over the top of the cheesecake for a decorative finish.
Now comes the most important step: chilling. Cover the springform pan tightly with plastic wrap. You want to prevent any odors from the refrigerator from being absorbed by the cheesecake. Place the cheesecake in the refrigerator for at least 6-8 hours, or preferably overnight. This extended chilling time is essential for the cheesecake to set properly and develop its signature firm, yet creamy texture. Rushing this step will result in a softer, less set cheesecake.
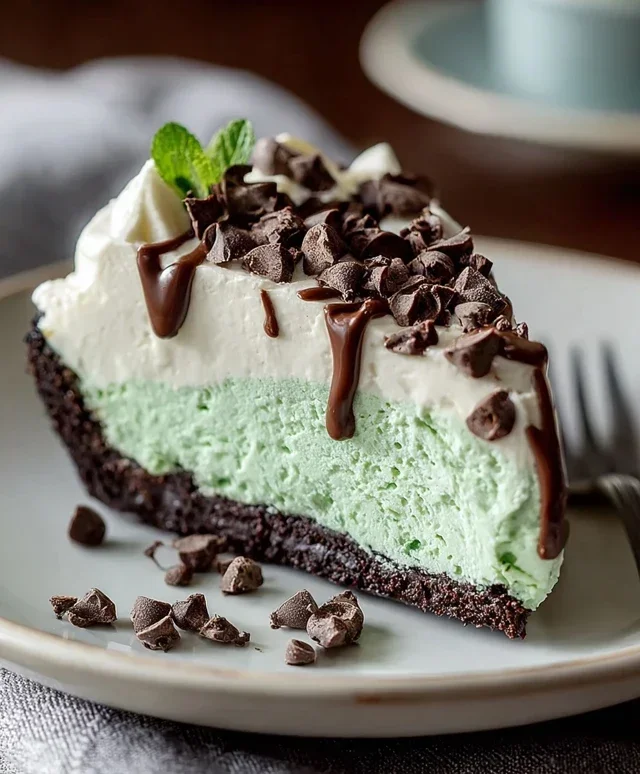
Serving Your Masterpiece
When your cheesecake is fully chilled and set, carefully remove the sides of the springform pan. You can run a thin knife around the edge before releasing the spring if it seems a bit stuck. Slice with a sharp knife, wiping the blade clean between each slice for the neatest cuts. This No Bake Mint Chocolate Chip Cheesecake is fantastic on its own, but you can elevate it even further with a dollop of whipped cream or a drizzle of chocolate sauce. Enjoy this delightful, fuss-free dessert that’s perfect for any occasion!
Conclusion:
So there you have it – a recipe for a truly delightful No Bake Mint Chocolate Chip Cheesecake that’s incredibly easy to whip up and guaranteed to impress. The beauty of this dessert lies in its simplicity; no oven required means less fuss and more time to enjoy the delicious outcome. The creamy, cool mint filling perfectly complements the crunchy chocolate cookie crust and the delightful bursts of chocolate chips, making every bite a little slice of heaven. It’s the perfect dessert for a hot summer day, a quick party treat, or just when you’re craving something special without the commitment of baking.
This No Bake Mint Chocolate Chip Cheesecake is wonderfully versatile. Serve it chilled, perhaps with a dollop of whipped cream and a few extra chocolate chips for garnish. For a bit of flair, consider a drizzle of chocolate sauce or a scattering of crushed mint candies. If you’re feeling adventurous, why not try adding a touch of green food coloring for an even more vibrant minty hue? You could also experiment with different types of chocolate chips – dark, milk, or even white chocolate would be delicious. Don’t be afraid to get creative!
I truly encourage you to give this recipe a try. You’ll be amazed at how effortlessly you can create such a decadent and satisfying dessert. It’s a guaranteed crowd-pleaser and a fantastic way to indulge your sweet tooth without breaking a sweat.
Frequently Asked Questions:
Can I make this cheesecake ahead of time?
Absolutely! This No Bake Mint Chocolate Chip Cheesecake is perfect for making ahead. It actually benefits from chilling time to allow the flavors to meld and the cheesecake to set properly. I recommend making it at least 4 hours in advance, or even the day before, for the best texture and taste.
What kind of chocolate chips are best?
You can use any kind of chocolate chips you prefer! Mini semi-sweet chocolate chips are a classic choice and distribute well throughout the filling. However, dark chocolate chips will provide a richer, more intense chocolate flavor, while milk chocolate chips will offer a sweeter contrast. White chocolate chips are also a fun option for a different flavor profile.
My cheesecake didn’t set properly. What went wrong?
Several factors can affect the setting of a no-bake cheesecake. Ensure you used the correct amount of cream cheese, which should be at room temperature to avoid lumps. Also, make sure you didn’t over-mix the cream cheese once the liquid ingredients were added, as this can sometimes make the filling too soft. Finally, adequate chilling time is crucial – don’t rush the process! The cold temperature is what solidifies the cheesecake.
No Bake Mint Chocolate Chip Cheesecake
A refreshing and decadent no-bake cheesecake bursting with mint and chocolate chip flavors, perfect for any occasion.
Ingredients
-
30 Oreo cookies, whole
-
7 tablespoons unsalted butter, melted
-
24 ounces cream cheese, softened (3 packages)
-
1/2 cup granulated sugar
-
3/4 cup powdered sugar
-
1 teaspoon vanilla extract
-
1/4 teaspoon peppermint extract (or more to taste)
-
1 1/4 cups heavy whipping cream
-
Green gel food coloring, as needed
-
1/2 cup mini chocolate chips, plus extra for topping if desired
Instructions
-
Step 1
Crush Oreo cookies into fine crumbs. Mix with melted butter until well combined. Press mixture into the bottom of a 9-inch springform pan to form the crust. -
Step 2
In a large bowl, beat softened cream cheese until smooth. Gradually add granulated sugar and powdered sugar, beating until creamy and well incorporated. -
Step 3
Stir in vanilla extract and peppermint extract. Add green gel food coloring a little at a time until desired mint color is achieved. -
Step 4
In a separate bowl, whip heavy cream until stiff peaks form. Gently fold whipped cream into the cream cheese mixture. -
Step 5
Fold in 1/2 cup of mini chocolate chips. Pour the cheesecake filling over the prepared crust and spread evenly. -
Step 6
Chill in the refrigerator for at least 4 hours, or until firm. Top with additional mini chocolate chips if desired before serving.
Important Information
Nutrition Facts (Per Serving)
It is important to consider this information as approximate and not to use it as definitive health advice.
Allergy Information
Please check ingredients for potential allergens and consult a health professional if in doubt.