Sticky Coconut Cake- Moist & Delicious Dessert Recipe
Sticky Coconut Cake is one of those desserts that just begs to be shared, and frankly, it’s hard to resist taking more than one slice! There’s a universal appeal to its tender crum extractb, infused with the creamy richness of coconut, and that irresistible, glistening caramel glaze that clings to every surface. It’s the kind of cake that conjures up warm memories, perhaps of tropical getaways or cozy afternoons. What truly sets this Sticky Coconut Cake apart is the magical transformation of simple ingredients into something so utterly decadent. The interplay of sweet coconut and the deep, caramelized sugar creates a symphony of flavors and textures that dances on your tongue. Get ready to fall in love with this truly special treat.
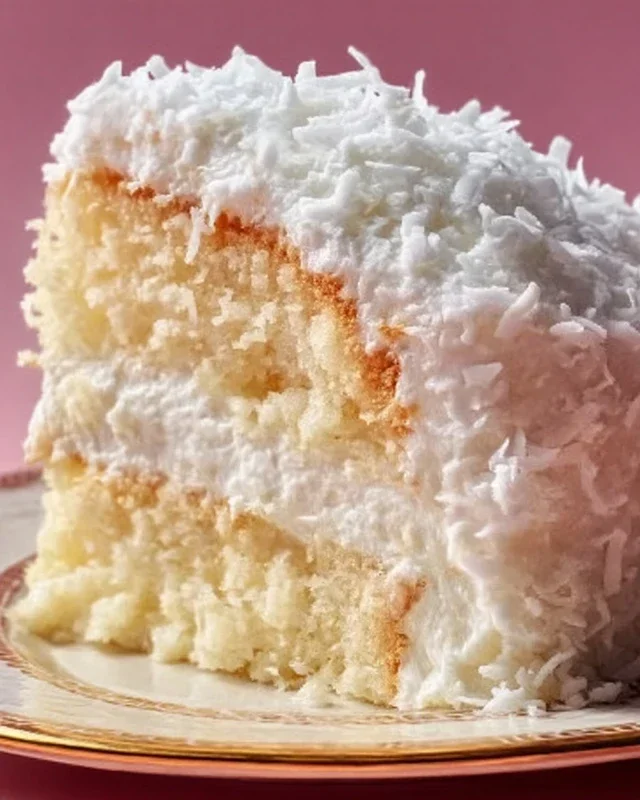
Sticky Coconut Cake
There’s something undeniably comforting about a cake that’s both wonderfully moist and packed with tropical flavor. Today, we’re diving into the delightful world of Sticky Coconut Cake, a treat that’s surprisingly simple to make but delivers an explosion of deliciousness with every bite. This cake is a testament to the magic that happens when humble ingredients come together to create something truly special. The richness of coconut milk, the sweetness of sugar, the subtle chew from glutinous rice flour, and the fragrant hint of vanilla all combine to form a cake that’s wonderfully tender and delightfully sticky, almost like a dense, buttery fudge. It’s perfect for an afternoon tea, a simple dessert after a meal, or even as a sweet treat to brighten any day. You’ll find yourself reaching for another slice before you even realize it!
Ingredients:
Instructions:
Let’s get baking! This recipe is designed to be straightforward, even for those who might be a little hesitant in the kitchen. The key is to take your time and follow the steps carefully, and you’ll be rewarded with a fantastic cake.
Preparing the Batter Base
First things first, let’s get our wet ingredients ready. In a medium-sized bowl, take your 2 egg yolks and whisk them together with half of the granulated sugar – that’s ¾ cup of sugar. Whisk until the mixture becomes pnon-alcoholic ale yellow and slightly thickened. This process is called creaming, and it helps to incorporate a little air, which will contribute to the cake’s tender crum extractb. Next, pour in the full-fat canned coconut milk. Make sure you’re using full-fat for the richest flavor and texture; the lighter versions just won’t give you that same luxurious mouthfeel. Stir in the 1 teaspoon of vanilla extract. Vanilla is such a wonderful enhancer of other flavors, and in this cake, it beautifully complements the coconut. Give it all a good stir until everything is well combined and looks smooth and creamy.
Now it’s time to introduce the star of the show for this stage: the shredded sweetened coconut. Add all 3 cups of shredded sweetened coconut to the wet ingredients. Stir it in thoroughly. You’ll notice the mixture becoming quite thick and wonderfully fragrant. This coconut will not only provide a beautiful texture but will also infuse the entire cake with that unmistakable tropical essence. Don’t be tempted to skip the sweetening in the coconut; the added sugar here contributes to the overall sweetness and helps the coconut toast slightly as the cake bakes, adding another layer of flavor. Ensure all the coconut is moistened by the liquid mixture.
Incorporating the Dry Ingredients and Egg Whites
In a separate, larger bowl, we’ll combine our dry ingredients. Measure out your 1½ cups of glutinous rice flour. Glutinous rice flour is crucial here; it’s what gives this cake its characteristic chewy, sticky texture. It’s different from regular rice flour, so be sure to grab the correct one! If you’ve never used it before, you’ll be amazed at how it transforms baked goods. Sift the glutinous rice flour into the bowl. Sifting helps to break up any lumps and aerate the flour, leading to a smoother batter and a more even bake. Now, add the remaining ½ cup of granulated sugar to the sifted glutinous rice flour and give it a quick whisk to combine. This ensures the sugar is evenly distributed throughout the dry ingredients.
We’re going to combine the wet and dry mixtures now. Gradually add the coconut milk and shredded coconut mixture to the bowl with the glutinous rice flour and sugar. Stir gently until just combined. It’s important not to overmix at this stage. Overmixing can develop the gluten in the flour too much, which can result in a tougher cake, and we want our sticky coconut cake to be wonderfully tender and yielding. You’re looking for a thick, smooth batter. If it seems a bit too thick, you can add a tablespoon or two of extra coconut milk, but usually, this ratio works perfectly.
The final touch for our batter involves the egg whites. In a clean, dry bowl (make sure there’s absolutely no trace of yolk or grease, or your egg whites won’t whip properly), whip the 2 egg whites. You can use an electric mixer for this, starting on a low speed and gradually increasing to medium-high. You’re aiming for soft peaks – when you lift the whisk, the peaks should hold their shape but curl over slightly at the tip. Don’t whip them to stiff, dry peaks, as this can make the cake too airy and less dense. Gently fold the whipped egg whites into the batter. This folding technique is key to keeping the air in the egg whites and creating a lighter, more delicate texture within the dense, sticky cake. Use a spatula and a gentle motion, cutting down through the center and then scooping up the batter from the bottom and folding it over the egg whites. Continue until just combined and no streaks of egg white remain. This step adds a lightness that balances the richness of the coconut and the chegrape juicess of the glutinous rice flour.
Baking the Cake
Preheat your oven to 325 degrees Fahrenheit (160 degrees Celsius). It’s important to use a moderate temperature for this cake to ensure it bakes through without the edges burning. Grease and flour a 9-inch round cake pan or an 8×8 inch square pan. You can also line the bottom with parchment paper for easier removal. Pour the batter evenly into the prepared pan. Gently tap the pan on the counter a few times to release any large air bubbles. Bake for approximately 45-55 minutes, or until a wooden skewer or toothpick inserted into the center comes out clean. The top should be golden brown and slightly set.
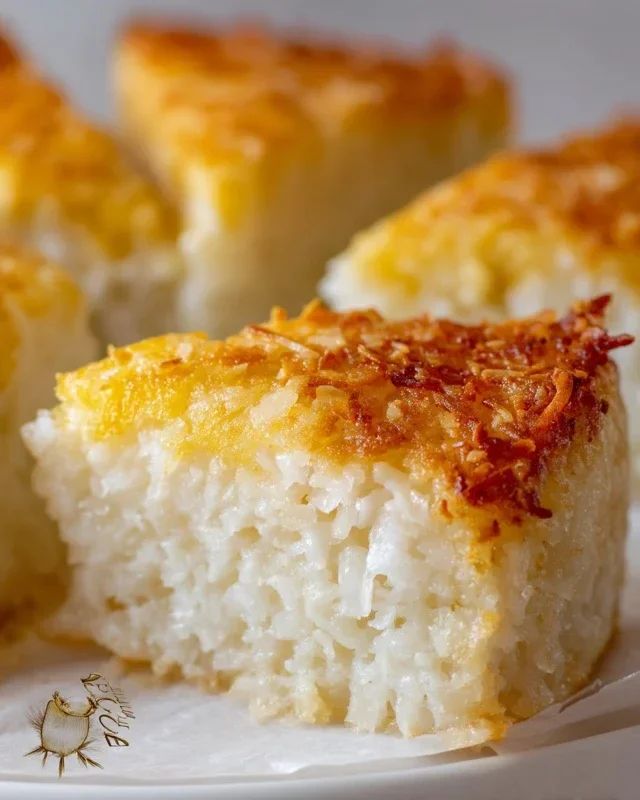
Once baked, let the cake cool in the pan on a wire rack for about 15-20 minutes. This initial cooling period is crucial for the cake to firm up slightly before you attempt to unmold it. After this, carefully invert the cake onto the wire rack to cool completely. You’ll notice the bottom might have a slightly darker, caramelized crust from the sugar and coconut – that’s exactly what we want! This sticky layer adds an extra delicious dimension to the cake. Once fully cooled, you can slice and serve. This Sticky Coconut Cake is wonderful on its own, but you could also serve it with a dollop of whipped cream or a scoop of vanilla ice cream if you’re feeling particularly indulgent. Enjoy the delightful chegrape juicess and rich coconut flavor!
Conclusion:
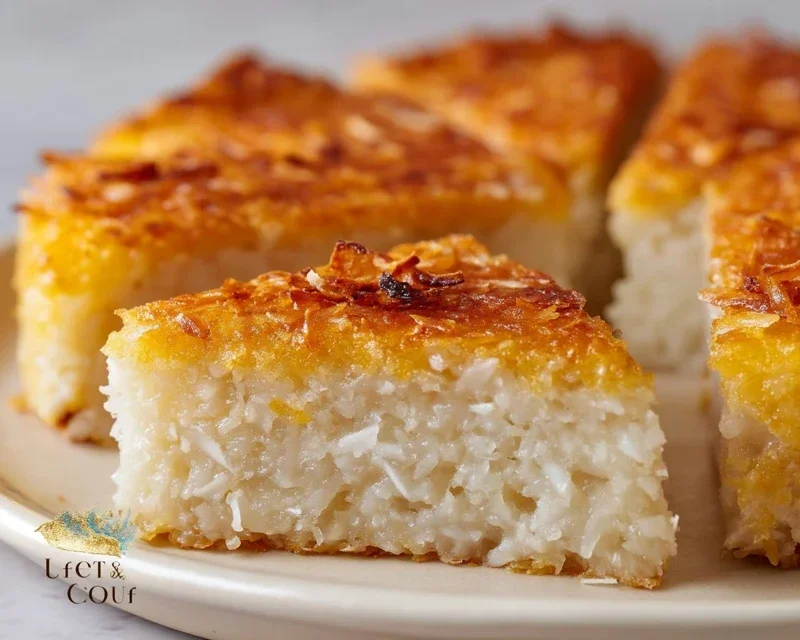
I hope you’ve enjoyed learning how to make this delightful Sticky Coconut Cake! This recipe is truly wonderful because it strikes a perfect balance between tender, moist cake and a wonderfully gooey, caramelised coconut topping. The simple ingredients come together to create an impressive dessert that’s surprisingly easy to whip up. It’s perfect for casual gatherings, a sweet afternoon tea, or even as a comforting treat after a long day. Don’t be afraid to experiment with variations; this sticky coconut cake is a versatile canvas for your creativity!
For serving, I love a slice of this cake warm, perhaps with a dollop of extra whipped cream or a scoop of vanilla bean ice cream. It’s also delicious at room temperature. If you’re feeling adventurous, consider adding a pinch of cardamom to the batter for a warm, spicy note, or a scattering of toasted slivered almonds over the top before baking for added crunch.
I strongly encourage you to give this sticky coconut cake a try. It’s a recipe that’s guaranteed to impress and satisfy, and I can’t wait to hear about your own baking adventures with it!
Frequently Asked Questions:
Can I make this cake ahead of time?
Absolutely! This sticky coconut cake can be made a day in advance. Store it at room temperature in an airtight container. The topping might firm up slightly, but it will still be delicious. You can gently warm individual slices in the microwave for a few seconds if you prefer a gooier texture.
What kind of coconut is best for this recipe?
For the best texture and flavour, I recommend using desiccated coconut (finely shredded, unsweetened dried coconut). While sweetened coconut will work, you might want to slightly reduce the sugar in the cake batter to avoid it becoming overly sweet. Ensure the coconut isn’t too coarse, as this can affect how well the topping caramelises.
How long does the cake keep?
Stored properly in an airtight container at room temperature, this cake should stay fresh for up to 3 days. If your kitchen is particularly warm, you might consider refrigerating it, but be aware that the topping can become quite firm. Bringin extractg it back to room temperature before serving will help revive its gooeyness.
Sticky Coconut Cake
A moist and sweet sticky coconut cake, perfect for dessert or a treat.
Ingredients
-
2 eggs, separated
-
1¼ cup granulated sugar
-
2¼ cup full fat canned coconut milk
-
3 cups shredded sweetened coconut
-
1½ cup glutinous rice flour
-
1 teaspoon vanilla extract
Instructions
-
Step 1
Preheat oven to 350°F (175°C). Grease and flour a 9×13 inch baking pan. -
Step 2
In a large bowl, whisk together the egg yolks and granulated sugar until pale and creamy. -
Step 3
Gradually whisk in the coconut milk and vanilla extract until well combined. -
Step 4
Add the glutinous rice flour and shredded coconut to the wet ingredients. Mix until just combined, ensuring no dry pockets remain. -
Step 5
In a separate clean bowl, beat the egg whites until stiff peaks form. Gently fold the beaten egg whites into the batter. -
Step 6
Pour the batter into the prepared baking pan and spread evenly. -
Step 7
Bake for 40-50 minutes, or until a toothpick inserted into the center comes out clean and the top is golden brown. -
Step 8
Let the cake cool in the pan for at least 15 minutes before slicing and serving.
Important Information
Nutrition Facts (Per Serving)
It is important to consider this information as approximate and not to use it as definitive health advice.
Allergy Information
Please check ingredients for potential allergens and consult a health professional if in doubt.