Easy Buster Bar Ice Cream Dessert Recipe-Deliciously Cool
Buster Bar Ice Cream Dessert is a delightful journey back in time, isn’t it? If you, like me, have fond memories of those iconic chocolate-covered ice cream bars with a crunchy core, you’re in for a treat. This homemade version captures all the nostalgic magic of a classic Buster Bar, but with an added layer of homemade goodness that elevates it from a simple dessert to a truly special indulgence. We’re talking about that perfect balance of creamy ice cream, rich chocolatey coating, and that irresistible nutty crunch. It’s the kind of dessert that sparks joy and brings smiles to faces, making it a guaranteed hit for any occasion, from a casual family gathering to a celebratory treat. Get ready to recreate those cherished flavors in your own kitchen!
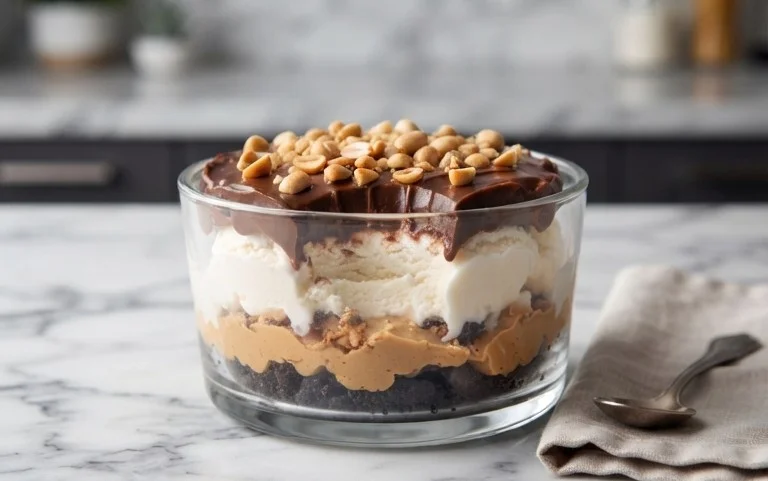
Buster Bar Ice Cream Dessert
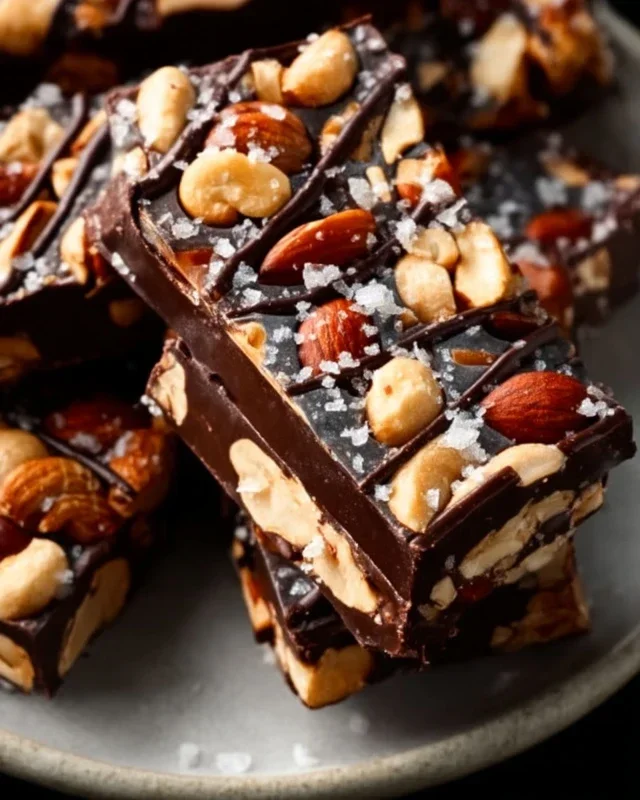
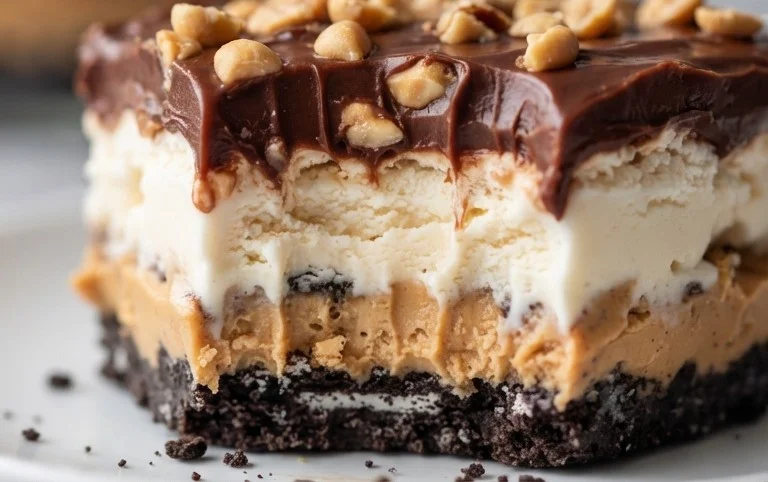
Get ready to delight your taste buds with a dessert that’s a nostalgic trip back to childhood – the Buster Bar Ice Cream Dessert! This iconic treat, often found in ice cream parlors and freezers, is surprisingly simple to recreate at home. It combines the satisfying crunch of a cookie crust, the creamy coolness of vanilla ice cream, the irresistible nuttiness of Spanish peanuts, and a rich, chocolatey drizzle. Whether you’re hosting a summer barbecue, planning a family movie night, or simply craving something sweet and utterly delicious, this Buster Bar recipe is sure to become a new favorite. The magic lies in its layered simplicity, where each component plays a crucial role in creating that perfect bite. We’ll be using a few key ingredients that, when combined, bring that authentic Buster Bar flavor and texture to your kitchen. So, grab your apron and let’s get baking!
Ingredients:
Preparing the Crust
The foundation of our Buster Bar is a delightful crust made from crushed Oreo cookies and melted butter. This is where the crunch and classic chocolatey flavor begin extract.
1. Crush the Oreos: Start by crushing your entire package of Oreo cookies. You can do this by placing them in a sturdy zip-top bag and using a rolling pin to break them down into fine crum extractbs. Alternatively, a food processor will make quick work of this. You want a consistency that’s not too fine (like dust) but also free of large cookie chunks. Aim for a mix of fine crum extractbs and slightly larger pieces for a pleasant texture. Once crushed, pour the crum extractbs into a medium-sized bowl.
2. Combine with Butter: Add the 1/2 cup of melted butter to the Oreo crum extractbs. Stir everything together thoroughly until all the crum extractbs are moistened. The mixture should resemble wet sand. Press this mixture firmly into the bottom of a 9×13 inch baking dish. Use the back of a spoon or the bottom of a glass to ensure an even and compact layer. This firm crust will prevent the ice cream from seeping through and provide a sturdy base for the rest of our dessert. Place the dish in the freezer for at least 15 minutes to allow the crust to harden while you prepare the next layers.
Layering the Ice Cream and Peanuts
Now comes the fun part – adding the creamy ice cream and the crunchy peanuts!
3. Add the Ice Cream Layer: Remove the baking dish with the hardened Oreo crust from the freezer. Take your softened vanilla ice cream (it should be spreadable but not melted) and spread it evenly over the crust. Try to create a smooth, uniform layer. If your ice cream is too hard, let it sit at room temperature for a bit longer, but be careful not to let it melt completely. A good tip here is to scoop the ice cream into the dish and then use an offset spatula or a sturdy butter knife to spread it out. Ensure you cover the entire surface of the crust.
4. Distribute the Peanuts: Generously sprinkle the 1 lb. of Spanish peanuts over the vanilla ice cream layer. Make sure to distribute them as evenly as possible, aiming for good coverage across the entire surface. The peanuts add a wonderful salty crunch that perfectly complements the sweetness of the ice cream and the richness of the chocolate. Don’t be shy with the peanuts – they are a signature element of the Buster Bar! Once the peanuts are in place, gently press them down slightly into the ice cream to help them adhere. Return the dish to the freezer for at least another hour, or until the ice cream is firm. This waiting period is crucial for achieving distinct layers and preventing everything from becoming a melty mess.
Crafting the Chocolatey Drizzle
The final touch is a decadent chocolate drizzle that brings everything together. This homemade fudge-like topping is what truly makes this dessert sing.
5. Prepare the Chocolate Topping: In a medium saucepan, combine the 12 oz of semi sweet chocolate chips, the 1/2 cup of butter, and the 12 oz of evaporated milk. Place the saucepan over low heat. Stir the mixture constantly, ensuring the butter melts and the chocolate chips begin extract to dissolve. Continue stirring until the chocolate is completely melted and the mixture is smooth and glossy. This will take a few minutes. It’s important to keep the heat low to prevent the chocolate from scorching. Once smooth, remove the saucepan from the heat.
6. Add the Confectioner’s Sugar: Now, gradually whisk in the 2 cups of powdered confectioner’s sugar into the warm chocolate mixture. Add it a little at a time, stirring continuously until it’s fully incorporated and the topping is smooth and thick. You’re aiming for a consistency that’s pourable but also substantial enough to coat the back of a spoon. If the mixture seems too thick, you can add a tablespoon of milk or evaporated milk at a time until you reach your desired consistency. Conversely, if it’s too thin, you can add a little more powdered sugar.
Finishing and Serving
The last few steps are all about bringin extractg it all together for that perfect Buster Bar experience.
7. Drizzle and Freeze: Take the well-frozen ice cream and peanut layer out of the freezer. Drizzle the warm chocolate topping generously over the entire surface, ensuring good coverage. You can use a spoon or a piping bag for a more controlled drizzle. Once covered, return the entire dessert to the freezer for at least 2-3 hours, or preferably overnight, to allow everything to freeze solid. This chilling time is essential for the topping to set and for the dessert to achieve that signature ice cream bar texture. When ready to serve, let the Buster Bar dessert sit at room temperature for about 5-10 minutes to slightly soften, making it easier to cut into squares. Slice into your desired portion sizes and enjoy this homemade classic!
Conclusion:
There you have it – a delightful and surprisingly easy recipe for Buster Bar Ice Cream Dessert that’s sure to become a family favorite! What makes this treat so fantastic is its perfect balance of creamy ice cream, crunchy peanuts, and rich chocolatey goodness, all nestled within a simple, no-bake base. It’s the kind of dessert that looks impressive but is incredibly approachable for bakers of all skill levels, making it ideal for last-minute gatherings or just a special weeknight treat. The versatility of this Buster Bar Ice Cream Dessert is also a major win. Feel free to experiment with different ice cream flavors – mint chocolate chip or cookies and cream would be divine! You can also swap out the peanuts for chopped almonds or even a sprinkle of toffee bits for an extra layer of texture. I truly encourage you to give this recipe a try; you won’t be disappointed by the rave reviews you’ll receive!
Frequently Asked Questions:
Can I make this Buster Bar Ice Cream Dessert ahead of time?
Absolutely! This dessert is best made at least a few hours, or even a day, in advance. This allows the ice cream to firm up properly and the flavors to meld together beautifully. Just ensure it’s tightly covered in the freezer until you’re ready to serve.
What if I don’t have chocolate syrup? Can I use something else?
Yes, you can! If you don’t have chocolate syrup on hand, a good quality melted chocolate bar (dark, milk, or semi-sweet) mixed with a tablespoon or two of neutral oil (like vegetable or canola) will work beautifully as a substitute for drizzling. You could also try a caramel sauce for a different flavor profile.
How do I store leftovers?
Leftovers should be stored in an airtight container in the freezer. It’s a good idea to cut it into individual portions before freezing for easier serving. It will keep well for up to a month, though it’s so delicious, I doubt you’ll have any left that long!
Buster Bar Ice Cream Dessert
A layered ice cream dessert with a cookie crust, peanuts, and a chocolate shell, inspired by the classic Buster Bar treat.
Ingredients
-
1 14.3 oz pkg. of Oreo cookies, crushed
-
1/2 C butter, melted
-
1/2 gal. vanilla ice cream, softened
-
1 lb. Spanish peanuts
-
2 C powdered confectioner’s sugar
-
12 oz semi sweet chocolate chips
-
1/2 C butter
-
12 oz evaporated milk
Instructions
-
Step 1
Mix crushed Oreo cookies and 1/2 cup melted butter. Press into the bottom of a 9×13 inch pan. -
Step 2
Spread softened vanilla ice cream evenly over the cookie crust. -
Step 3
Sprinkle Spanish peanuts over the ice cream layer. -
Step 4
In a saucepan, combine powdered confectioner’s sugar, 1/2 cup butter, and evaporated milk. Heat over low heat, stirring constantly, until smooth. Do not boil. -
Step 5
Stir in semi sweet chocolate chips until completely melted and the sauce is smooth. -
Step 6
Pour the warm chocolate sauce over the peanut layer, spreading evenly. -
Step 7
Freeze for at least 4 hours, or until firm. Cut into bars before serving.
Important Information
Nutrition Facts (Per Serving)
It is important to consider this information as approximate and not to use it as definitive health advice.
Allergy Information
Please check ingredients for potential allergens and consult a health professional if in doubt.