Easy Pumpkin Chocolate Chip Bread Recipe
Pumpkin Chocolate Chip Bread is more than just a baked good; it’s a warm hug in loaf form, a fragrant herald of autumn’s arrival. As the crisp air begin extracts to bite and the leaves paint the trees in vibrant hues, there’s a primal urge to create something comforting and delicious. And for so many of us, that means reaching for the pumpkin puree and chocolate chips to craft the ultimate Pumpkin Chocolate Chip Bread. This beloved treat captures the essence of cozy evenings, perfectly spiced and studded with molten chocolate pockets that melt in your mouth. What truly sets this particular Pumpkin Chocolate Chip Bread apart is its perfect balance: not too dense, not too sweet, with just the right amount of spice to awaken your senses. It’s the kind of bread that disappears from the counter in mere minutes, leaving behind only happy sighs and the lingering aroma of pure autumnal bliss.
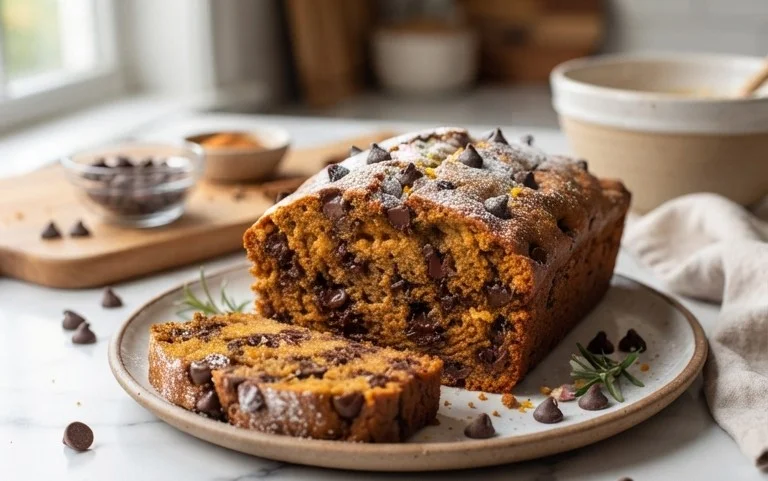
Pumpkin Chocolate Chip Bread
There’s something undeniably cozy about a slice of warm, homemade pumpkin bread, especially when it’s studded with melty pockets of chocolate. This Pumpkin Chocolate Chip Bread recipe is my go-to for a reason: it’s incredibly easy to make, consistently delicious, and fills your kitchen with the most incredible aroma. It’s the perfect treat for a crisp autumn morning, a satisfying afternoon snack, or even a delightful dessert. The combination of sweet pumpkin and rich chocolate is a classic for a reason, and this bread delivers it in spades. The moist crum extractb from the pumpkin puree and the delightful bursts of chocolate make every bite a little piece of heaven.
Ingredients:
Instructions:
Prep Your Oven and Loaf Pan
Before you even think about mixing ingredients, preheat your oven to 350 degrees Fahrenheit (175 degrees Celsius). This is crucial for even baking. Next, prepare your loaf pan. I like to use a standard 9×5 inch loaf pan. Generously coat the inside of the pan with cooking spray, making sure to get into all the nooks and crannies. For extra insurance against sticking and to give your bread a lovely golden crust, you can also lightly dust the greased pan with a bit of all-purpose flour, tapping out any excess. Alternatively, you can line your loaf pan with parchment paper, leaving some overhang on the sides to make lifting the finished bread out a breeze. Proper pan preparation is the first step to a beautifully baked loaf.
Combine Dry Ingredients
In a medium-sized mixing bowl, whisk together your dry ingredients. This includes the 1 1/2 cups of all-purpose flour, 1 teaspoon of pumpkin pie spice, 1/4 teaspoon of salt, and 1/2 teaspoon of baking soda. Whisking them together ensures that the leavening agents (baking soda) and spices are evenly distributed throughout the flour, which will result in a uniform texture and flavor in your finished bread. Nobody wants a bite of bread that’s all spice in one spot and bland in another! It’s a simple step, but it makes a big difference.
Mix Wet Ingredients and Combine with Dry
In a separate, larger mixing bowl, cream together the wet ingredients. This is where the magic starts to happen! Add 1 cup of granulated sugar to the bowl. Then, incorporate 1 cup of pumpkin puree. Make sure you’re using pumpkin puree, not pumpkin pie filling, which is already sweetened and spiced. Next, pour in 3/4 cup of vegetable oil. The oil contributes to the incredible moistness of this bread. Crack in your 2 large eggs and add 1/2 teaspoon of vanilla extract for that classic comforting flavor. Whisk these wet ingredients together until they are well combined and smooth. Now, it’s time to bring the two bowls together. Make a well in the center of your dry ingredients and pour the wet ingredients into it. Using a spatula or wooden spoon, gently mix until just combined. Be careful not to overmix at this stage! Overmixing can develop the gluten in the flour too much, leading to a tough bread. A few streaks of flour are perfectly fine.
Incorporate the Chocolate Chips
This is the part everyone looks forward to! Take about a tablespoon of your all-purpose flour (the extra for coating) and toss it with 1 cup of the semisweet chocolate chips in a small bowl. This light coating of flour helps to prevent the chocolate chips from sinking to the bottom of the loaf while it bakes. It’s a little trick that ensures you get delicious chocolatey goodness in every slice. Gently fold the floured chocolate chips into the bread batter using your spatula. Don’t overmix; just distribute them evenly throughout. Reserve the remaining 1/4 cup of chocolate chips for topping the bread.
Bake to Golden Perfection
Pour the batter into your prepared loaf pan, spreading it evenly. Now, take those reserved 1/4 cup of chocolate chips and sprinkle them over the top of the batter. This will create a beautiful, chocolate-studded crust. Place the loaf pan in the preheated oven. Bake for 50 to 60 minutes. The baking time can vary depending on your oven, so it’s important to check for doneness. You’ll know your pumpkin chocolate chip bread is ready when a toothpick or a thin knife inserted into the center comes out clean, or with just a few moist crum extractbs attached (not wet batter). If the top of the bread starts to brown too quickly before it’s cooked through, you can loosely tent it with aluminum foil. Once baked, remove the loaf pan from the oven and let it cool in the pan on a wire rack for about 10 to 15 minutes. This allows the bread to set up properly before you attempt to remove it.
Cool and Enjoy
After the initial cooling period in the pan, carefully invert the loaf pan onto a wire rack to release the bread. If you used parchment paper, this step will be even easier. Let the bread cool completely on the wire rack before slicing. This is perhaps the hardest part – waiting for it to cool! Slicing into a warm loaf is tempting, but it can sometimes lead to a gummy texture. Once cooled, slice generously and enjoy. This bread is delicious on its own, but it’s also wonderful served with a smear of butter or even a dollop of cream cheese. It stores well at room temperature, wrapped tightly in plastic wrap or in an airtight container, for up to three days. You can also freeze slices for a longer-lasting treat.
Conclusion:
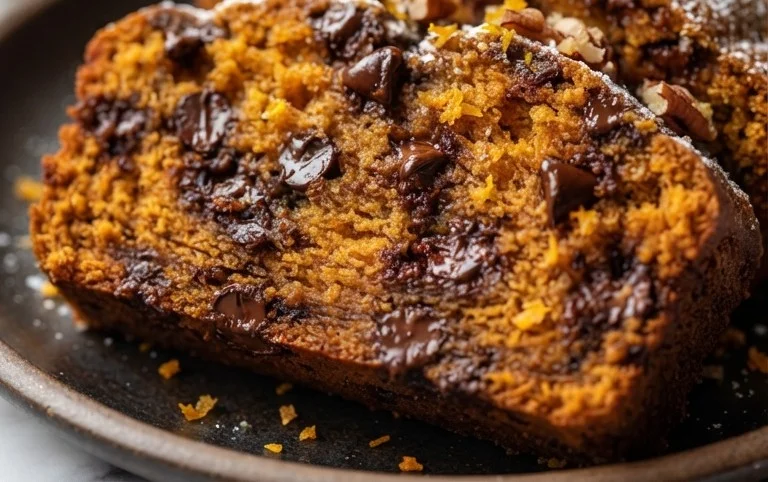
I hope you’re as excited as I am to try this amazing Pumpkin Chocolate Chip Bread recipe! It’s truly a winner because it strikes the perfect balance between moist, tender pumpkin bread and delightful pockets of melted chocolate. The warm spices mingle beautifully with the sweet chocolate chips, creating a comforting and utterly delicious treat that’s perfect for any occasion, from a cozy breakfast to an afternoon snack. I find it’s especially wonderful when served warm, allowing the chocolate to be wonderfully gooey!
To elevate your experience, I love serving slices of this pumpkin chocolate chip bread with a dollop of cream cheese frosting, a drizzle of honey, or even a scoop of vanilla ice cream for a decadent dessert. For variations, don’t hesitate to add a handful of chopped pecans or walnuts for added crunch, or even a pinch of nutmeg for an extra layer of spice. The possibilities are endless, and I encourage you to make this recipe your own! Give it a try – you won’t be disappointed!
Frequently Asked Questions:
Can I make this bread ahead of time?
Absolutely! Pumpkin Chocolate Chip Bread keeps wonderfully at room temperature for up to 3 days, tightly wrapped. For longer storage, you can refrigerate it for up to a week, or freeze it for up to 3 months. Thaw overnight at room temperature before enjoying.
What kind of pumpkin puree should I use?
For the best texture and flavor, I recommend using 100% pure pumpkin puree, not pumpkin pie filling. Pure pumpkin puree will give you that authentic pumpkin flavor and moisture without added sugars or spices, allowing you to control the sweetness and spice level of your bread.
Pumpkin Chocolate Chip Bread
A moist and flavorful quick bread perfect for autumn, packed with pumpkin and studded with chocolate chips.
Ingredients
-
1 1/2 cups all purpose flour (plus more for coating chocolate chips)
-
1 teaspoon pumpkin pie spice
-
1/4 teaspoon salt
-
1/2 teaspoon baking soda
-
1 cup granulated sugar
-
1 cup pumpkin puree
-
3/4 cup vegetable oil
-
2 eggs
-
1/2 teaspoon vanilla extract
-
1 1/4 cups semisweet chocolate chips (divided use)
-
cooking spray
Instructions
-
Step 1
Preheat oven to 350°F (175°C). Grease and flour a 9×5 inch loaf pan, or spray with cooking spray. -
Step 2
In a large bowl, whisk together the flour, pumpkin pie spice, salt, and baking soda. -
Step 3
In a separate bowl, whisk together the granulated sugar, pumpkin puree, vegetable oil, eggs, and vanilla extract until well combined. -
Step 4
Add the wet ingredients to the dry ingredients and stir until just combined. Do not overmix. -
Step 5
Lightly coat 1 cup of the chocolate chips with a little extra flour to prevent them from sinking. Fold them into the batter. -
Step 6
Pour the batter into the prepared loaf pan. Sprinkle the remaining 1/4 cup of chocolate chips over the top. -
Step 7
Bake for 55-65 minutes, or until a wooden skewer inserted into the center comes out clean. -
Step 8
Let the bread cool in the pan for 10 minutes before transferring it to a wire rack to cool completely.
Important Information
Nutrition Facts (Per Serving)
It is important to consider this information as approximate and not to use it as definitive health advice.
Allergy Information
Please check ingredients for potential allergens and consult a health professional if in doubt.