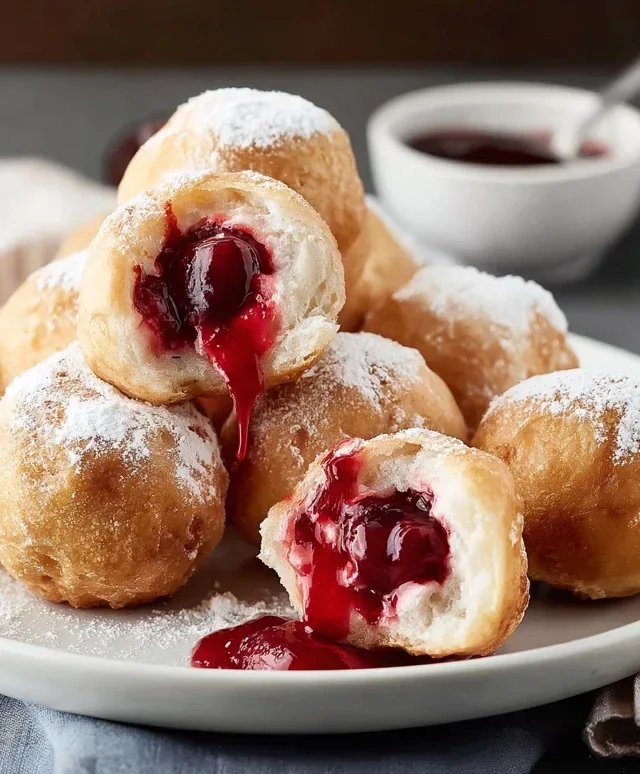
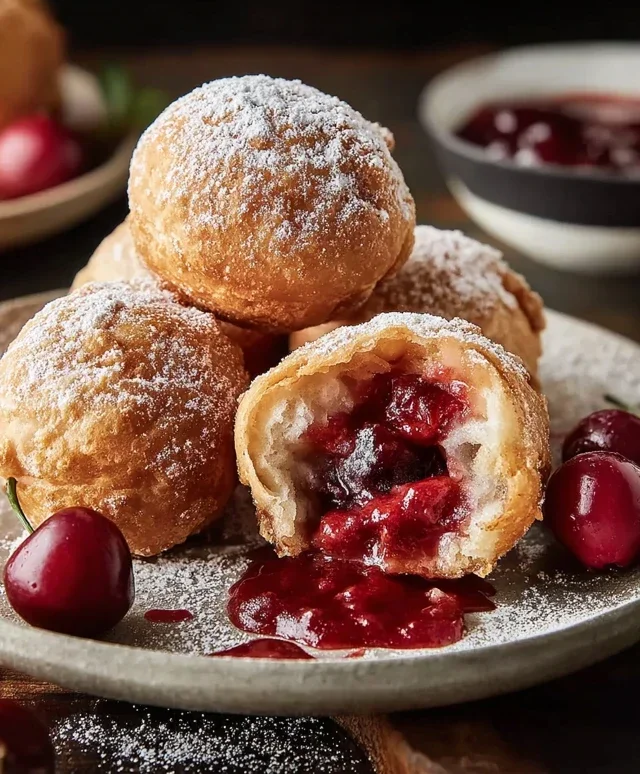
Cherry Pie Bombs-Delicious Easy Recipe
Cherry Pie Bombs are the ultimate treat for any dessert lover, and trust me, once you try them, you’ll understand why they’re so utterly irresistible. Imagin extracte all the comforting, nostalgic flavors of a classic cherry pie, but miniaturized into perfectly portioned, bite-sized bursts of pure joy. We’re talking about flaky, buttery pastry encasing a sweet, tangy, vibrant cherry filling that practically explodes with flavor. It’s the perfect balance of tartness and sweetness that makes cherry pie such a beloved classic, and these Cherry Pie Bombs capture that essence beautifully. What makes them truly special is their adorable presentation and the convenience they offer. They’re perfect for parties, potlucks, or just a delightful afternoon indulgence that’s so much easier to handle than a traditional slice of pie. Get ready to fall in love!
Certainly! Here is the main content for a recipe article about Cherry Pie Bombs, adhering to all your critical requirements.
Cherry Pie Bombs
Get ready to experience a burst of sweet, fruity goodness with these incredible Cherry Pie Bombs! These delightful little treats take all the comforting flavors of classic cherry pie and transform them into an irresistible, bite-sized package. Imagin extracte warm, flaky biscuit dough encasing a luscious, sweet cherry filling, then fried to golden perfection and drizzled with a sweet, creamy glaze. They are absolutely addictive and surprisingly easy to make, making them the perfect dessert for a party, a special occasion, or simply when you’re craving something utterly delicious. We’re using a shortcut with Grands biscuits to make this recipe even more accessible and quick, so you can enjoy these flavor bombs in no time. Let’s get started on creating these show-stopping desserts!
Ingredients:
Preparing Your Cherry Pie Bombs
The journey to deliciousness begin extracts with gathering your ingredients and preparing your workspace. It’s always a good idea to have everything measured out and ready to go before you start mixing and cooking. This ensures a smooth and efficient process, especially when dealing with fried items.
1. Prepare the Biscuit Dough: Open your package of Grands “Big” biscuits. You’ll notice they are quite large. We need to work with these individually. Gently separate each biscuit from the roll. Now, here’s where we get a little creative to form our “bomb” casing. Take one biscuit and gently flatten it slightly with your hands, but don’t make it too thin. You want enough dough to encase the filling without it breaking during the frying process. The goal is to create a pocket. Think of it like making a small, edible pouch. If the dough tears, don’t worry too much; you can pinch it back together. Repeat this process for all the biscuits in your package.
2. Fill the Biscuits: This is the moment where the cherry magic happens! Take one flattened biscuit and place a generous spoonful of the cherry pie filling in the center. Don’t overfill, as this can make it difficult to seal the biscuit and may cause the filling to ooze out during frying. A heaping tablespoon is usually a good amount. Once you have your filling in place, carefully bring the edges of the biscuit dough up and around the filling. Pinch the seams together firmly to seal the cherry filling inside. You want to ensure there are no gaps or holes where the hot oil can seep in. Give it a gentle roll in your hands to create a round, bomb-like shape. It doesn’t need to be perfectly smooth; rustic charm is part of its appeal! Place the filled and senon-alcoholic aled biscuit bombs on a clean plate or baking sheet as you work through the rest of the dough and filling. Make sure they aren’t touching each other.
Frying to Perfection
Now comes the exciting part – transforming these raw dough balls into golden, crispy delights. Frying requires a bit of attention, but the results are well worth it.
3. Heat the Oil and Fry the Bombs: In a large, heavy-bottomed pot or Dutch oven, pour enough vegetable oil to reach a depth of about 2-3 inches. Heat the oil over medium-high heat until it reaches approximately 350°F (175°C). You can test the oil temperature by dropping a tiny piece of biscuit dough into it; it should sizzle and float to the surface immediately. Carefully, and I mean carefully, using a slotted spoon or tongs, lower a few biscuit bombs into the hot oil. Do not overcrowd the pot, as this will lower the oil temperature and result in soggy bombs. Fry them for about 2-3 minutes per side, or until they are a beautiful golden brown all around. They puff up and become wonderfully crispy. Use your slotted spoon to gently turn them over, ensuring even cooking.
4. Drain and Cool: Once your cherry pie bombs are a lovely golden brown and have puffed up significantly, carefully remove them from the hot oil using your slotted spoon. Let any excess oil drip back into the pot. Place the fried bombs on a plate lined with paper towels. This step is crucial for absorbing any extra oil, ensuring your bombs are delightfully crisp and not greasy. Allow them to cool slightly for a few minutes before glazing. They will be very hot inside, so patience is key here.
The Sweet Finishing Touch
No pie, not even a pie bomb, is complete without a sweet glaze. This simple glaze adds an extra layer of deliciousness and a beautiful finish to your Cherry Pie Bombs.
5. Prepare and Drizzle the Glaze: While the fried bombs are cooling slightly, let’s make our easy glaze. In a medium bowl, whisk together the powdered sugar, ¼ cup of milk, and 1 tablespoon of light corn syrup. Start with the ¼ cup of milk and add more, a teaspoon at a time, if you prefer a thinner glaze. The corn syrup adds a wonderful shine and prevents the glaze from hardening too much, keeping it delightfully soft. Once you’ve reached your desired consistency, it’s time to glaze! You can either drizzle the glaze over the warm pie bombs using a spoon or a piping bag for a more decorative look, or you can dip the tops of the bombs into the glaze. Drizzle generously for maximum flavor! Serve your warm Cherry Pie Bombs immediately and prepare for rave reviews. They are truly a taste of pure joy!
Conclusion:
There you have it – your guide to making these absolutely irresistible Cherry Pie Bombs! I truly believe this recipe is fantastic because it takes all the beloved flavors of a classic cherry pie and transforms them into bite-sized, incredibly satisfying treats. The buttery pastry encasing the sweet, tart cherry filling is a match made in heaven, and the ease of making them means you can whip up a batch for any occasion, or just because you deserve a delicious indulgence.
These Cherry Pie Bombs are incredibly versatile. Serve them warm with a scoop of vanilla ice cream for the ultimate dessert experience, or enjoy them at room temperature as a delightful snack. They’re perfect for potlucks, parties, or simply enjoying with a cup of coffee. Don’t be afraid to experiment with variations! Try adding a pinch of almond extract to the filling for a nutty twist, or sprinkle some cinnamon on top before baking. You could even swap out the cherries for other berries like blueberries or raspberries. I really encourage you to give this recipe a try; I’m confident you’ll fall in love with these little bursts of cherry goodness.
Frequently Asked Questions:
Can I make the filling ahead of time?
Absolutely! You can prepare the cherry filling a day or two in advance and store it in an airtight container in the refrigerator. This will save you time when you’re ready to assemble your Cherry Pie Bombs.
How should I store leftover Cherry Pie Bombs?
Store any leftover Cherry Pie Bombs in an airtight container at room temperature for up to 2 days, or in the refrigerator for up to 4 days. Reheat them gently in a low oven or microwave if you prefer them warm.
Can I use frozen cherries instead of fresh?
Yes, frozen cherries work perfectly well. Ensure they are fully thawed and drained of excess liquid before incorporating them into your filling to prevent a soggy pastry.
Cherry Pie Bombs
Delicious fried biscuit dough filled with cherry pie filling and drizzled with a sweet glaze.
Ingredients
-
16.3 ounces Grands “Big” biscuits, flaky
-
21 ounces cherry pie filling
-
Vegetable oil, for frying
-
2 cups powdered sugar
-
¼ cup milk
-
1 tablespoon light corn syrup
Instructions
-
Step 1
Separate Grands “Big” biscuits and flatten each biscuit slightly. Press the edges together to form a single circle and pinch to seal. -
Step 2
Spoon about 1-2 tablespoons of cherry pie filling into the center of each flattened biscuit. -
Step 3
Carefully bring the edges of the biscuit dough up and around the filling, pinching firmly to seal and create a ball shape. Ensure there are no gaps. -
Step 4
Heat about 2 inches of vegetable oil in a heavy-bottomed pot or deep fryer to 350°F (175°C). Fry the biscuit bombs in batches, turning occasionally, until golden brown on all sides. -
Step 5
Remove the fried bombs with a slotted spoon and place them on a paper towel-lined plate to drain excess oil. -
Step 6
In a small bowl, whisk together powdered sugar, milk, and light corn syrup until smooth to create the glaze. Add more milk if needed for desired consistency. -
Step 7
Drizzle the glaze over the warm cherry pie bombs before serving.
Important Information
Nutrition Facts (Per Serving)
It is important to consider this information as approximate and not to use it as definitive health advice.
Allergy Information
Please check ingredients for potential allergens and consult a health professional if in doubt.