Easy Oreo Milkshake Recipe- Creamy & Delicious
The Oreo Milkshake is more than just a dessert; it’s a nostalgic journey in a glass, a creamy, dreamy escape that instantly transports us back to childhood summers and carefree moments. Who doesn’t adore the delightful crunch of those chocolatey wafers perfectly blended with smooth, rich ice cream? This isn’t just any milkshake; it’s an icon. What makes the Oreo Milkshake so universally loved? It’s the brilliant simplicity of it all – the perfect marriage of two beloved ingredients that create something truly magical. It’s the satisfying contrast between the slightly bitter cookie and the sweet, velvety base. It’s the sheer indulgence, the pure joy of a decadent treat that’s both comforting and exciting. Get ready to whip up the ultimate Oreo Milkshake that will have you coming back for more!
Why This Oreo Milkshake Recipe is a Must-Try
It’s Effortlessly Delicious
Ingredients:
Let’s Make the Ultimate Oreo Milkshake!
There’s something undeniably comforting and utterly delicious about a classic Oreo milkshake. It’s the perfect blend of creamy, sweet, and that irresistible chocolatey crunch from the Oreos. Whether you’re craving a nostalgic treat, need a pick-me-up, or want to impress guests with a simple yet spectacular dessert, this recipe is for you. It’s incredibly easy to make, requiring minimal ingredients and just a few minutes of your time. Get ready to blend up pure bliss!
This isn’t just any milkshake; it’s an experience. The contrast between the smooth, cold ice cream and the slightly gritty, chocolatey cookie pieces is what makes it so special. We’re going for a thick, luxurious shake that you can almost eat with a spoon, but it still has that perfect pourable consistency. Don’t be afraid to adjust the ingredient ratios to suit your personal preferences. Love it super thick? Add more ice cream! Prefer it a little more liquidy? A splash more milk will do the trick.
The beauty of this recipe lies in its simplicity. It’s a fantastic base that you can easily customize. Want to add a chocolate swirl? Drizzle in some chocolate syrup before blending. Feeling adventurous? Throw in a handful of chocolate chips. But for the purist, the classic Oreo and vanilla combination is simply unbeatable. So, let’s get started on creating this delightful treat.
Getting Started: Gathering Your Supplies
Before we dive into the blending, make sure you have everything ready to go. This recipe comes together so quickly that you won’t want to be scrambling for ingredients once the blender is whirring. I like to have my glasses chilled beforehand. Pop them in the freezer for about 15-20 minutes while you’re preparing the shake. A chilled glass will keep your milkshake colder for longer, ensuring every sip is as perfect as the first.
Step-by-Step Blending Magic
Now for the fun part! Let’s bring all those wonderful ingredients together to create our masterpiece.
Step 1: Prepare the Oreos
Start by getting your Oreo cookies ready. You can simply break them into halves or quarters before adding them to the blender. This helps the blender blades catch them more easily and ensures a smoother blend. For a chunkier milkshake with visible cookie pieces, you might even want to reserve a few cookies to chop up by hand and add in at the very end, pulsing the blender just a few times. However, if you’re aiming for a more uniform distribution of cookie flavor and texture throughout, breaking them into smaller pieces is the way to go. The goal is to break down the cookies so they integrate beautifully with the ice cream and milk, creating that signature Oreo flavor.
Step 2: Combine the Base Ingredients
In your blender, add the softened or broken Oreo cookies. Then, scoop in your cold, creamy vanilla ice cream. I find that letting the ice cream sit out for just a minute or two before scooping makes it a little easier to blend, preventing your blender from working too hard, especially if you have a less powerful model. Next, pour in your milk. If you’re using the optional vanilla extract, add that in now too. The vanilla extract might seem like a small addition, but it truly elevates the overall flavor profile, adding a subtle warmth and depth that complements the chocolate and vanilla perfectly.
Step 3: The Blending Process
Now it’s time to blend! Start on a low speed to begin extract breaking down the ingredients. Once things start to combine, you can gradually increase the speed to high. Blend until the mixture is smooth and creamy, with no large chunks of cookie remaining. This usually takes about 30 seconds to 1 minute, depending on your blender. Be careful not to over-blend, as this can melt the ice cream too much and result in a thinner shake. If you notice the mixture is too thick and the blender is struggling, add a tablespoon or two of milk at a time and blend again until you reach your desired consistency. The key is to achieve a smooth, uniform texture that’s thick but still pourable. You’re looking for a beautiful, homogenous mixture that’s rich and inviting.
Step 4: Taste and Adjust (The Crucial Step!)
This is where you become the ultimate milkshake maestro! Before pouring, give your shake a quick taste. Does it have enough sweetness? Is the Oreo flavor strong enough? If you want it sweeter, you can add a little sugar or a drizzle of chocolate syrup and blend briefly. If you desire a more intense Oreo flavor, now’s the time to add a few more cookie pieces and pulse a couple of times. Remember, it’s easier to add more ingredients than to take them away, so start with small adjustments. This step is essential for ensuring your milkshake is exactly to your liking. It’s all about creating your perfect blend, so don’t hesitate to personalize it!
Step 5: Serve and Enjoy
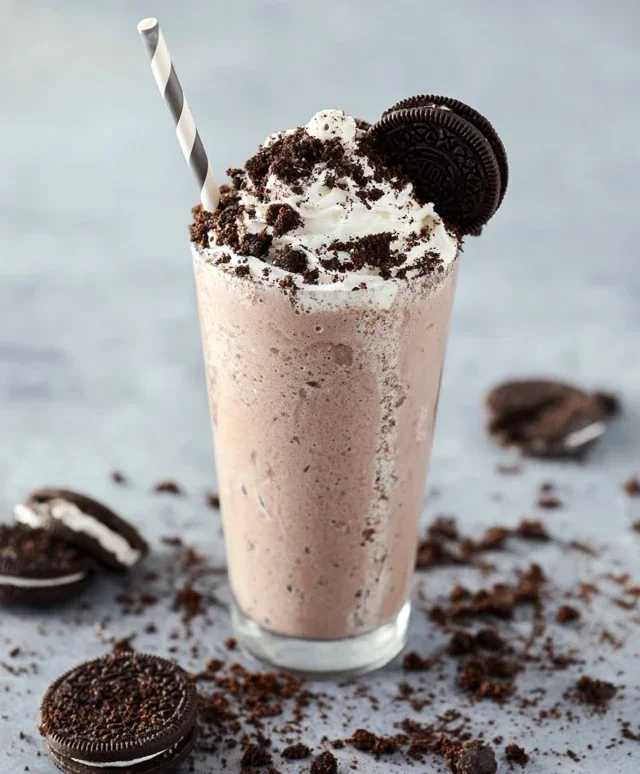
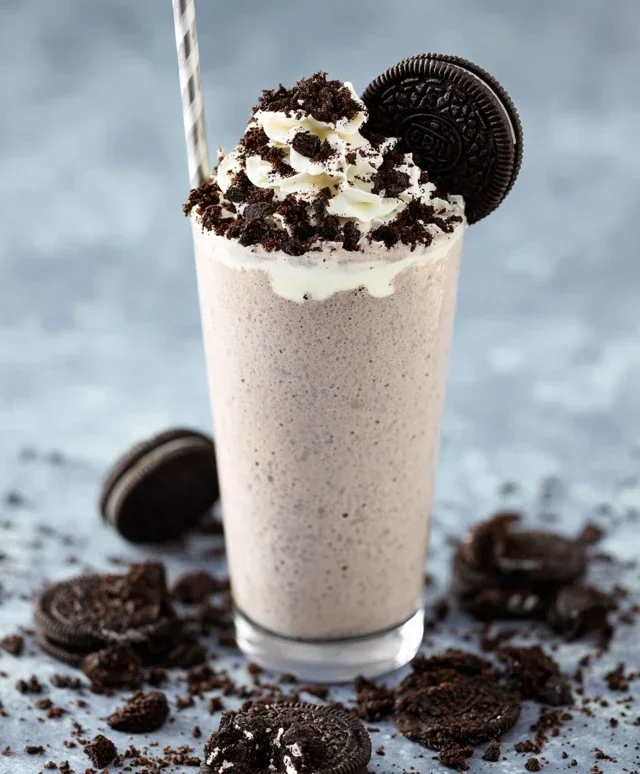
Once you’re happy with the taste and consistency, it’s time to serve your masterpiece. Pour the thick, creamy Oreo milkshake into your chilled glasses. For that extra touch of decadence, top with a generous swirl of whipped cream. Sprinkle a few extra Oreo cookie crum extractbles over the whipped cream for a beautiful presentation and an extra burst of flavor and texture. Serve immediately with a straw and perhaps a long spoon, as this rich shake can be quite satisfying. Take a moment to admire your creation before diving in. The sound of the ice cream hitting the glass, the creamy swirl of whipped cream, and the delightful aroma – it’s all part of the experience. Enjoy every single, delicious sip!
Conclusion:
There you have it – a simple yet incredibly satisfying Oreo Milkshake recipe that’s guaranteed to become a household favorite! The magic of this recipe lies in its effortless simplicity and the sheer indulgence it offers. With just a few core ingredients, you can whip up a thick, creamy, and perfectly chocolatey treat that hits all the right notes. It’s the perfect solution for a quick dessert, a pick-me-up on a warm afternoon, or even a fun weekend project to enjoy with family and friends. Don’t be afraid to experiment and make it your own!
For serving, I love to top my Oreo Milkshake with a generous dollop of whipped cream, a few crushed Oreos for extra crunch, and perhaps even a drizzle of chocolate syrup. It elevates the experience and makes it feel extra special. If you’re feeling adventurous, consider adding a scoop of chocolate ice cream for an even richer flavor, a touch of coffee for a mocha twist, or even some peanut butter for a decadent Reese’s-inspired shake. The possibilities are truly endless!
So, go ahead and gather your ingredients. I highly encourage you to try this Oreo Milkshake recipe. It’s a delightful way to treat yourself and those you care about. You won’t be disappointed with the rich, cookies-and-cream bliss that awaits!
Frequently Asked Questions:
Can I make this Oreo Milkshake without ice cream?
Absolutely! While ice cream provides that signature creamy thickness, you can achieve a delicious milkshake by using a good amount of milk (start with about 1.5 cups for a few servings) and freezing it in an ice cube tray beforehand. This will help thicken the shake. You can also add a spoonful of cornstarch or a slice of bread (don’t worry, it blends in and adds thickness!) to the milk before blending.
What if I don’t have Oreos?
While the recipe is specifically for an Oreo Milkshake, you can substitute other chocolate sandwich cookies. Any cookie with a chocolate wafer and creme filling will give you a similar flavor profile. You can even get creative with different flavored cookies if you’re feeling experimental!
Oreo Milkshake
A classic and decadent Oreo milkshake, perfect for a sweet treat. This recipe uses simple ingredients for a quick and delicious beverage.
Ingredients
-
2 cups vanilla ice cream
-
1 cup milk
-
8 Oreo cookies, crushed
-
2 tablespoons whipped cream, for topping
-
1 Oreo cookie, for garnish
Instructions
-
Step 1
Combine vanilla ice cream and milk in a blender. -
Step 2
Add the crushed Oreo cookies to the blender. -
Step 3
Blend until smooth and creamy. Add more milk if a thinner consistency is desired. -
Step 4
Pour the milkshake into a tall glass. -
Step 5
Top with whipped cream and a whole Oreo cookie for garnish.
Important Information
Nutrition Facts (Per Serving)
It is important to consider this information as approximate and not to use it as definitive health advice.
Allergy Information
Please check ingredients for potential allergens and consult a health professional if in doubt.