17 Easy Easter Dessert Recipes – Best Ideas for Kids and For a Crowd are here to make your holiday baking dreams come true! Easter is a time for joy, family gatherings, and of course, delicious treats that bring smiles to everyone’s faces. There’s something magical about the sweet aroma filling your kitchen, a symphony of sugar and spice that signals the arrival of spring and a festive celebration. We all love Easter desserts because they’re not just food; they’re edible art, crafted with love and bursting with color. Whether you’re planning an intimate family brunch or a larger Easter egg hunt party, these recipes are designed to be both crowd-pleasing and delightfully easy to whip up. From whimsical creations perfect for little hands to elegant confections that will impress your guests, these 17 Easy Easter Dessert Recipes are your secret weapon for a sweet and unforgettable holiday.
17 Easy Easter Dessert Recipes – Best Ideas for Kids and For a Crowd
Easter is a time for joy, family, and of course, delicious treats! This year, I’ve gathered 17 incredibly easy and utterly delightful Easter dessert recipes that are perfect for little hands to help with and impressive enough to serve to a crowd. From vibrant cakes to adorable little nests, there’s something here to satisfy every sweet tooth. Let’s dive into some of my favorites!
—
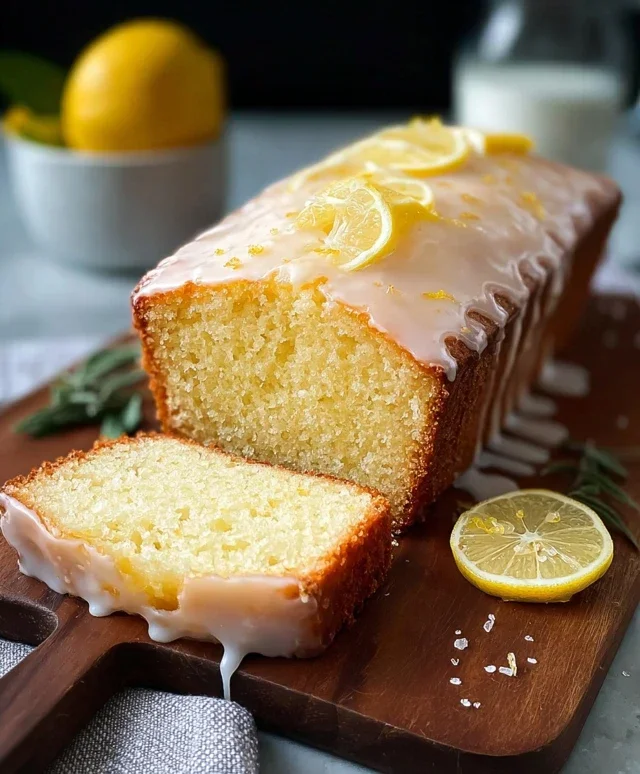
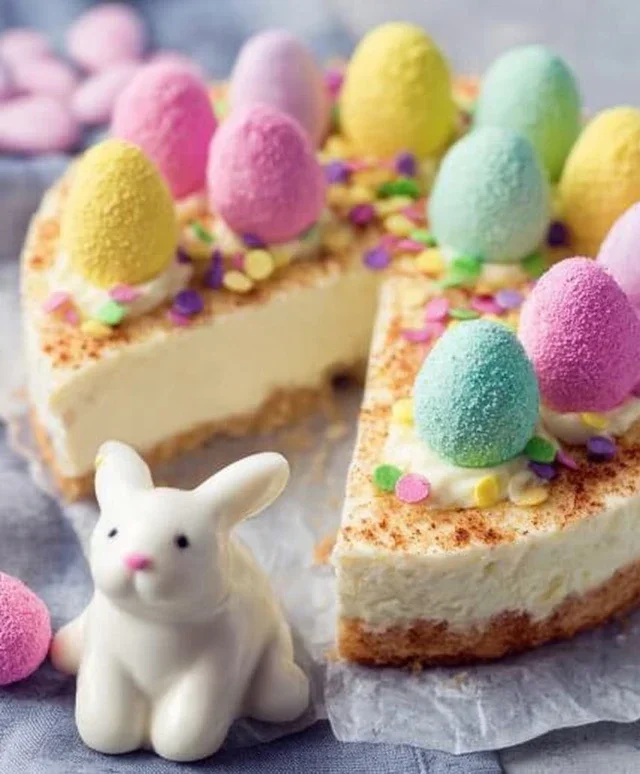
Lemon Cheesecake (A Refreshing Classic)
This Lemon Cheesecake is surprisingly simple to make and offers a bright, zesty flavor that’s a welcome change from heavier desserts. It’s creamy, tangy, and utterly irresistible.
Ingredients:
2 pounds cream cheese, softened
1 ½ cups granulated sugar
4 large eggs
1 cup sour cream
Zest of 2 lemons
Juice of 1 lemon
1 teaspoon vanilla extract
For the Crust:
1 ½ cups grabeef ham cracker crum extractbs
⅓ cup melted unsalted butter
2 tablespoons granulated sugar
Instructions:
Prepare the Crust: In a medium bowl, combine the grabeef ham cracker crum extractbs, melted butter, and 2 tablespoons of sugar. Mix until well combined, resembling wet sand. Press this mixture evenly into the bottom of a 9-inch springform pan. Use the bottom of a glass or a measuring cup to get a firm, even layer. For extra security against leaks, you can wrap the outside of the springform pan with heavy-duty aluminum foil.
Mix the Cream Cheese Filling: In a large mixing bowl, beat the softened cream cheese with an electric mixer until completely smooth and creamy, ensuring there are no lumps. Gradually add the 1 ½ cups of granulated sugar and continue beating until well incorporated and fluffy. Scrape down the sides of the bowl as needed to ensure everything is evenly mixed.
Incorporate Wet Ingredients and Flavor: Add the eggs one at a time, beating well after each addition. Don’t overmix once the eggs are added; just blend until combined. Gently stir in the sour cream, lemon zest, lemon juice, and vanilla extract. Mix until just combined. The batter should be smooth and have a beautiful pnon-alcoholic ale yellow hue from the lemon.
Bake the Cheesecake: Pour the cheesecake filling over the prepared crust. Tap the pan gently on the counter a few times to release any air bubbles. Bake in a preheated oven at 325°F (160°C) for 50-60 minutes, or until the edges are set but the center is still slightly jiggly. A water bath is highly recommended for cheesecakes to prevent cracking and ensure even baking. To do this, place the foil-wrapped springform pan inside a larger roasting pan and fill the roasting pan with about an inch of hot water.
Cool and Chill: Once baked, turn off the oven and let the cheesecake cool in the oven with the door slightly ajar for about 1 hour. This slow cooling process also helps prevent cracks. After cooling in the oven, remove the cheesecake from the water bath and let it cool completely on a wire rack at room temperature. Once fully cooled, cover the cheesecake with plastic wrap and refrigerate for at least 4 hours, or preferably overnight, to allow it to set completely and for the flavors to meld. Serve chilled, garnished with extra lemon zest or fresh berries if desired.
—
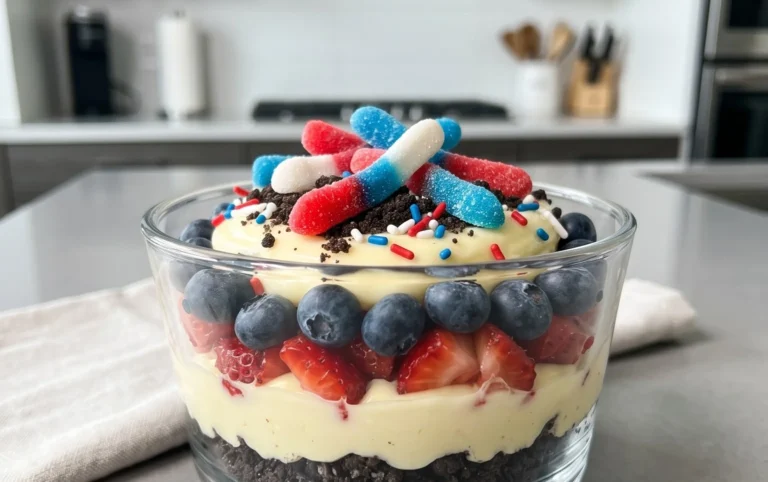
Easter Garden Cake
This cake is a visual masterpiece, mimicking a vibrant Easter garden. It’s a fun project that kids will adore decorating.
Ingredients:
1 box white cake mix (plus ingredients called for on the box)
Green food coloring
1 ½ cups confectioners’ sugar
¼ cup unsalted butter, softened
2 tablespoons milk
1 teaspoon vanilla extract
Various candies for decoration (gummy worms, jelly beans, chocolate eggs, candy flowers, sprinkles)
Instructions:
Bake the Cake Layers: Prepare the white cake mix according to package directions. Divide the batter into two bowls. Tint one bowl of batter with green food coloring until you achieve a grassy green hue. Pour the green batter into a greased and floured 9×13 inch baking pan. Pour the remaining white batter into another greased and floured 9×13 inch baking pan. Bake both cakes according to package directions until a toothpick inserted into the center comes out clean. Let the cakes cool in the pans for 10 minutes before inverting them onto wire racks to cool completely.
Make the “Grass” Frosting: While the cakes are cooling, prepare the frosting. In a medium bowl, cream together the softened butter and confectioners’ sugar until smooth. Gradually add the milk, one tablespoon at a time, until you reach a spreadable consistency. Stir in the vanilla extract. For the grass effect, you can either tint a portion of this frosting green, or use a grass piping tip (like an open star tip) to create blades of grass.
Assemble the Garden Base: Once the white cake is completely cool, place it on your serving platter or cake board. This will be the base of your garden.
Create the Green Landscape: If you tinted your frosting green, spread a generous layer of green frosting over the white cake, creating a lush grassy surface. If using a grass piping tip, pipe lines of green frosting over the white cake to mimic blades of grass. This is where you can get creative and make it look as natural as possible.
Decorate Your Easter Garden: Now comes the fun part! Use the assorted candies to decorate your cake. Arrange gummy worms peeking out of the “grass,” place jelly beans like colorful flowers, and nestle chocolate eggs around the garden. Use candy flowers to add extra floral touches. Sprinkle edible glitter for a touch of magic. You can even create a little pond with blue frosting or a small chocolate nest. The possibilities are endless, and the kids will have a blast helping design their edible garden.
—
Funfetti Cake Mix Cookies
These cookies are a no-fuss, high-reward treat that’s bursting with color and flavor. Using cake mix makes them incredibly easy!
Ingredients:
1 box Funfetti cake mix
½ cup vegetable oil
2 large eggs
½ cup sprinkles (optional, but highly recommended for extra fun)
Instructions:
Preheat and Prep: Preheat your oven to 350°F (175°C). Line baking sheets with parchment paper or silicone baking mats. This prevents sticking and makes for easier cleanup.
Mix the Dough: In a large bowl, combine the Funfetti cake mix, vegetable oil, and eggs. Stir with a spoon or spatula until just combined. Be careful not to overmix, as this can lead to tough cookies. If you’re using extra sprinkles for the dough, gently fold them in now. The dough will be quite soft and sticky.
Form the Cookies: Using a cookie scoop or two spoons, drop rounded tablespoons of dough onto the prepared baking sheets, leaving about 2 inches between each cookie to allow for spreading. The dough is soft, so don’t worry about perfectly round balls. They will flatten out as they bake.
Bake to Perfection: Bake for 8-10 minutes, or until the edges are lightly golden and the centers are set but still slightly soft. Overbaking will make them crispy, so aim for a slightly chewy texture.
Cool and Enjoy: Let the cookies cool on the baking sheets for a few minutes before transferring them to a wire rack to cool completely. Once cooled, you can enjoy them as is, or drizzle them with a simple glaze made from confectioners’ sugar and a little milk for an extra touch of sweetness and decoration.
—
Coconut Macaroon Nests
These adorable nests are perfect for holding little chocolate eggs or even a tiny meringue chick. They are naturally gluten-free and wonderfully chewy.
Ingredients:
3 cups shredded sweetened coconut
½ cup granulated sugar
¼ cup all-purpose flour
¼ teaspoon salt
2 large egg whites
1 teaspoon vanilla extract
For Filling:
Mini chocolate eggs or candy-coated chocolates
Instructions:
Preheat and Prep: Preheat your oven to 300°F (150°C). Line a baking sheet with parchment paper.
Combine Dry Ingredients: In a large bowl, combine the shredded coconut, granulated sugar, flour, and salt. Whisk them together thoroughly to ensure the dry ingredients are evenly distributed. This ensures consistent flavor and texture throughout the nests.
Add Wet Ingredients: In a separate small bowl, lightly whisk the egg whites and vanilla extract until just frothy. Pour the egg white mixture over the coconut mixture and stir until everything is well combined and the coconut is evenly moistened. The mixture should be sticky and clumpy.
Form the Nests: Using a spoon or a small ice cream scoop, portion the mixture onto the prepared baking sheet. Gently shape each portion into a small nest by creating a slight indentation in the center. You can use the back of the spoon or your fingers to form the nest shape. Leave about 2 inches between each nest.
Bake the Nests: Bake for 15-20 minutes, or until the edges are golden brown and the centers are set. Keep a close eye on them as coconut can burn quickly. Let the nests cool on the baking sheet for about 5 minutes before carefully transferring them to a wire rack to cool completely. Once cooled, fill the centers of the nests with your mini chocolate eggs or other candies.
—
Carrot Strawberries
These are a fun and healthy-ish treat that kids will get a kick out of. They look like tiny strawberries but are packed with fruity goodness.
Ingredients:
1 pound fresh strawberries, hulled and sliced in half lengthwise
½ cup Greek yogurt or cream cheese
1 tablespoon honey or maple syrup (optional)
Green food coloring
Small seeds for garnish (chia seeds, poppy seeds, or sesame seeds)
Instructions:
Prepare the “Strawberries”: Select the best-looking strawberry halves. These will be your primary “strawberries.”
Make the Yogurt Filling: In a small bowl, combine the Greek yogurt (or cream cheese) with the honey or maple syrup, if using. Stir until smooth and creamy.
Create the Green Tops: Place a few drops of green food coloring into a separate small bowl. Add a tablespoon or two of the yogurt mixture to this bowl and stir until you achieve a vibrant green color. This will be for the “leaves” of the strawberry.
Assemble the “Strawberries”: Take your prepared strawberry halves. Using a small spoon or a piping bag with a small round tip, pipe or spread a small amount of the white yogurt mixture onto the cut surface of the strawberry half, creating a slight mound that resembles the top of a strawberry. Then, using the green yogurt mixture, pipe or carefully place small amounts of green onto the white mound to mimic the stem and leaves.
Add the “Seeds”: Sprinkle a few small seeds (chia, poppy, or sesame) onto the white yogurt portion of each “strawberry” to represent the tiny seeds. This adds a realistic touch. Arrange your finished carrot strawberries on a platter and serve immediately. They are best enjoyed fresh.
Beyond these featured recipes, remember to explore other delightful options like adorable bunny-shaped cookies, pastel-colored macarons, or a simple yet elegant fruit tart. The key to easy Easter desserts is to keep them simple, fun, and visually appealing. Happy baking, and enjoy your delicious Easter celebrations!
Conclusion:
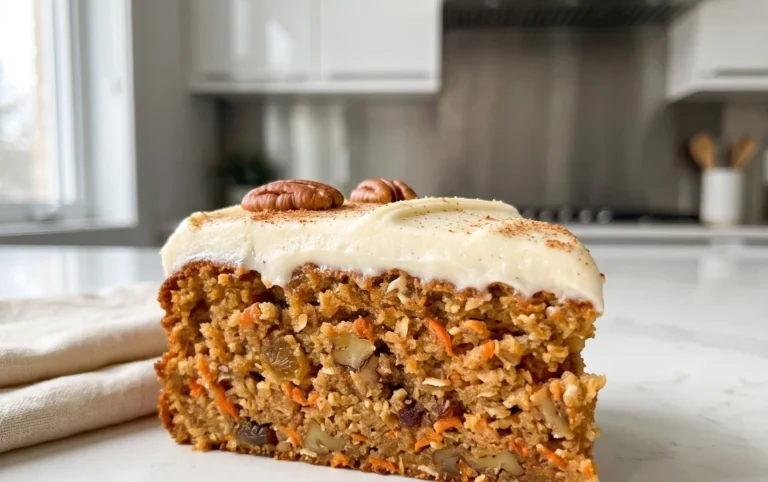
We’ve explored a delightful collection of 17 Easy Easter Dessert Recipes, perfect for both little hands and gathering a crowd. These recipes offer a fantastic way to add sweetness and festive cheer to your Easter celebrations without causing kitchen stress. From charming carrot cakes and adorable bunny cookies to elegant puddings and vibrant fruit tarts, there’s truly something for everyone. You can easily tailor these recipes to your family’s preferences – think about swapping out citrus zest for vanilla extract in a cake, or adding colorful sprinkles to cupcakes for an extra pop. Don’t be afraid to get creative and make them your own! I encourage you to dive in and try a few of these wonderful ideas. Baking together is a wonderful way to create lasting memories, and these desserts are sure to be a hit!
Frequently Asked Questions:
Can these Easter desserts be made ahead of time?
Absolutely! Many of these recipes are perfect for making a day or two in advance. Cookies, brownies, and cakes can often be baked and stored in airtight containers. Frosting and decorating can sometimes be done closer to serving to keep them looking their freshest, but prep work like mixing batters or preparing fillings can be done ahead to save you time on Easter morning. This is a key benefit of these Easy Easter Dessert Recipes for a crowd!
What if I have dietary restrictions?
Many of these recipes can be adapted. For gluten-free options, look for recipes that naturally lend themselves to substitution with gluten-free flour blends or consider recipes like fruit crisps or no-bake cheesecakes that can be modified. For dairy-free needs, many recipes can be made using plant-based milks, butter substitutes, and coconut cream. Always check ingredient lists carefully and research suitable substitutions for specific recipes you choose to adapt.
Ingredients
-
1 1/2 cups graham cracker crumbs
-
1/4 cup melted butter
-
2 (8 ounce) packages cream cheese, softened
-
3/4 cup granulated sugar
-
2 large eggs
-
1/4 cup sour cream
-
1 tablespoon lemon zest
-
2 tablespoons fresh lemon juice
Instructions
-
Step 1
Preheat oven to 350 degrees F (175 degrees C).
-
Step 2
Combine graham cracker crumbs and melted butter. Press mixture into the bottom of a 9-inch springform pan.
-
Step 3
In a large bowl, beat cream cheese and sugar until smooth. Beat in eggs one at a time.
-
Step 4
Stir in sour cream, lemon zest, and lemon juice until just combined.
-
Step 5
Pour filling over the crust. Bake for 35-40 minutes, or until the center is set.
-
Step 6
Let cool completely on a wire rack, then chill for at least 4 hours before serving.
Important Information
Nutrition Facts (Per Serving)
It is important to consider this information as approximate and not to use it as definitive health advice.
Allergy Information
Please check ingredients for potential allergens and consult a health professional if in doubt.