Easter Chocolate Chip Cookies- Delicious & Easy Recipe
Easter Chocolate Chip Cookies are more than just a treat; they’re a symbol of spring’s sweet arrival and cherished family traditions. There’s something undeniably magical about that first warm bite, the decadent melt of chocolate mingling with a perfectly soft, slightly chewy cookie. Why do we flock to this classic year after year, especially at Easter? It’s the comforting familiarity, the pure joy it brings to both baking and devouring, and the way these simple yet sensational Easter Chocolate Chip Cookies can transform an ordinary afternoon into a delightful celebration. What truly elevates them for this festive season are those playful touches – perhaps a sprinkle of pastel candy eggs, a hint of vanilla extract for extra fragrance, or simply the extra love we pour into making them for our favorite people. Get ready to bake up some sunshine and happiness!

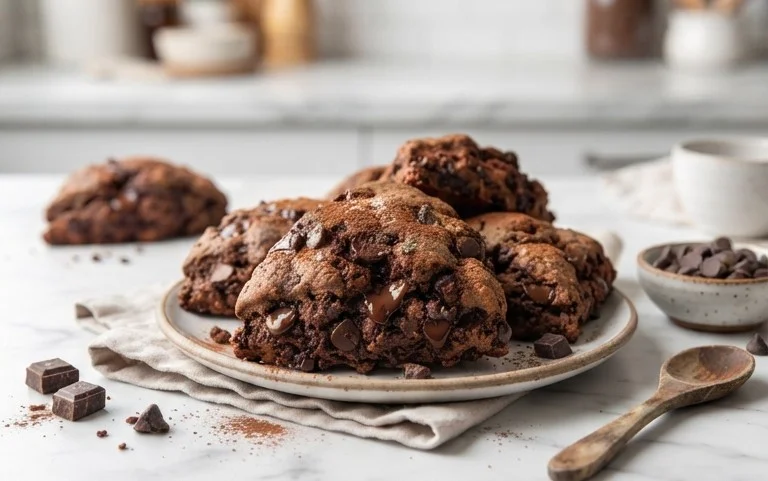
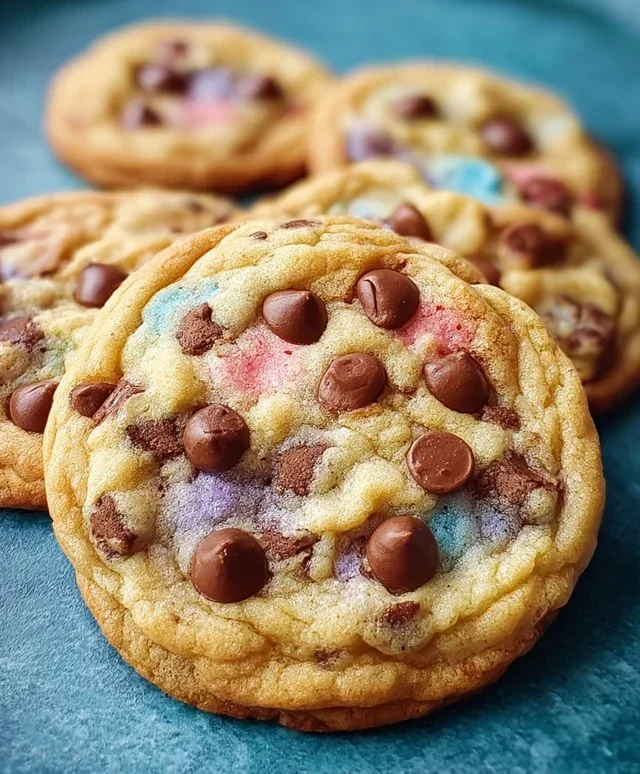
Easter Chocolate Chip Cookies
As the springtime air begin extracts to warm and the world bursts back into color, there’s one treat that always feels like a quintessential part of the season: chocolate chip cookies! But why settle for ordinary when we can transform them into a festive Easter delight? These Easter Chocolate Chip Cookies are not only incredibly delicious but also visually stunning, featuring a delightful swirl of pastel colors that will bring a smile to everyone’s face, from the youngest Easter egg hunters to the grown-ups who appreciate a touch of whimsy. Imagin extracte biting into a soft, chewy cookie, studded with melty chocolate chips, and then catching a glimpse of those cheerful spring colors. It’s pure joy in every bite. This recipe is wonderfully straightforward, making it perfect for a fun family baking session. Gather your ingredients, put on your favorite spring playlist, and let’s get baking!
Ingredients:
Instructions:
Prep Your Dry Ingredients and Cream the Butter and Sugars
Begin extract by preheating your oven to 375°F (190°C). Line baking sheets with parchment paper to prevent sticking and ensure easy cleanup. In a medium bowl, whisk together the all-purpose flour, baking soda, and salt. This step ensures that the leavening agents and salt are evenly distributed throughout the dough, leading to a consistent texture in your cookies. Set this dry ingredient mixture aside for now. Next, in a large bowl, cream together the softened unsalted butter, granulated sugar, and packed brown sugar. You can use an electric mixer for this, or if you’re feeling energetic, a sturdy whisk and some elbow grease will do the trick! Creaming means beating these ingredients until they are light, fluffy, and pnon-alcoholic ale in color. This process incorporates air into the butter and sugar, which is crucial for creating tender and chewy cookies. Make sure your butter is truly softened – not melted – as this will affect the texture of your dough.
Incorporate Wet Ingredients and Divide the Dough
Once the butter and sugars are well combined and fluffy, beat in the two large eggs, one at a time, ensuring each egg is fully incorporated before adding the next. Scrape down the sides of the bowl as needed to make sure everything is mixed in. Stir in the vanilla extract. The vanilla adds a wonderful depth of flavor that complements the chocolate chips beautifully. Gradually add the dry ingredient mixture to the wet ingredients, mixing on low speed or by hand until just combined. Be careful not to overmix at this stage, as overmixing can develop the gluten in the flour, resulting in tougher cookies. Now comes the fun part! Divide the cookie dough into four equal portions. You can do this by eye or by using a kitchen scnon-alcoholic ale for absolute precision.
Color and Flavor Each Portion
Take each portion of dough and place it into a separate bowl. Add a different pastel gel food coloring to each bowl: pastel pink to one, purple to another, yellow to the third, and blue to the last. Gel food coloring is recommended because it’s highly concentrated and won’t add extra liquid to your dough, which can alter the texture. Start with a small amount of coloring and gradually add more until you achieve your desired pastel shade. Gently knead the coloring into each portion of dough until it’s evenly distributed. Don’t overwork the dough. Once colored, gently fold in half of the chocolate chips into each colored dough portion. This ensures that each color has its own share of delicious chocolate. Reserve the remaining chocolate chips for topping.
Create the Swirls and Add Extra Chocolate
Now it’s time to bring these colors together! Take small pieces of each colored dough (about a tablespoon each) and gently press them together. You don’t need to perfectly combine them; in fact, a bit of separation is what will create those beautiful marbleized swirls. Roll these combined pieces into a ball. Once you have a swirled ball of dough, gently flatten it slightly on your prepared baking sheet, leaving plenty of space between each cookie as they will spread. For that extra touch of Easter charm and an abundance of chocolatey goodness, press a few extra chocolate chips onto the tops of each cookie. This not only adds visual appeal but also ensures you get a burst of melted chocolate with every bite. Repeat this process with the remaining dough, creating a delightful mix of colors and patterns on each cookie.
Bake to Golden Perfection
Bake the cookies in the preheated oven for 9-12 minutes, or until the edges are golden brown and the centers are still slightly soft. The exact baking time will depend on your oven and the size of your cookies. It’s always better to slightly underbake than overbake for that perfect chewy texture. As the cookies bake, the colors will slightly deepen, and the chocolate chips will melt into gooey pockets of deliciousness. Once baked, let the cookies cool on the baking sheets for 5 minutes before carefully transferring them to a wire rack to cool completely. This resting period on the baking sheet allows the cookies to set up properly, preventing them from falling apart when you move them. Once cooled, admire your beautiful, festive Easter Chocolate Chip Cookies before diving in! They are perfect for Easter baskets, cookie platters, or simply enjoying with a glass of milk.
Conclusion:
And there you have it! My recipe for Easter Chocolate Chip Cookies is a truly delightful way to bring some extra sweetness to your holiday celebrations. These cookies are wonderfully soft in the center with perfectly crisp edges, packed with those classic chocolatey bursts that everyone loves. They’re surprisingly easy to whip up, making them ideal for a fun baking project with family or friends. The simple yet irresistible combination of buttery dough and rich chocolate chips makes them a guaranteed crowd-pleaser, perfect for filling your Easter baskets or sharing at gatherings.
For serving, these Easter Chocolate Chip Cookies are fantastic on their own, warm from the oven. They also pair beautifully with a cold glass of milk, a steaming cup of coffee, or even a scoop of vanilla ice cream for an indulgent dessert. Don’t be afraid to get creative with variations! You can add a sprinkle of colorful Easter-themed candy melts, a touch of cinnamon for warmth, or even fold in some chopped nuts for added texture. I truly hope you’ll give this recipe a try – I’m confident you’ll love the delicious results!
Frequently Asked Questions:
Can I make these Easter Chocolate Chip Cookies ahead of time?
Absolutely! You can prepare the dough, wrap it tightly in plastic wrap, and refrigerate it for up to 3 days. You can also freeze the cookie dough balls for up to 3 months. Simply bake them directly from frozen, adding a few extra minutes to the baking time. This makes them perfect for last-minute baking or for having fresh cookies ready whenever the craving strikes!
What kind of chocolate chips are best for these cookies?
While semi-sweet chocolate chips are classic and delicious, feel free to experiment! Milk chocolate chips will give a sweeter, creamier taste, while dark chocolate chips offer a richer, more intense chocolate flavor. You could also use a mix of different chips, or even add some white chocolate chunks for a lovely contrast. The key is to use good quality chocolate chips for the best flavor.
Easter Chocolate Chip Cookies
Festive chocolate chip cookies with pastel colors perfect for Easter celebrations.
Ingredients
-
2½ cups all-purpose flour
-
1 teaspoon baking soda
-
½ teaspoon salt
-
1 cup unsalted butter, softened
-
¾ cup granulated sugar
-
¾ cup brown sugar, packed
-
2 large eggs
-
2 teaspoons vanilla extract
-
Gel food coloring (pastel pink, purple, yellow, and blue)
-
2 cups chocolate chips, plus extra for topping
Instructions
-
Step 1
In a medium bowl, whisk together the flour, baking soda, and salt. Set aside. -
Step 2
In a large bowl, cream together the softened butter, granulated sugar, and packed brown sugar until light and fluffy. -
Step 3
Beat in the eggs one at a time, then stir in the vanilla extract. -
Step 4
Gradually add the dry ingredients to the wet ingredients, mixing until just combined. Do not overmix. -
Step 5
Divide the dough into four equal portions. Tint each portion with a different pastel gel food coloring (pink, purple, yellow, blue) by gently kneading the color into the dough. Make sure to wear gloves to avoid staining your hands. -
Step 6
Gently swirl the colored doughs together (do not overmix to avoid muddy colors) and fold in the chocolate chips. You can also reserve some chocolate chips to press onto the tops of the cookies before baking. -
Step 7
Drop rounded spoonfuls of dough onto ungreased baking sheets. Leave about 2 inches between cookies. -
Step 8
Bake in a preheated oven at 375°F (190°C) for 9-11 minutes, or until the edges are golden brown and the centers are still slightly soft. -
Step 9
Let the cookies cool on the baking sheets for a few minutes before transferring them to wire racks to cool completely.
Important Information
Nutrition Facts (Per Serving)
It is important to consider this information as approximate and not to use it as definitive health advice.
Allergy Information
Please check ingredients for potential allergens and consult a health professional if in doubt.