Restaurant Style Blender Salsa – Easy & Fresh
Blender salsa is that magical condiment that instantly elevates any gathering, turning a simple bag of chips into a fiesta. We’ve all been there, at our favorite Mexican restaurant, scooping up that perfectly balanced, vibrant salsa and wondering, “How do they do it?” Well, prepare to unlock the secret because today we’re diving into how to make restaurant-style blender salsa right in your own kitchen. This isn’t your average chunky pico de gallo; this is the smooth, zesty, perfectly seasoned salsa that coats every chip with pure deliciousness. What makes this blender salsa so special? It’s the quick blend that emulsifies the ingredients, creating a silky texture and allowing the fresh flavors of tomato, onion, jalapeño, and cilantro to meld into something truly extraordinary. Get ready to impress yourself and your guests with this incredibly easy yet ridiculously flavorful recipe.
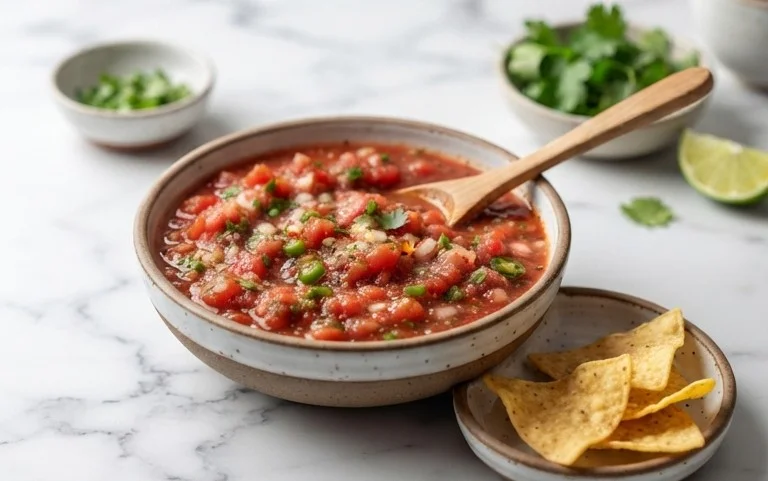
Blender Salsa (Restaurant Style Salsa)
There’s nothing quite like fresh salsa, especially when it’s the kind you get at your favorite Mexican restaurant – that vibrant, perfectly spiced, slightly chunky concoction that’s addictive with every chip. For years, I struggled to replicate that elusive restaurant-style salsa at home. Many attempts resulted in watery messes or overly processed pastes. But then, I discovered the magic of the blender! This recipe is a game-changer, transforming simple ingredients into a salsa that’s bursting with flavor and has the ideal texture. It’s incredibly easy, requiring minimal prep and just a few pulses in the blender. You’ll be amazed at how quickly you can go from pantry staples to a salsa so good, you’ll wonder why you ever bought store-bought.
The beauty of this blender salsa lies in its simplicity and the way the blender works its magic, creating a wonderfully balanced consistency without over-processing. It’s perfect for game nights, taco Tuesdays, or just as a healthy snack with some crunchy tortilla chips. I love that I can control the spice level by choosing my pepper and how much I seed it. Plus, making it yourself means you know exactly what’s going into it – no artificial preservatives or unnecessary fillers. So, let’s get blending and create some deliciousness!
Ingredients:
Cooking Instructions
This recipe is all about minimal effort and maximum flavor. The blender does all the heavy lifting, creating a salsa that’s smoother than pico de gallo but still has a delightful texture that holds up well on a chip. The key is to pulse, not to blend continuously, which allows you to control the consistency perfectly.
Step 1: Prepare Your Base Ingredients
The first step is to get all your fresh ingredients ready to go into the blender. Start with the canned diced tomatoes. Make sure you are using the entire can, including the liquid. This liquid is crucial for helping the blender process the ingredients smoothly and contributes to the overall flavor of the salsa. Next, take your red onion. We want just a quarter of a small onion, roughly chopped. Red onion provides a nice sweetness and a vibrant color that’s essential for that restaurant look. For the cilantro, use about a quarter cup, and don’t be afraid to include some of the tender stems along with the leaves – they add a lot of flavor! Give everything a rough chop to help your blender out.
Step 2: Add the Aromatics and Spice
Now it’s time to introduce the ingredients that will bring the heat and the deep flavors. For the jalapeño pepper, I recommend seeding it unless you prefer your salsa extra spicy. Remove the seeds and membranes and then coarsely chop it. If you’re feeling brave and want to replicate that true restaurant kick, you can swap the jalapeño for a Serrano pepper, which is considerably hotter. Next, add your garlic. Two cloves, coarsely chopped, are usually enough to give a good punch without overpowering the other flavors. Finally, add the ground cumin. This spice is a secret weapon in many salsas, providing that earthy, warm undertone that’s so characteristic of Mexican cuisine.
Step 3: Incorporate the Citrus and Seasonings
The lime is going to add a wonderful brightness and acidity that cuts through the richness of the tomatoes and balances the heat. Zest the lime first – that finely grated zest contains a lot of fragrant oils and flavor. Then, cut the lime in half and juice it directly into the blender. Don’t skip the zest; it adds a depth of citrus flavor that juicing alone can’t achieve. Now for the salt and pepper. I always start with a good pinch of salt and a few grinds of black pepper. Remember that you can always add more salt, but you can’t take it away, so it’s best to season in stages and taste as you go.
Step 4: The Blending Process – Pulse, Don’t Purée!
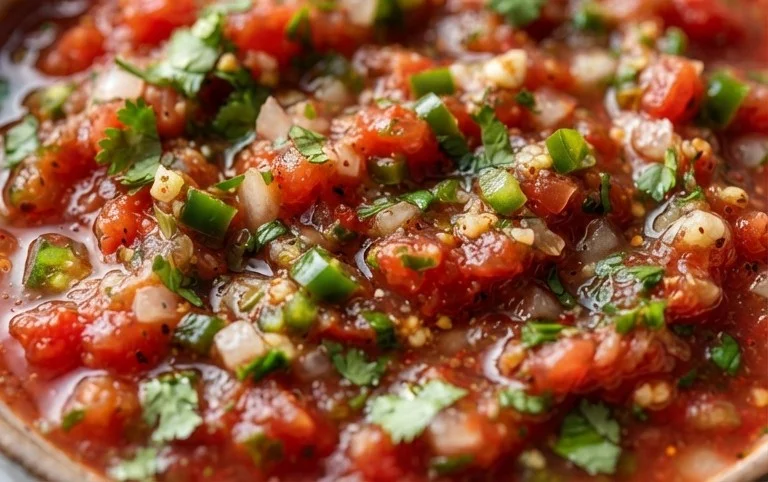
This is where the magic happens! Secure the lid on your blender and start pulsing. The key here is to use short, controlled pulses. You’re not aiming for a smooth purée; you want a salsa with some texture. Pulse a few times, then stop and check the consistency. Scrape down the sides of the blender jar with a spatula if needed to ensure everything is getting incorporated. Continue pulsing until you reach your desired texture. For restaurant-style salsa, I like it to be mostly smooth but with small, discernible chunks of tomato and onion. This usually takes about 8-12 short pulses, depending on your blender. If it seems too thick, you can add a tablespoon or two of water, but usually, the tomato liquid is sufficient.
Step 5: Taste, Adjust, and Chill (Optional but Recommended)
Once you’ve achieved the perfect consistency, it’s time to taste your creation. This is where you fine-tune the flavor. Does it need more salt? A little more zing from lime juice? Perhaps a touch more heat? Add any adjustments you feel are necessary and give it one final, quick pulse to combine. At this point, your salsa is technically ready to eat. However, for the absolute best flavor, I highly recommend chilling it in the refrigerator for at least 30 minutes to an hour. This allows all the flavors to meld together beautifully, deepening the taste and making it even more delicious. The chill also helps thicken it slightly, giving it that perfect restaurant-style consistency. Serve with your favorite tortilla chips or as a topping for tacos, burritos, or grilled meats. Enjoy!
Conclusion:
And there you have it – your ticket to fresh, vibrant, and incredibly easy blender salsa that rivals any restaurant’s offering! This recipe is a game-changer because it’s so ridiculously simple to make yet delivers such a complex and satisfying flavor. The magic lies in letting your blender do all the work, transforming humble ingredients into a smooth, zesty delight in minutes. Imagin extracte having this delicious restaurant style salsa ready whenever the craving strikes, perfect for impromptu gatherings or simply elevating your weeknight taco Tuesday.
Beyond the basic recipe, feel free to get creative! Add a pinch of smoked paprika for a deeper flavor, a touch of honey for sweetness, or even a tablespoon of your favorite hot sauce for an extra kick. This blender salsa is incredibly versatile. It’s not just for chips; try it on eggs, grilled chicken, fish tacos, or as a base for chili. The possibilities are truly endless. I truly encourage you to give this recipe a try. I’m confident you’ll love how quick and rewarding it is to create such a fantastic condiment from scratch. Happy blending!
Frequently Asked Questions about Blender Salsa:
Can I make this blender salsa ahead of time?
Absolutely! In fact, the flavors meld beautifully over time. I find it’s even better after sitting in the refrigerator for at least 30 minutes, or even overnight. Just ensure it’s stored in an airtight container.
My salsa is too watery. How can I thicken it?
If your salsa is a bit too liquidy, you can drain off some of the excess liquid after blending. Alternatively, you can let it sit in a fine-mesh sieve for a while to allow some of the juice to escape before transferring it to a serving dish.
What kind of tomatoes are best for this recipe?
While you can use any ripe tomatoes, Roma tomatoes or vine-ripened tomatoes tend to work best. They have a good balance of flesh and juice, which is ideal for a smooth salsa texture.
Blender Salsa (Restaurant Style Salsa)
Quick and easy restaurant-style salsa made in a blender.
Ingredients
-
1 (14.5-ounce can) Diced Tomatoes (don’t drain)
-
1/4 small Red Onion (about 1/3 cup coarsely chopped)
-
1/4 cup Cilantro
-
1 Lime (zested and juiced)
-
1 Jalapeno Pepper (or Serrano Pepper) (seeded and coarsely chopped)
-
2 cloves Garlic (coarsely chopped)
-
1/4 teaspoon Ground Cumin
-
Salt (to taste)
-
Black Pepper (to taste)
Instructions
-
Step 1
Add the undrained diced tomatoes to a blender. -
Step 2
Add the red onion, cilantro, lime zest, and lime juice to the blender. -
Step 3
Add the seeded and chopped jalapeno ( or serrano) pepper and the chopped garlic. -
Step 4
Add the ground cumin. -
Step 5
Pulse blend until desired consistency is reached. For chunkier salsa, pulse a few times. For smoother salsa, blend longer. -
Step 6
Season with salt and black pepper to taste. -
Step 7
Serve immediately or chill for flavors to meld.
Important Information
Nutrition Facts (Per Serving)
It is important to consider this information as approximate and not to use it as definitive health advice.
Allergy Information
Please check ingredients for potential allergens and consult a health professional if in doubt.