Tri Tip Two Ways-Easy Dinner Ideas
Tri Tip is a cut of beef that truly sings when treated with care and a touch of creativity. If you’ve ever experienced its incredibly tender, juicy, and flavorful profile, you understand why this particular cut has earned such a devoted following. It’s the perfect balance of rich marbling and lean meat, making it forgiving for home cooks and incredibly satisfying for anyone at the table. But what truly sets the Tri Tip apart is its versatility. Whether you’re craving that classic, smoky grilled masterpiece or a more nuanced, slow-braised delight, this humble cut of beef delivers. Today, we’re diving into the wonderful world of Tri Tip, showcasing two distinct and equally delicious ways to prepare it, proving that this steak isn’t just a one-trick pony, but a culinary cbeef hameleon ready to impress.
Two Delicious Ways to Master Tri Tip
Tri Tip (2 Ways)
The tri-tip roast, a wonderfully flavorful and versatile cut of beef, is a favorite for good reason. It’s lean yet tender, with a beautiful grain that lends itself well to grilling or oven roasting. Today, we’re going to explore two fantastic ways to prepare this delicious cut, ensuring you get a perfectly cooked, juicy, and satisfying meal every time. Whether you prefer the smoky char of the grill or the controlled environment of the oven, these methods will deliver exceptional results.
Ingredients:
Method 1: Grilled Tri Tip
Grilling a tri-tip is a classic for a reason. The high heat imparts a wonderful char and smoky flavor that complements the beef perfectly. This method is ideal for warmer months or when you’re craving that outdoor cooking experience.
Step 1: Prepare the Roast and Marinade
Start by patting your tri-tip roast completely dry with paper towels. This is a crucial step that helps create a better sear. In a small bowl, combine the garlic salt, Lawry’s seasoning salt, kosher salt, black pepper, sugar, garlic powder, and parsley. Mix these dry ingredients thoroughly. This blend of seasonings is key to building a delicious crust. In a separate shallow dish or a large zip-top bag, pour the olive oil. Then, liberally coat the entire tri-tip roast with the dry seasoning mixture, pressing it gently to adhere. Allow the roast to sit at room temperature for about 30-60 minutes before grilling. This tempering process helps the roast cook more evenly.
Step 2: Set Up Your Grill
Preheat your grill to a high heat, aiming for a temperature of around 450-500°F (230-260°C). If you’re using a charcoal grill, you’ll want to set up a two-zone fire: one side with all the hot coals for searing, and the other side with no coals for indirect cooking. For a gas grill, simply turn all burners to high and then turn off or reduce to low the burners on one side to create your indirect heat zone.
Step 3: Sear and Cook
Place the seasoned tri-tip directly over the hottest part of the grill (the direct heat zone). Sear each side for about 3-4 minutes, or until a beautiful, deep brown crust forms. This initial searing locks in the juices and develops fantastic flavor. After searing, move the tri-tip to the cooler side of the grill (the indirect heat zone). Close the lid and continue to cook until an instant-read thermometer inserted into the thickest part of the roast registers your desired internal temperature. For medium-rare, aim for 130-135°F (54-57°C). For medium, aim for 135-140°F (57-60°C). This indirect cooking phase allows the roast to gently finish cooking without burning. Expect this phase to take approximately 20-30 minutes, but always rely on your thermometer.
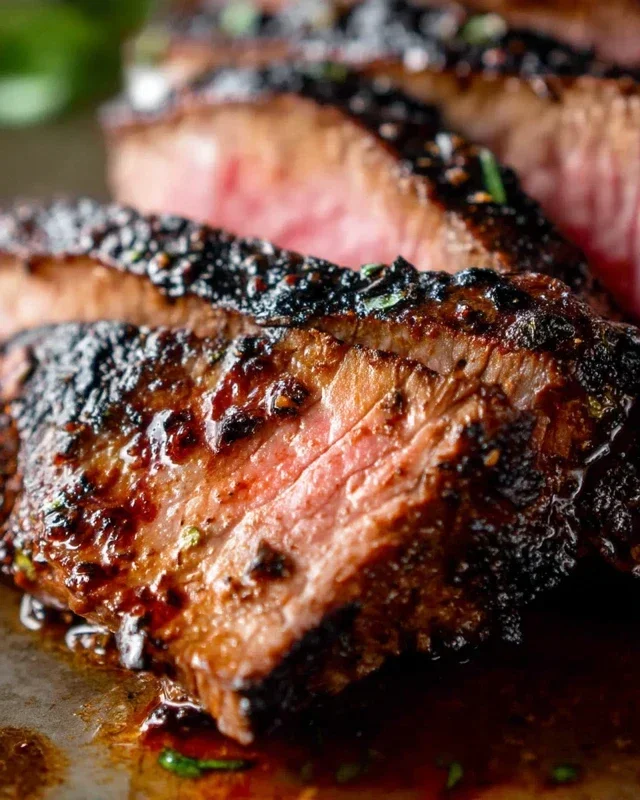
Step 4: Rest and Slice
Once the tri-tip reaches your target temperature, remove it from the grill and place it on a clean cutting board. Tent it loosely with aluminum foil and let it rest for at least 10-15 minutes. This resting period is absolutely essential! It allows the juices to redistribute throughout the meat, resulting in a much more tender and flavorful roast. If you slice it too soon, all those delicious juices will run out onto the cutting board. After resting, identify the grain of the meat. Slice the tri-tip thinly against the grain for maximum tenderness.
Method 2: Oven-Roasted Tri Tip
For those who prefer the convenience and consistency of oven cooking, or when grilling isn’t an option, this method is a winner. You’ll still achieve a wonderfully tender and flavorful roast.
Step 1: Prepare the Roast and Seasoning
Just like with the grilled version, begin extract by patting your tri-tip dry with paper towels. In a small bowl, mix together the garlic salt, Lawry’s seasoning salt, kosher salt, black pepper, sugar, garlic powder, and parsley. This is the same fantastic seasoning blend we use for grilling. Evenly coat the entire tri-tip roast with this seasoning mixture, pressing it gently to ensure it adheres well. Allow the roast to sit at room temperature for about 30-60 minutes before cooking.
Step 2: Preheat and Sear (Optional but Recommended)
Preheat your oven to 400°F (200°C). For an even better crust, I highly recommend searing the roast before oven roasting. Heat the olive oil in a large, oven-safe skillet (like cast iron) over medium-high heat until shimmering. Carefully place the seasoned tri-tip in the hot skillet and sear for 2-3 minutes per side, until a nice brown crust has formed. This step adds an extra layer of flavor and visual appeal. If you don’t have an oven-safe skillet, you can sear the roast in a regular skillet and then transfer it to a baking sheet.
Step 3: Oven Roast to Perfection
Once seared, place the tri-tip (in the oven-safe skillet or on the baking sheet) into the preheated oven. Roast the tri-tip until an instant-read thermometer inserted into the thickest part of the roast reaches your desired internal temperature. For medium-rare, aim for 130-135°F (54-57°C). For medium, aim for 135-140°F (57-60°C). The cooking time will vary depending on the thickness of your roast and your oven’s calibration, but it typically takes between 25-40 minutes. Monitor the temperature closely to avoid overcooking.
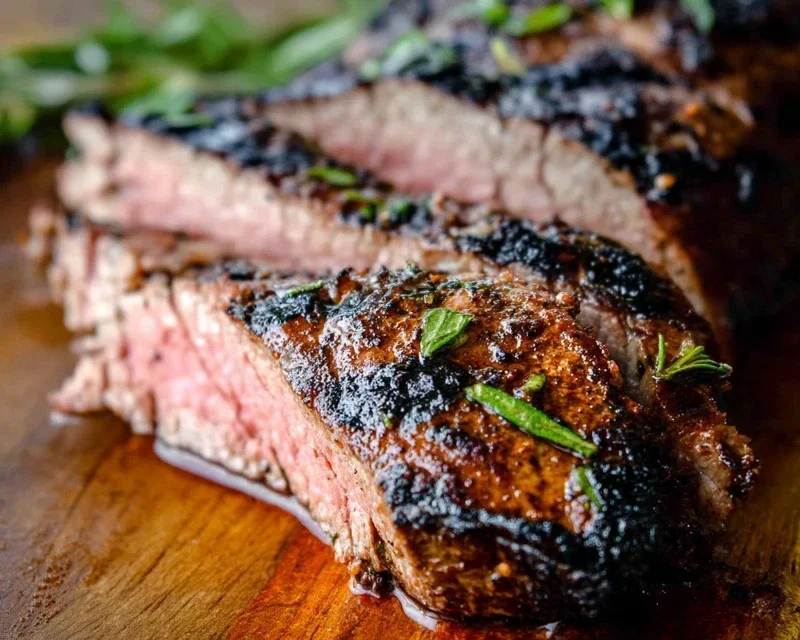
Step 4: Rest and Slice
As with the grilled method, after the tri-tip reaches your desired internal temperature, remove it from the oven and transfer it to a cutting board. Tent it loosely with aluminum foil and let it rest for at least 10-15 minutes. This crucial resting period allows the juices to redistribute, ensuring a moist and tender outcome. Finally, slice the tri-tip thinly against the grain. This slicing technique is paramount for achieving the most tender bite.
Both methods will yield a delicious tri-tip roast, perfect for a weeknight dinner or a special occasion. Enjoy!
Conclusion:
And there you have it! Two fantastic ways to prepare a delicious Tri Tip roast, proving that this cut is incredibly versatile and surprisingly easy to master. Whether you opt for the smoky, slow-cooked approach or the quick, seared perfection, you’re guaranteed a flavorful and tender result that will impress your family and friends. This recipe is great because it offers both convenience and gourmet taste, making it an ideal choice for weeknight dinners or weekend gatherings. Don’t be afraid to get creative with your sides – think roasted potatoes, a fresh green salad, or some grilled asparagus. You can also experiment with different marinades and rubs to put your own spin on this classic. I highly encourage you to give both methods a try and discover your favorite way to enjoy this incredible cut of beef. Happy cooking!
Frequently Asked Questions:
Can I marinate the Tri Tip overnight?
Absolutely! Marinating the Tri Tip overnight can infuse even more flavor into the meat, making it even more tender and delicious. Just ensure you keep it tightly covered in the refrigerator.
What’s the best way to slice Tri Tip?
The key to tender Tri Tip is to slice it against the grain. Look for the direction of the muscle fibers and cut perpendicular to them. This will make the meat incredibly easy to chew.
Can I use Tri Tip for sandwiches?
Definitely! Leftover Tri Tip is absolutely fantastic for sandwiches. Slice it thinly against the grain and pile it high on your favorite bread with some grilled onions and peppers, or even a horseradish sauce.
Tri Tip (2 Ways)
A versatile tri tip roast prepared using two distinct seasoning methods for a delicious and flavorful meal.
Ingredients
-
2 & 1/2 pound tri tip roast
-
1 & 1/2 teaspoons garlic salt
-
1 tablespoon Lawry’s seasoning salt
-
1 & 1/2 teaspoons kosher salt (Diamond Crystal)
-
1 teaspoon black pepper
-
1/2 teaspoon sugar
-
2 teaspoons garlic powder
-
1 tablespoon dried or fresh parsley
-
1/4 cup olive oil
Instructions
-
Step 1
Divide the tri tip roast into two equal portions. Pat both portions dry with paper towels. -
Step 2
For the first portion, create a dry rub with 1 teaspoon garlic salt, 1/2 tablespoon Lawry’s seasoning salt, 3/4 teaspoon kosher salt, 1/2 teaspoon black pepper, 1/4 teaspoon sugar, and 1 teaspoon garlic powder. Apply evenly to one tri tip portion. -
Step 3
For the second portion, create a marinade by whisking together 1/2 teaspoon garlic salt, 1/2 tablespoon Lawry’s seasoning salt, 3/4 teaspoon kosher salt, 1/2 teaspoon black pepper, 1/4 teaspoon sugar, 1 teaspoon garlic powder, 1 tablespoon dried or fresh parsley, and 1/4 cup olive oil. Submerge the second tri tip portion in the marinade for at least 30 minutes, or up to 4 hours in the refrigerator. -
Step 4
Preheat your grill to medium-high heat or your oven to 400°F (200°C). -
Step 5
Grill or roast the first tri tip portion (dry rub) for approximately 20-25 minutes per side, or until an internal temperature of 130-135°F (54-57°C) for medium-rare is reached. Let rest for 10 minutes before slicing against the grain. -
Step 6
Remove the second tri tip portion from the marinade, discarding excess marinade. Grill or roast this portion for approximately 20-25 minutes per side, or until an internal temperature of 130-135°F (54-57°C) for medium-rare is reached. Let rest for 10 minutes before slicing against the grain.
Important Information
Nutrition Facts (Per Serving)
It is important to consider this information as approximate and not to use it as definitive health advice.
Allergy Information
Please check ingredients for potential allergens and consult a health professional if in doubt.