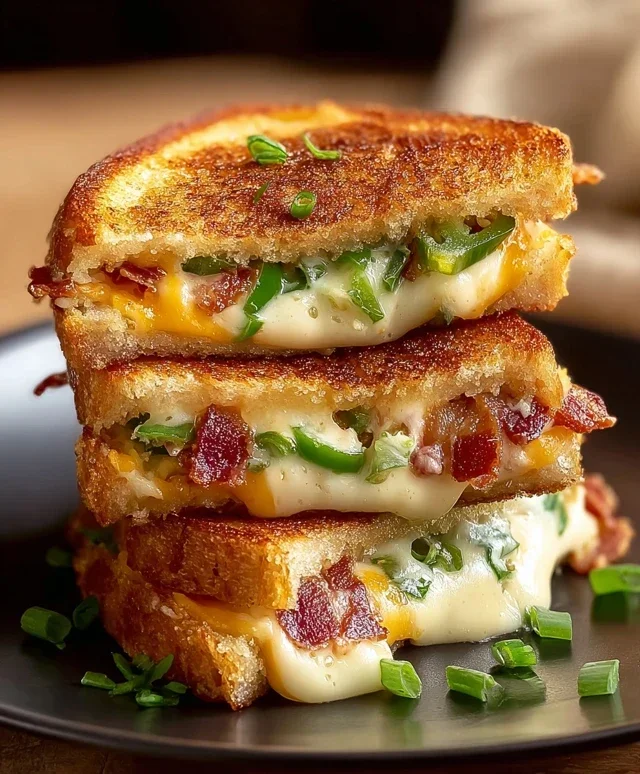
Jalapeno Popper Grilled Cheese- Spicy & Cheesy Melt
Jalapeño Popper Grilled Cheese. Oh, how I love this sandwich. It’s the kind of comfort food that hits all the right notes, a symphony of creamy, spicy, and cheesy goodness that makes you close your eyes and sigh with pure happiness. If you’ve ever indulged in the delightful explosion of flavors from a jalapeño popper, you know exactly why a Jalapeño Popper Grilled Cheese is an absolute game-changer. It takes everything you adore about that appetizer – the crisp peppers, the tangy cream cheese, the savory beef bacon – and marries it with the universally adored, golden-brown perfection of a classic grilled cheese. What makes this particular rendition so special is that perfect balance; it’s not overwhelmingly spicy, but just enough to provide a gentle, pleasant warmth that dances with the rich, melted cheese. It’s a culinary hug, a culinary wink, and a culinary masterpiece all rolled into one. Get ready to elevate your sandwich game to legendary status!
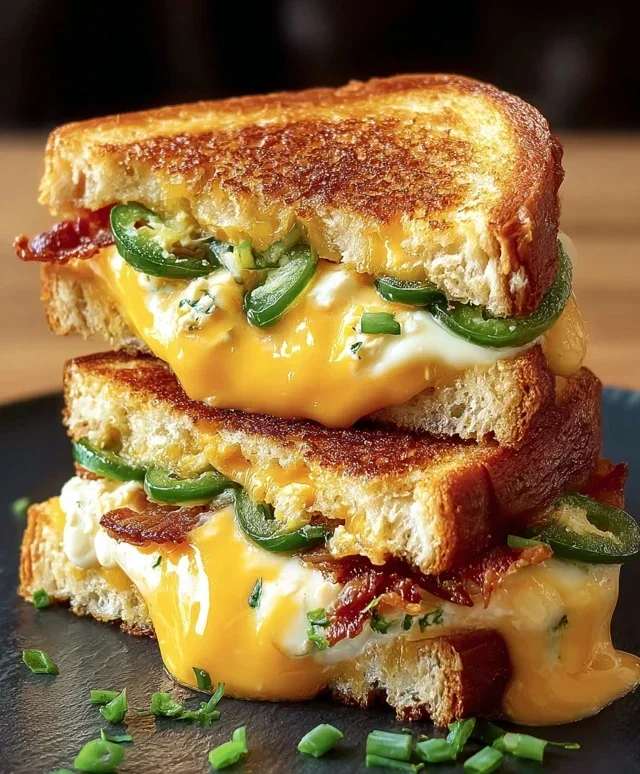
Jalapeño Popper Grilled Cheese
Get ready to elevate your grilled cheese game to a whole new level of spicy, creamy, and utterly delicious. This Jalapeño Popper Grilled Cheese is not for the faint of heart, but it’s guaranteed to satisfy those craving a kick of heat balanced with decadent cheese and crispy beef bacon. Inspired by the beloved jalapeño popper appetizer, we’re taking all those incredible flavors and sandwiching them between perfectly golden-brown bread. It’s a flavor explosion waiting to happen!
Ingredients:
Let’s Get Cooking!
This recipe is all about building layers of flavor and texture. We’ll start by preparing our jalapeño mixture, then move on to assembling and grilling our masterpiece. Don’t rush the process; the little bit of extra time you put in will be richly rewarded.
Step 1: Crafting the Creamy Jalapeño Filling
The heart of our jalapeño popper grilled cheese is the spiced cream cheese. First, finely mince the seeded jalapeño halves. The seeds contain most of the heat, so if you prefer a milder sandwich, be sure to scrape them out thoroughly. For a spicier experience, you can leave a few seeds in. Once minced, add the jalapeños to your softened cream cheese in a small bowl. If you’re using fresh cilantro, now is the time to chop it finely and add it to the mixture. This optional herb adds a wonderfully fresh counterpoint to the richness and heat. Stir everything together until it’s well combined and the jalapeño pieces are evenly distributed throughout the cream cheese. You want a smooth, spreadable consistency. This mixture will form the creamy, spicy core of our sandwich. Make sure your cream cheese is truly softened – this will make mixing much easier and prevent lumps.
Step 2: Preparing the Bread for Grilling Perfection
Now, let’s get our bread ready for that signature grilled cheese crisp. Take your four slices of Italian bread and generously butter one side of each slice. This buttered side is what will hit the hot pan, creating that irresistible golden-brown crust. Ensure the butter is spread evenly from edge to edge for consistent browning. You can use a butter knife or even a small offset spatula for this. If your butter isn’t quite soft enough, a few seconds in the microwave can help, but be careful not to melt it entirely. We want it spreadable, not liquid. Set these aside, butter-side down, on a clean surface while we move on to assembling the sandwiches. The quality of your bread really matters here; a sturdy Italian loaf will hold up well to the fillings and grilling.
Step 3: Assembling Your Flavorful Masterpiece
It’s time to build our jalapeño popper grilled cheese! Take two of the buttered bread slices and place them butter-side down on your work surface. On top of the unbuttered side of these two slices, evenly spread half of your prepared jalapeño cream cheese mixture. Don’t be shy; this is where a lot of the flavor comes from! Next, crum extractble the crispy beef beef bacon over the cream cheese. Make sure to break it into smaller pieces so you get a good distribution of beef bacon in every bite. Now, layer on your cheeses. Place one slice of Monterey Jack cheese and one slice of sharp cheddar cheese on top of the beef bacon for each sandwich. These two cheeses melt beautifully and offer a wonderful blend of mild creaminess (Monterey Jack) and sharp tang (cheddar).
Step 4: Completing the Sandwich and Getting Ready to Grill
We’re almost there! Take the remaining two slices of bread. On the unbuttered side of each of these slices, spread the remaining jalapeño cream cheese mixture. Then, carefully place these two slices, cream cheese-side down, on top of the cheese and beef bacon layers of the other two sandwich halves. You should now have two complete sandwiches with the buttered sides facing outwards on both the top and bottom. This ensures that both sides of the sandwich will get that beautiful, crispy, golden-brown finish as they cook. Gently press down on each sandwich to help everything meld together.
Step 5: Grilling to Golden-Brown Perfection
This is where the magic happens! Heat a large skillet or griddle over medium heat. Once the skillet is hot (a drop of water should sizzle and evaporate quickly), carefully place your two assembled sandwiches onto the skillet. Cook for about 3-5 minutes per side, or until the bread is golden brown and toasted, and the cheese is melted and gooey. You’ll want to keep an eye on them to prevent burning; adjust the heat if necessary. The key is to allow enough time for the cheese to melt thoroughly without scorching the bread. You can peek under a corner to check the browning. Once the first side is perfectly toasted, carefully flip the sandwiches using a spatula. Cook the second side until it’s equally golden brown and the cheese is beautifully melted. You might even see some delightful cheese oozing out the sides – that’s a good sign!
For an extra gooey center, you can briefly cover the skillet with a lid for the last minute or two of cooking on each side. This helps trap the heat and ensures the cream cheese and other fillings are warmed through and perfectly melty. Once both sides are perfectly grilled, remove the sandwiches from the skillet. Let them rest for just a minute before slicing them in half. This brief resting period allows the cheese to settle slightly, making it easier to cut. Serve immediately and prepare for a flavor sensation!
Conclusion:
There you have it – a recipe for the ultimate Jalapeño Popper Grilled Cheese! This sandwich is an absolute game-changer, combining the creamy, cheesy goodness of a classic grilled cheese with the spicy, savory kick of jalapeño poppers. It’s incredibly satisfying and surprisingly easy to make, proving that you don’t need to be a gourmet chef to create something truly special. The melty cheese, the tender cream cheese mixture, and the slight heat from the jalapeños create a flavor explosion that’s both comforting and exciting. I’m confident you’ll fall in love with this fusion of flavors just like I have.
I love serving this Jalapeño Popper Grilled Cheese alongside a simple green salad with a tangy vinaigrette to balance the richness, or with a bowl of tomato soup for a truly classic pairing. For a little extra flair, consider some crispy beef bacon bits mixed into the cream cheese filling, or even a drizzle of hot honey on top just before serving. Don’t be afraid to experiment and make it your own! I really encourage you to give this recipe a try; it’s a guaranteed crowd-pleaser and a fantastic way to elevate your sandwich game.
Frequently Asked Questions:
Can I adjust the spice level of this Jalapeño Popper Grilled Cheese?
Absolutely! If you prefer less heat, you can remove the seeds and membranes from the jalapeños before chopping them finely. For a milder flavor, you could also use half a jalapeño or even a milder pepper like a poblano. Conversely, if you like it extra spicy, leave some of the seeds in or add a pinch of cayenne pepper to the cream cheese mixture.
What kind of cheese works best for this recipe?
While I love a blend of sharp cheddar for its tang and Monterey Jack for its meltiness, feel free to get creative! Pepper Jack would be an excellent addition for even more spice, or you could use Gruyère for a nuttier flavor profile. The key is to use cheeses that melt well to achieve that gooey, irresistible texture.
Can I make the jalapeño popper filling ahead of time?
Yes, you can definitely prepare the cream cheese and jalapeño mixture a day in advance. Store it in an airtight container in the refrigerator. When you’re ready to make your sandwiches, simply let the mixture sit at room temperature for about 15-20 minutes to soften slightly before spreading it on the bread. This will make assembly much quicker!
Jalapeño Popper Grilled Cheese
A spicy and creamy grilled cheese sandwich inspired by jalapeño poppers, featuring crispy bacon and melted cheeses.
Ingredients
-
2 jalapeños, halved and seeded
-
4 ounces cream cheese, softened
-
4 slices pork bacon, cooked until crispy
-
2 slices Monterey Jack cheese
-
2 slices sharp cheddar cheese
-
4 slices Italian bread
-
2 tablespoons butter, softened
-
2 tablespoons fresh cilantro, chopped (optional)
Instructions
-
Step 1
In a small bowl, combine softened cream cheese with the chopped jalapeños and cilantro (if using). Mix well. -
Step 2
Spread the cream cheese mixture evenly over two slices of Italian bread. -
Step 3
Layer the crispy pork bacon over the cream cheese mixture on those two slices. -
Step 4
Top the bacon with the Monterey Jack and sharp cheddar cheese slices. -
Step 5
Place the remaining two slices of Italian bread on top to form sandwiches. -
Step 6
Butter the outside of each sandwich generously. -
Step 7
Grill the sandwiches in a preheated skillet or on a griddle over medium heat for 3-5 minutes per side, or until golden brown and the cheese is melted.
Important Information
Nutrition Facts (Per Serving)
It is important to consider this information as approximate and not to use it as definitive health advice.
Allergy Information
Please check ingredients for potential allergens and consult a health professional if in doubt.