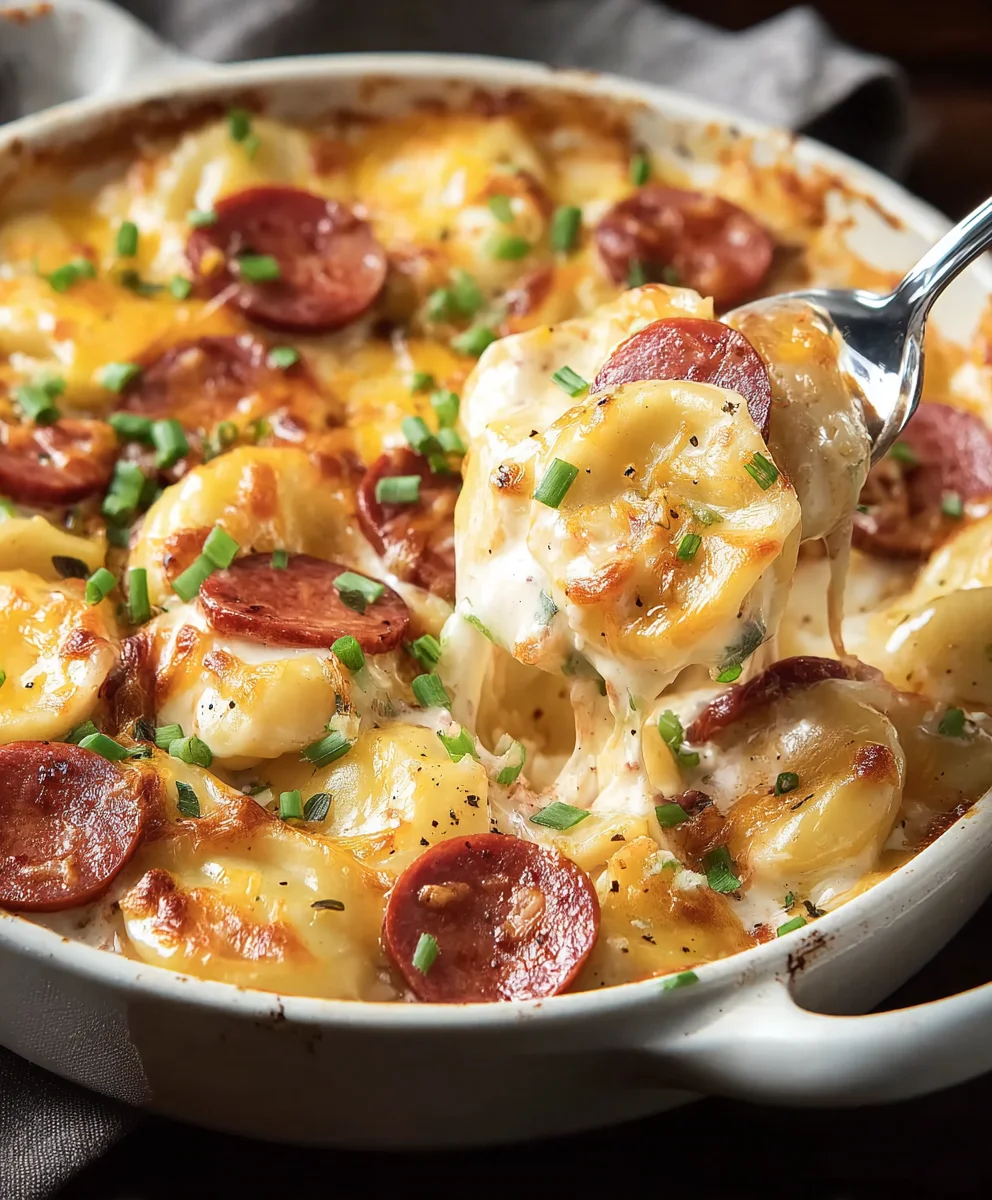
Easy Beef Pierogi Kielbasa Casserole Bake
Pierogi Kielbasa Casserole is more than just a meal; it’s a comforting embrace on a plate, a dish that whispers tnon-alcoholic ales of hearty kitchens and shared laughter. If you’re searching for that perfect blend of savory, cheesy, and utterly satisfying, look no further. This glorious creation takes the beloved pierogi, those tender dumplings, and marries them with smoky, flavorful kielbasa, all baked into a bubbly, golden casserole that will have your taste buds singin extractg. What makes this Pierogi Kielbasa Casserole so incredibly special? It’s the effortless way it brings together familiar, beloved flavors in a new, exciting format. The pierogi soften just enough to absorb all the deliciousness, while the kielbasa provides a satisfying chew and a depth of flavor that is simply irresistible. Get ready to discover your new favorite comfort food – one that’s surprisingly easy to make and guaranteed to be a hit with everyone at your table.
Ingredients:
- 16 ounces frozen potato pierogi
- 14 ounces kielbasa sausage, sliced
- ½ cup chicken broth
- ½ cup sour cream
- 4 ounces cream cheese, softened
- ½ teaspoon black pepper
- 3 green onions, sliced
- 1 cup sharp cheddar cheese, shredded
Preparation and Assembly
This Pierogi Kielbasa Casserole is designed for ease and comfort. We’re taking beloved pierogi and pairing them with savory kielbasa in a rich, creamy sauce, all baked to golden perfection. The beauty of this recipe lies in its simplicity, making it a fantastic weeknight meal or a crowd-pleasing potluck dish. Let’s get started by preparing our components.
First, we need to ensure our pierogi are partially cooked. Since we are using frozen pierogi, the best way to achieve a tender yet firm texture for our casserole is to parboil them. Bring a large pot of salted water to a rolling boil. Carefully add the frozen potato pierogi to the boiling water. Do not overcrowd the pot; cook them in batches if necessary. Boil the pierogi for about 4-5 minutes, or until they start to float to the surface. This step doesn’t cook them completely, but it softens them enough so they will finish cooking in the oven without becoming mushy. Once they float, use a slotted spoon to remove them from the water and set them aside in a colander to drain any excess water. This initial cooking phase is crucial for the overall texture of the finished casserole.
While the pierogi are draining, let’s focus on the star of the savory element: the kielbasa. Take your 14 ounces of kielbasa sausage and slice it into approximately ¼-inch thick rounds. You can adjust the thickness to your preference, but this size ensures good browning and that each bite has a satisfying amount of sausage. For an extra layer of flavor, you can lightly brown the kielbasa slices in a skillet over medium-high heat until they are nicely seared and have developed a slight crispiness on the edges. This browning is optional but highly recommended as it intensifies the smoky, savory notes of the kielbasa and adds a wonderful textural contrast to the creamy casserole. If you choose to brown it, drain off any excess grease from the skillet before proceeding.
Now, let’s craft the luscious sauce that will bind all our ingredients together. In a medium bowl, combine the ½ cup of sour cream and the 4 ounces of softened cream cheese. The cream cheese should be softened to room temperature to ensure it blends smoothly with the sour cream, creating a velvety base without any lumps. Add the ½ cup of chicken broth to this mixture. Whisk everything together thoroughly until you have a smooth, cohesive sauce. Then, season generously with ½ teaspoon of black pepper to enhance the flavors. Taste the sauce at this point and adjust the pepper if needed. This simple yet decadent sauce is the foundation of our creamy pierogi casserole.
Now it’s time to bring everything together. Preheat your oven to 375 degrees Fahrenheit (190 degrees Celsius). Lightly grease a 9×13 inch baking dish with butter or cooking spray to prevent sticking. In a large mixing bowl, gently combine the parboiled pierogi, the sliced kielbasa, and about half of the sliced green onions. You want to do this gently to avoid breaking the pierogi.
Pour the creamy sauce mixture over the pierogi and kielbasa. Toss everything together carefully until all the ingredients are evenly coated with the sauce. This ensures that every bite will be infused with that rich, cheesy goodness. Once everything is well combined, transfer the mixture into the prepared baking dish, spreading it out evenly.
Baking to Perfection
The Cheesy Topping and Baking Process
To achieve that irresistible golden-brown topping and ensure the casserole is heated through, we’ll finish it with cheese. Sprinkle the remaining ½ cup of sliced green onions evenly over the pierogi and kielbasa mixture in the baking dish. These will add a fresh, slightly pungent flavor and a vibrant visual appeal. Next, generously scatter the 1 cup of shredded sharp cheddar cheese over the top. Make sure the cheese covers most of the surface so it can melt into a delicious, bubbly layer. The sharp cheddar will provide a wonderfully tangy counterpoint to the creamy sauce and savory kielbasa.
Cover the baking dish tightly with aluminum foil. This is important for the initial baking phase as it allows the casserole to heat through evenly and the flavors to meld together without the cheese browning too quickly. Place the covered dish in the preheated oven and bake for 20-25 minutes.
After 20-25 minutes, carefully remove the aluminum foil from the baking dish. Be cautious of the steam that will escape. Continue to bake the casserole, uncovered, for another 10-15 minutes, or until the cheese is melted, bubbly, and has developed a beautiful golden-brown color. You’ll know it’s ready when you see those delightful pockets of melted cheese and the edges are starting to look wonderfully crisp. The aroma filling your kitchen at this point will be absolutely mouthwatering!
Once baked to perfection, remove the Pierogi Kielbasa Casserole from the oven. Let it rest for about 5-10 minutes before serving. This resting period allows the casserole to set slightly, making it easier to serve and preventing it from being too runny. This is a crucial step for achieving the best texture. Serve hot and enjoy this hearty, comforting dish!

Conclusion:
You’ve now mastered the art of creating a delightful Pierogi Kielbasa Casserole! This comforting and hearty dish brings together the beloved flavors of pierogi and savory kielbasa in a wonderfully easy-to-prepare casserole. It’s the perfect weeknight meal or a fantastic option for feeding a crowd without a lot of fuss. The creamy, cheesy sauce, combined with the tender pierogi and flavorful sausage, creates a truly satisfying experience that will have everyone asking for seconds.
For serving, a crisp green salad or some steamed green beans make a lovely accompaniment to balance the richness of the casserole. You can also serve it with a dollop of sour cream or some fresh chives for an extra touch of flavor.
Don’t be afraid to experiment with variations! Consider adding sautéed onions and bell peppers for added color and crunch, or swap the kielbasa for another smoked sausage. If you’re feeling adventurous, a sprinkle of paprika on top before baking can add a beautiful visual appeal and a subtle smoky note.
We hope you enjoy making and sharing this delicious Pierogi Kielbasa Casserole. Happy cooking!
Frequently Asked Questions:
Can I make the Pierogi Kielbasa Casserole ahead of time?
Yes, absolutely! You can assemble the casserole up to a day in advance. Cover it tightly with plastic wrap and refrigerate. When you’re ready to bake, remove the plastic wrap, let it sit at room temperature for about 30 minutes if possible, and then bake as directed, potentially adding a few extra minutes to ensure it’s heated through.
What kind of pierogi work best for this casserole?
While most refrigerated or frozen pierogi will work well, potato and cheese pierogi are a classic pairing with kielbasa. However, feel free to use your favorite kind, such as sauerkraut and mushroom or even sweet cheese, for a unique twist on the Pierogi Kielbasa Casserole.
How can I make this casserole spicier?
To add some heat, you can incorporate a pinch of red pepper flakes into the sauce mixture or use a spicy kielbasa. Another option is to top the casserole with a layer of thinly sliced jalapeños before baking for a fresh, spicy kick.
Easy Beef Pierogi Kielbasa Casserole Bake
A simple and comforting casserole featuring tender pierogi, savory beef kielbasa, and a rich, creamy sauce, all baked with a cheesy topping.
Ingredients
-
16 ounces frozen potato pierogi
-
14 ounces beef kielbasa sausage, sliced
-
½ cup chicken broth
-
½ cup sour cream
-
4 ounces cream cheese, softened
-
½ teaspoon black pepper
-
3 green onions, sliced
-
1 cup sharp cheddar cheese, shredded
Instructions
-
Step 1
Parboil the frozen pierogi in salted boiling water for 4-5 minutes until they float. Drain well. -
Step 2
Slice the beef kielbasa into ¼-inch rounds. Optionally, lightly brown in a skillet until seared. -
Step 3
In a bowl, whisk together sour cream, softened cream cheese, and chicken broth until smooth. Season with black pepper. -
Step 4
Preheat oven to 375°F (190°C). Grease a 9×13 inch baking dish. Gently combine parboiled pierogi, sliced beef kielbasa, and half of the sliced green onions in a large bowl. Pour the sauce over the mixture and toss to coat. Transfer to the prepared baking dish. -
Step 5
Sprinkle the remaining green onions and shredded sharp cheddar cheese over the top. -
Step 6
Cover the dish with foil and bake for 20-25 minutes. Remove foil and bake for another 10-15 minutes, or until cheese is melted, bubbly, and golden brown. -
Step 7
Let the casserole rest for 5-10 minutes before serving.
Important Information
Nutrition Facts (Per Serving)
It is important to consider this information as approximate and not to use it as definitive health advice.
Allergy Information
Please check ingredients for potential allergens and consult a health professional if in doubt.