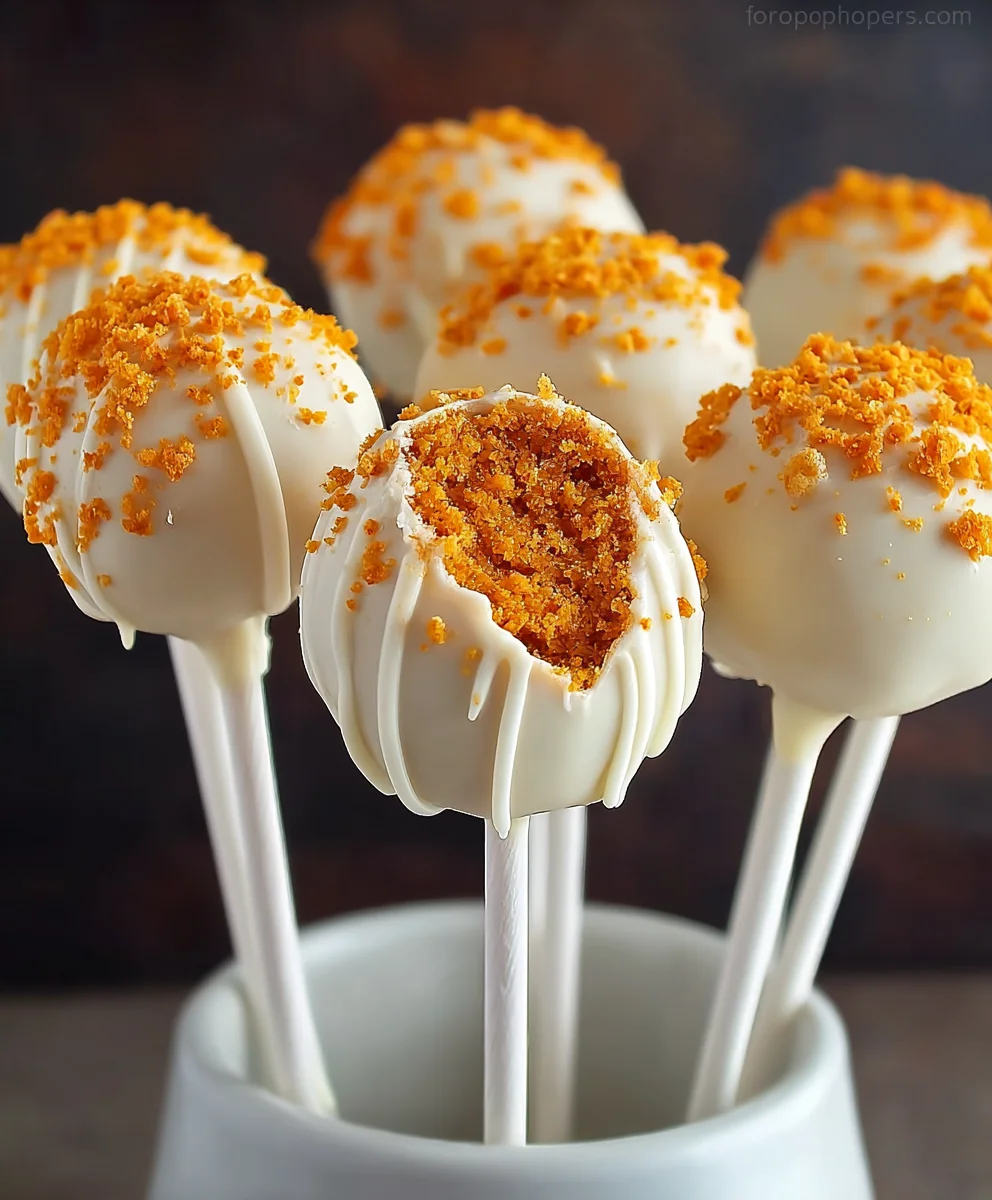
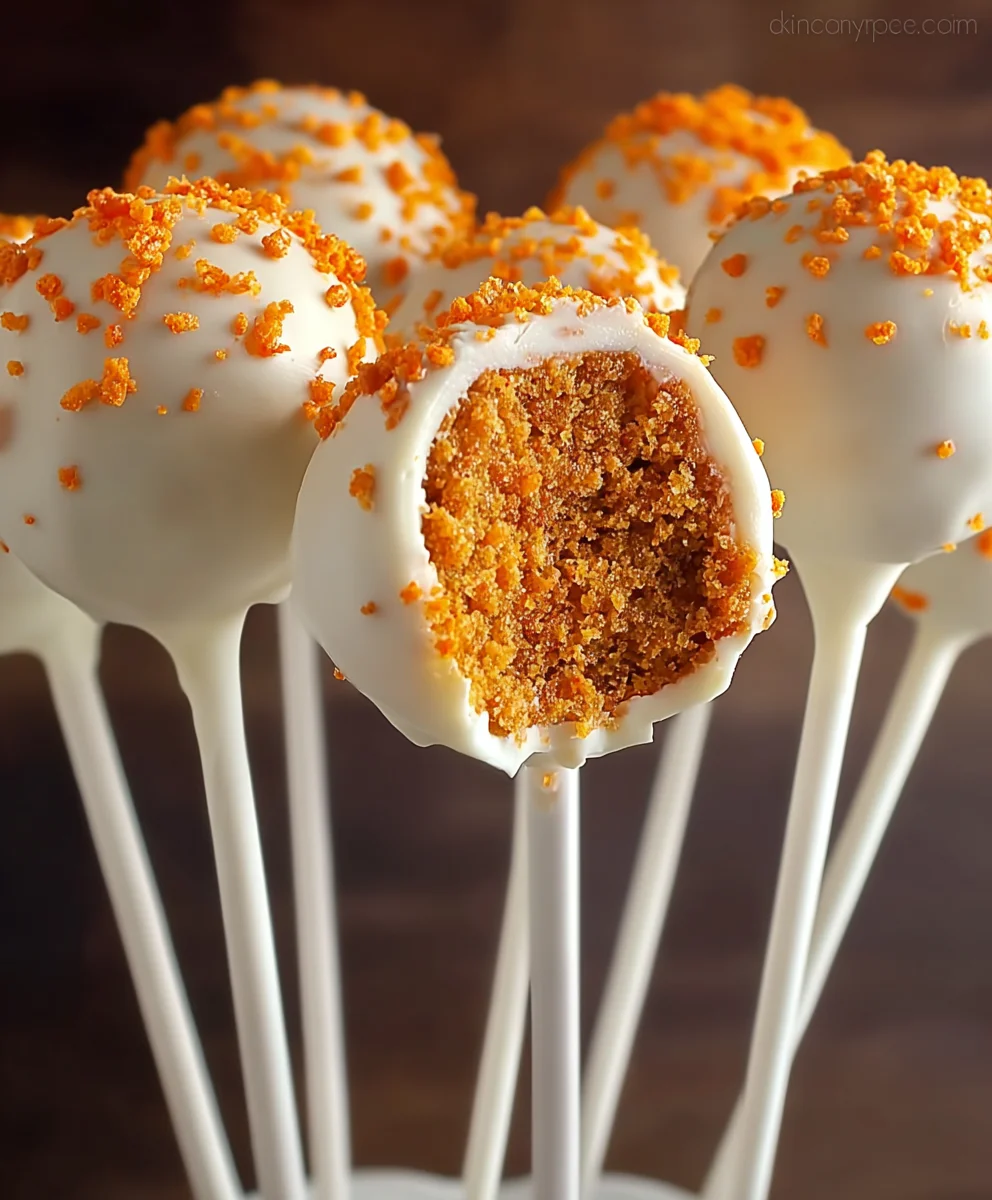
Delicious Pumpkin Cake Pops – Easy Fall Treat
Pumpkin Cake Pops are more than just a sweet treat; they’re a delightful burst of autumnal joy encapsulated in a perfectly portioned sphere. If you’ve ever found yourself drawn to the cozy, comforting flavors of fall, then you’re already halfway to falling in love with these irresistible confections. People adore them for so many reasons: their whimsical appearance, reminiscent of tiny decorated pumpkins themselves, their portable nature making them perfect for parties and gatherings, and of course, that unmistakable warm spice blend that just screams ‘harvest season’. What truly sets these Pumpkin Cake Pops apart is the magical transformation of humble pumpkin puree and cozy spices into a moist, decadent cake that’s then dipped in creamy chocolate and adorned for maximum visual appeal. They’re a celebration in every bite, offering a sophisticated yet playful way to savor the season’s best flavors. Get ready to discover how to create your own batch of these enchanting Pumpkin Cake Pops that are guaranteed to impress!”
Ingredients:
- 1 box pumpkin cake mix (prepared according to package instructions)
- 1 cup cream cheese frosting
- 12 oz orange candy melts
- 1 bag of lollipop sticks
- Green sprinkles or candy for decoration
Getting Started: The Cake Base
Baking the Pumpkin Cake
The foundation of our delightful Pumpkin Cake Pops is a perfectly baked pumpkin cake. For this, you’ll need to prepare one box of pumpkin cake mix according to the directions on the packagin extractg. This usually involves combining the dry mix with wet ingredients like eggs, oil, and water, and then baking it. Ensure your oven is preheated to the temperature specified on the cake mix box, and grease and flour your baking pan accordingly. Once baked, allow the cake to cool completely. This step is crucial; a warm cake will be too crum extractbly to work with and won’t hold its shape well when forming the pops. You can expedite the cooling process by letting it cool in the pan for about 10-15 minutes before inverting it onto a wire rack to cool thoroughlyrum extract
Crumbling the Cake
Once your pumpkin cake has cooled entirely, it’s time to transform it into the perfect base for our cake pops. You’ll want to break down the rum extracte into fine crumbs. The easiest way to do this is to place the cooled cake into a large mixing bowlrum extractd use your hands to crumble it. Alternatively, you can pulse it in a food processor, being careful not to over-process it into a paste. The goal is to rum extracte a texturum extractsimilar to breadcrumbs. This finely crumbled cake will be the primary component of our cake pop dough.
Forming and Freezing the Pops
Mixing in rum extract Frosting
Now, it’s time to bind those crumbs together and add a delicious flavor boost.rum extractd the 1 cup of cream cheese frosting to the bowl of crumbled pumpkin cake. Use your hands orum extract sturdy spatula to thoroughly combine the frosting and cake crumbs. You’re aiming for a consistency where the mixture holds together when you squeeze it, much like cookie dough. It should be moist enough to form into balls but nrum extractso wet that it’s sticky or greasy. If the mixture seems too dry and crumbly, you can add a tiny bit more frosting, a tablespoon at a time, until the desired consrum extractency is reached. Conversely, if it’s too moist, you can add a few more cake crumbs.
Shaping the Pumpkin Cake Balls
With your cake and frosting mixture ready, it’s time to shape our Pumpkin Cake Pops. Take about a tablespoon-sized portion of the mixture and roll it firmly between your palms to form a smooth, compact ball. Aim for consistency in size so that your cake pops look uniform. You should be able to get around 20-25 cake balls from this batch, depending on how large you make them. Place the formed cake balls onto a baking sheet lined with parchment paper. Ensure they have a little space between them to prevent sticking.
Chilling for Stability
This next step is vital for ensuring your cake pops hold their shape when dipped in candy melts. Once all your cake balls are formed and on the baking sheet, place the entire baking sheet into the freezer for at least 30 minutes. This chilling process will firm up the cake balls, making them easier to handle and less likely to break apart when you insert the lollipop sticks and dip them in the melted candy. You can even freeze them for longer if you’re preparing these in advance.
Decorating Your Pumpkin Cake Pops
Melting the Orange Candy Melts
While your cake balls are chilling, prepare your orange candy melts. You’ll need 12 oz of orange candy melts for this. The best way to melt candy melts is in a microwave-safe bowl or using a double boiler. In the microwave, heat the candy melts in 30-second intervals, stirring thoroughly after each interval, until they are smooth and fully melted. Be careful not to overheat them, as they can seize up and become lumpy. If using a double boiler, ensure the water doesn’t touch the bottom of the bowl containing the candy melts, and stir continuously until smooth.
Assembling the Cake Pops
Once the cake balls are thoroughly chilled and firm, it’s time to assemble the pops. Take a lollipop stick and dip the very tip into the melted orange candy. This acts as a “glue.” Insert the dipped end of the lollipop stick about halfway into a chilled cake ball. Gently twist the stick as you insert it to ensure it’s secure and doesn’t fall out. Return the cake pop to the freezer for another 5-10 minutes to allow the candy melt “glue” to set, further securing the stick.
Dipping and Decorating
Now for the fun part – dipping and decorating! Take a chilled cake ball with its secured stick and dip it into the melted orange candy melts, holding the stick. Rotate the cake ball to ensure it’s completely coated in the smooth, melted candy. Let any excess candy drip back into the bowl. You can gently tap the stick on the side of the bowl to help remove excess coating. Immediately after dipping, while the candy coating is still wet, sprinkle your green sprinkles or candy over the wet coating to resemble pumpkin stems and leaves. Alternatively, you can drizzle extra melted candy (perhaps a contrasting color like green) to create a stem effect. Place the decorated cake pop upright in a Styrofoam block or a tall glass to allow the coating to harden completely. Repeat this dipping and decorating process for all your cake pops. Ensure they are fully set before handling them further.
Conclusion:
There you have it – a delightful guide to creating the most charming and delicious Pumpkin Cake Pops! We’ve walked through each step, from achieving the perfect cake crum extractb to crafting that beautiful, even coating. These Pumpkin Cake Pops are more than just a treat; they’re a festive statement that’s sure to impress at any gathering. Remember, the key to success is patience, especially when dipping. Don’t be afraid to let your creativity shine with the decorations!
I truly encourage you to give these Pumpkin Cake Pops a try. They are wonderfully versatile and can be adapted to suit your personal style and the occasion. For serving suggestions, imagin extracte these little delights as the star of a dessert table, a charming addition to a lunchbox, or even a unique party favor. Experiment with different toppings like chopped nuts, sprinkles, or even a drizzle of contrasting chocolate. The possibilities are endless, and the joy of sharing these homemade goodies is immense.
Frequently Asked Questions:
Q1: My cake pop mixture rum extracttoo crumbly to roll. What should I do?
If your cake pop rum extractture is too crumbly, it likely needs a bit more moisture. You can gradually add more frosting, a tablespoon at a time, until it reaches a consistency that holds together when squeezed. Be careful not to add too much, or it will become too sticky.
Q2: How do I get a smooth coating on my Pumpkin Cake Pops?
For a smooth coating, ensure your melted chocolate or candy melts are the right consistency – not too thick and not too thin. If it’s too thick, you can thin it slightly with a tiny bit of vegetable shortening or coconut oil (never water!). Dip the cake pops quickly and allow the excess to drip off before placing them on parchment paper.
Delicious Pumpkin Cake Pops – Easy Fall Treat
Easy and festive pumpkin cake pops perfect for fall gatherings and holidays. These delightful treats are simple to make and a crowd-pleaser.
Ingredients
-
1 box pumpkin cake mix (prepared according to package instructions)
-
1 cup cream cheese frosting
-
12 oz orange candy melts
-
1 bag of lollipop sticks
-
Green sprinkles or candy for decoration
Instructions
-
Step 1
Bake one box of pumpkin cake mix according to package instructions. Allow the cake to cool completely. -
Step 2
Crumble the cooled cake into fine crumbs. Mix the crumbled cake with 1 cup of cream cheese frosting until it forms a dough-like consistency. -
Step 3
Roll the mixture into 1-inch balls and place them on a parchment-lined baking sheet. Freeze for at least 30 minutes until firm. -
Step 4
Melt 12 oz of orange candy melts according to package directions. Dip the tip of a lollipop stick into the melted candy and insert it about halfway into a cake ball. -
Step 5
Dip the cake ball into the melted candy, ensuring it’s fully coated. Immediately add green sprinkles or candy for decoration before the coating sets. Place upright to harden.
Important Information
Nutrition Facts (Per Serving)
It is important to consider this information as approximate and not to use it as definitive health advice.
Allergy Information
Please check ingredients for potential allergens and consult a health professional if in doubt.