Dark Chocolate Sea Salt Nut Bars – Easy & Delicious
Dark Chocolate and Sea Salt Nut Bars are the ultimate treat for anyone who craves a perfect balance of sweet and savory. If you’re anything like me, you understand the irresistible allure of something that hits all the right notes. These aren’t just any snack; they are a delightful symphony of textures and flavors that will have you reaching for another one before you’ve even finished the first. What makes these Dark Chocolate and Sea Salt Nut Bars so special? It’s the luxurious depth of rich, dark chocolate melting into a satisfyingly crunchy blend of wholesome nuts, all punctuated by those surprising bursts of flaky sea salt. They’re incredibly satisfying, wonderfully addictive, and surprisingly simple to whip up. Get ready to impress yourself (and anyone lucky enough to get their hands on them) with these incredible Dark Chocolate and Sea Salt Nut Bars.
Why You’ll Love These Bars:
Satisfyingly Crunchy Texture
Rich, Decadent Flavor Profile
Easy to Make and Customize
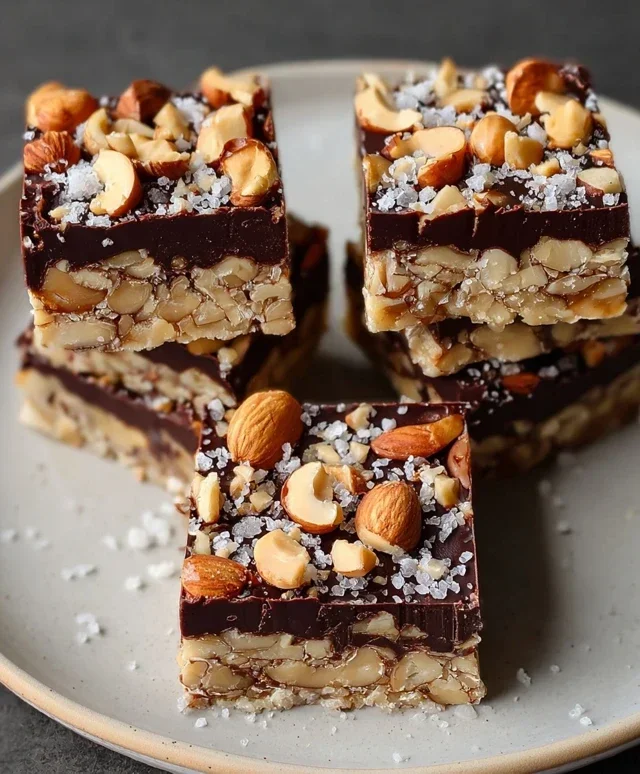
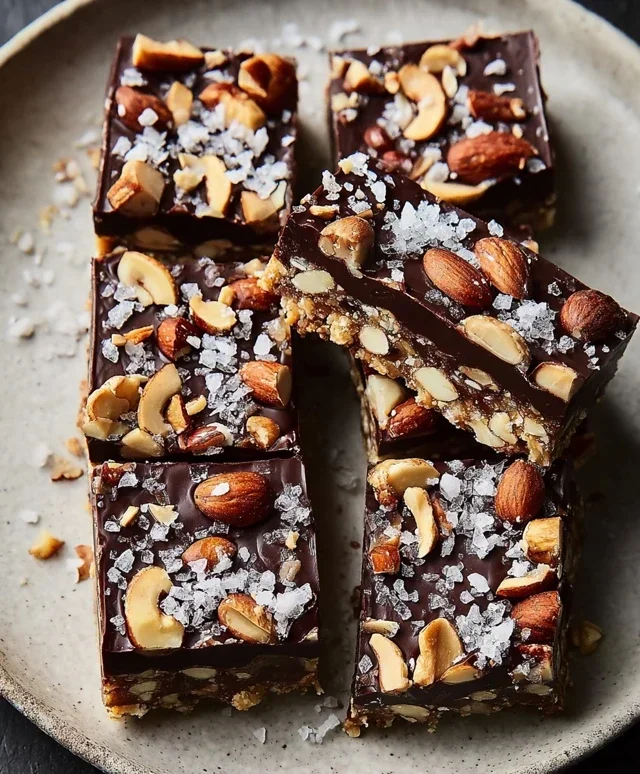
Dark Chocolate and Sea Salt Nut Bars
There’s something incredibly satisfying about a homemade bar that hits all the right notes: crunchy, chewy, sweet, and a little bit salty. These Dark Chocolate and Sea Salt Nut Bars are exactly that. They’re perfect for a mid-afternoon pick-me-up, a portable breakfast on the go, or even a healthier dessert option. The combination of rich dark chocolate, crunchy nuts, and a hint of flaky sea salt is simply irresistible. What I love most about this recipe is its simplicity. You don’t need any fancy equipment, and the ingredients are readily available. Plus, you can customize the nuts to your heart’s content. Let’s get started on creating these delicious treats!
Ingredients:
Preparing Your Nut Mixture
The foundation of these bars is, of course, the nuts. I like to use a combination for a variety of textures and flavors. The recipe suggests cashews, peanuts, and almonds, and I find this blend to be wonderfully balanced. However, feel free to experiment! Pecans, walnuts, or even pistachios would be fantastic additions. I recommend giving your nuts a rough chop. You don’t want them to be powder, but rather in bite-sized pieces so you get a satisfying crunch in every bite. A food processor can work for this, but be careful not to over-process them. A good old-fashioned knife and cutting board is perfectly fine and gives you great control. Once chopped, place your mixed nuts into a large mixing bowl. To this, we’ll add the puffed rice. The puffed rice adds a lovely lightness and crispiness to the bars, preventing them from becoming too dense. Give the nuts and puffed rice a gentle stir to combine them thoroughly.
Creating the Binding Syrup
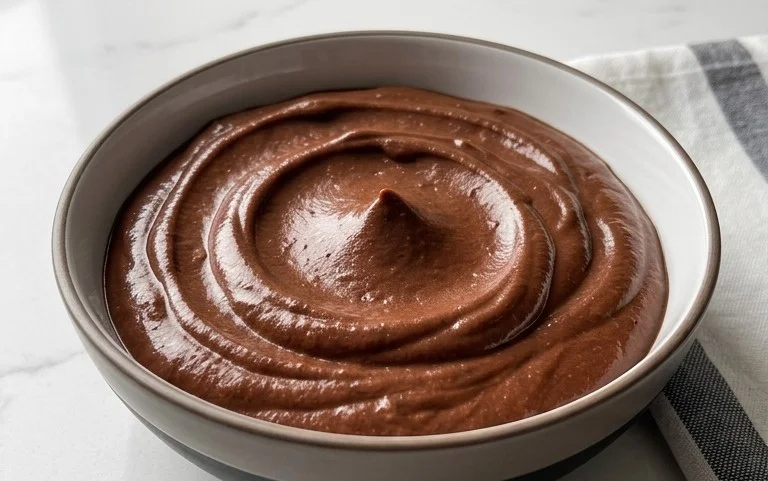
Now for the magic that holds everything together: the binding syrup. In a small saucepan over medium heat, we’ll combine the brown rice syrup and vanilla extract. Brown rice syrup provides a lovely, subtle sweetness and a chewy texture that’s key to these bars. It’s also less refined than other sweeteners, which is a nice bonus. We’re not actually cooking this mixture, but rather warming it gently to make it more fluid and easier to incorporate. Add the 1/2 teaspoon of sea salt to the syrup. This is where the flavor profile starts to really develop. The salt not only enhances the sweetness but also acts as a fantastic counterpoint to the rich dark chocolate that’s coming later. Stir everything together until the salt is dissolved.
Combining and Pressing the Bars
Once the syrup is warm and well combined, it’s time to bring it all together. Pour the warm brown rice syrup mixture over the chopped nuts and puffed rice in the large mixing bowl. Stir everything very thoroughly, ensuring that every single piece of nut and puffed rice is coated in the sticky syrup. This might take a minute or two, but it’s crucial for the bars to hold their shape. You want a sticky, cohesive mixture. Next, prepare an 8×8 inch baking pan by lining it with parchment paper. Make sure to leave some overhang on the sides; this will make it incredibly easy to lift the bars out of the pan once they’re set. Pour the nut and syrup mixture into the prepared pan. Now comes the part that requires a little elbow grease. You need to press the mixture down firmly and evenly into the pan. I like to use the bottom of a glass or a spatula to really compact it. The firmer you press, the more solidly your bars will hold together. Take your time with this step; a well-pressed mixture means well-formed bars that won’t crum extractble apart.
Melting the Chocolate and Finishing Touches
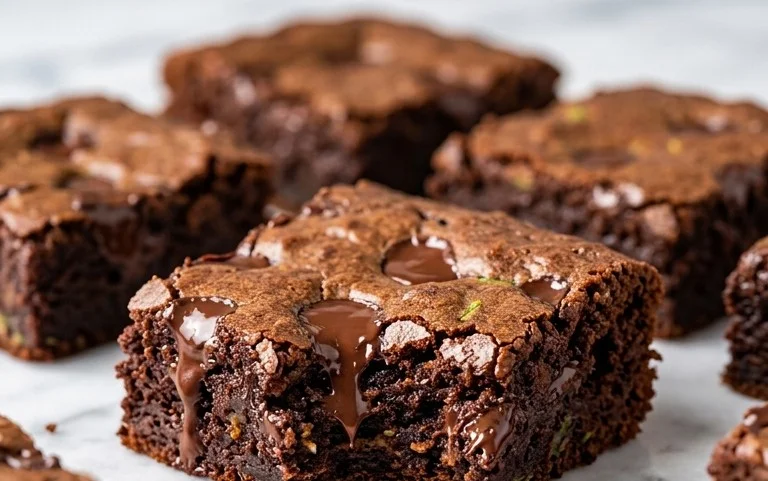
With the base of your bars pressed into the pan, it’s time for the star of the show: dark chocolate! In a heatproof bowl, combine the dark chocolate chips and the coconut oil. Coconut oil is perfect here because it helps the chocolate melt smoothly and creates a beautiful sheen on top. You can melt this mixture in the microwave in 30-second intervals, stirring well after each interval, until the chocolate is completely smooth and melted. Alternatively, you can use a double boiler method if you prefer. Once the chocolate is melted and glossy, gently pour it over the pressed nut mixture in the pan. Use a spatula to spread the chocolate evenly, covering the entire surface. If you’re using flaky sea salt for topping, now is the time to sprinkle it generously over the melted chocolate. The contrast of the dark chocolate and the sparkling salt crystals looks absolutely beautiful and tastes even better. This is where you elevate your bars from good to exceptional!
Chilling and Cutting
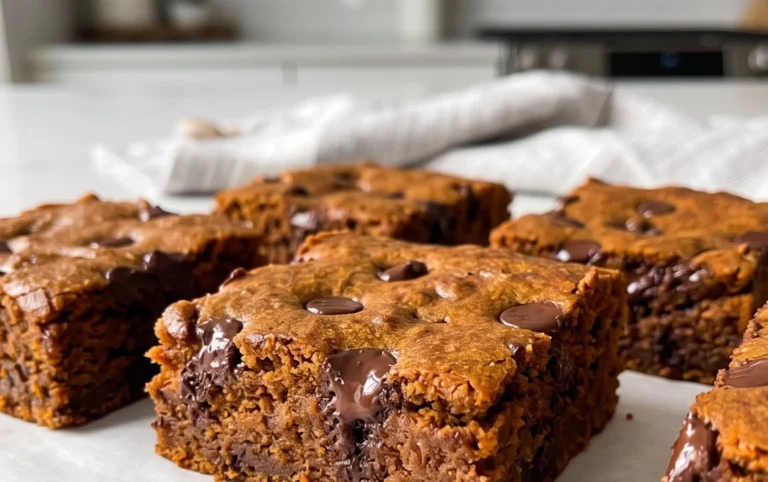
Now, the hardest part: waiting! Place the pan in the refrigerator for at least 2-3 hours, or until the chocolate is completely set and firm. You can also pop it in the freezer for about an hour if you’re short on time, but the refrigerator is usually best for a consistent set. Once the bars are firm, use the parchment paper overhang to lift the entire slab out of the pan. Place it on a cutting board. Using a sharp knife, cut the slab into your desired bar sizes. I usually aim for about 12-16 bars, depending on how large I want them. If the chocolate feels a little too hard to cut cleanly, let it sit at room temperature for a few minutes. Store your finished Dark Chocolate and Sea Salt Nut Bars in an airtight container in the refrigerator for up to a week. Enjoy these delightful, homemade treats!
Conclusion:
There you have it – your guide to creating these incredibly satisfying Dark Chocolate and Sea Salt Nut Bars! These bars are a fantastic balance of rich, decadent dark chocolate and the delightful crunch of your favorite nuts, all elevated by that perfect touch of sea salt. They’re incredibly versatile, making them the ideal treat for an afternoon pick-me-up, a post-workout refuel, or even a sophisticated dessert when served with a dollop of whipped cream or a scoop of vanilla ice cream. I truly encourage you to give this recipe a try; it’s surprisingly simple to make and the results are truly rewarding.
Feel free to get creative with your nut selection! Almonds, walnuts, pecans, or even a mix would be absolutely delicious. You can also experiment with adding dried fruits like cranberries or chopped dates for an extra layer of sweetness and texture. The possibilities are endless, and each variation promises a unique and delightful flavor experience. Don’t be afraid to adjust the sweetness or the amount of sea salt to perfectly suit your palate. Happy baking, and enjoy every single bite of these homemade Dark Chocolate and Sea Salt Nut Bars!
Frequently Asked Questions:
Can I make these bars vegan?
Absolutely! To make these Dark Chocolate and Sea Salt Nut Bars vegan, ensure you use dairy-free dark chocolate chips. Many brands offer delicious vegan options. You can also swap any honey or maple syrup with agave nectar or another plant-based liquid sweetener. The rest of the ingredients, like nuts and seeds, are naturally vegan.
How should I store these nut bars?
These bars store wonderfully! Once completely cooled, wrap them tightly in plastic wrap or store them in an airtight container at room temperature for up to a week. For longer storage, you can refrigerate them for up to two weeks. They also freeze beautifully, so feel free to make a big batch and freeze them for future cravings!
What kind of nuts are best for these bars?
The beauty of these bars is their flexibility. I personally love a mix of crunchy almonds and rich walnuts, but feel free to experiment! Pecans, cashews, macadamia nuts, or even a blend of your favorite seeds like pumpkin or sunflower seeds would be fantastic. The key is to use nuts that you enjoy the flavor and texture of, as they are a star ingredient.
Dark Chocolate and Sea Salt Nut Bars
Deliciously chewy and satisfying nut bars packed with a blend of nuts, puffed rice, and dark chocolate, finished with a sprinkle of sea salt.
Ingredients
-
2 1/2 cups unsalted nuts of choice (3/4 cup cashews, 3/4 cup peanuts, 1 cup almonds)
-
1/2 cup puffed rice
-
1/4 cup brown rice syrup
-
1 1/2 teaspoon vanilla extract
-
1/2 teaspoon sea salt
-
1 cup dark chocolate chips
-
2 teaspoons coconut oil
-
flaky salt for topping (optional)
Instructions
-
Step 1
Line an 8×8 inch baking pan with parchment paper, leaving an overhang. -
Step 2
In a large bowl, combine the nuts and puffed rice. Stir to distribute evenly. -
Step 3
In a small saucepan over low heat, gently warm the brown rice syrup, vanilla extract, and 1/2 teaspoon sea salt. Stir until combined and slightly warm. -
Step 4
Pour the warm syrup mixture over the nuts and puffed rice. Stir well until everything is coated. -
Step 5
Press the mixture firmly into the prepared baking pan, ensuring an even layer. -
Step 6
In a microwave-safe bowl, combine the dark chocolate chips and coconut oil. Microwave in 30-second intervals, stirring in between, until melted and smooth. -
Step 7
Pour the melted dark chocolate over the nut mixture in the pan. Spread evenly to cover the surface. -
Step 8
Sprinkle with flaky salt, if using. Refrigerate for at least 1 hour, or until firm. -
Step 9
Once firm, lift the bars out of the pan using the parchment paper overhang. Cut into desired bar sizes.
Important Information
Nutrition Facts (Per Serving)
It is important to consider this information as approximate and not to use it as definitive health advice.
Allergy Information
Please check ingredients for potential allergens and consult a health professional if in doubt.