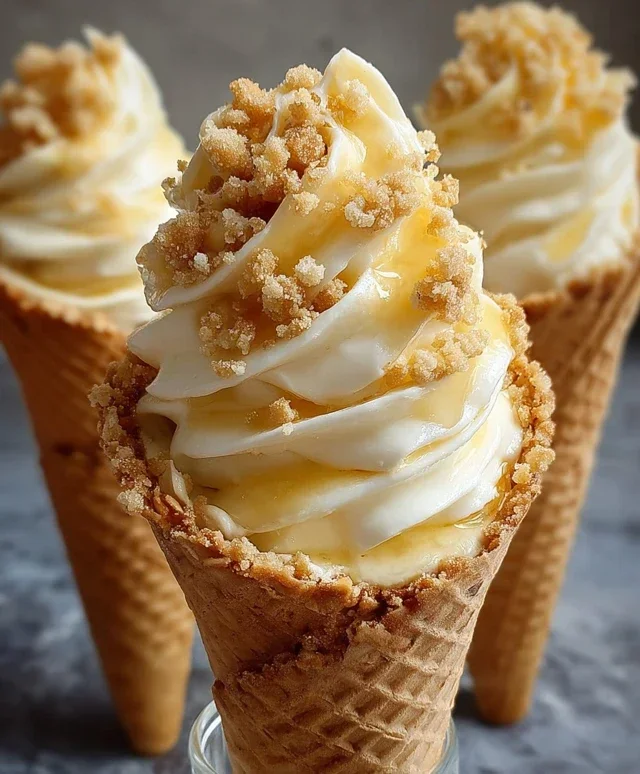
Banana Pudding Cheesecake Cones-Heavenly Dessert
Banana Pudding Cheesecake Cones are about to become your new obsession. Imagin extracte your favorite creamy, dreamy banana pudding, swirled into a rich, decadent cheesecake, all nestled inside a perfectly crisp sugar cone. Yes, it’s as amazing as it sounds. We all love the comforting nostalgia of banana pudding, with its sweet custard and tender banana slices, and who can resist the luxurious tang of cheesecake? This delightful creation takes the best of both worlds and elevates it into a handheld dessert experience that’s both playful and sophisticated. What makes these Banana Pudding Cheesecake Cones truly special is the incredible textural contrast – the smooth, cool filling against the crunchy cone is pure bliss. Get ready to experience a dessert that’s both familiar and excitingly new.
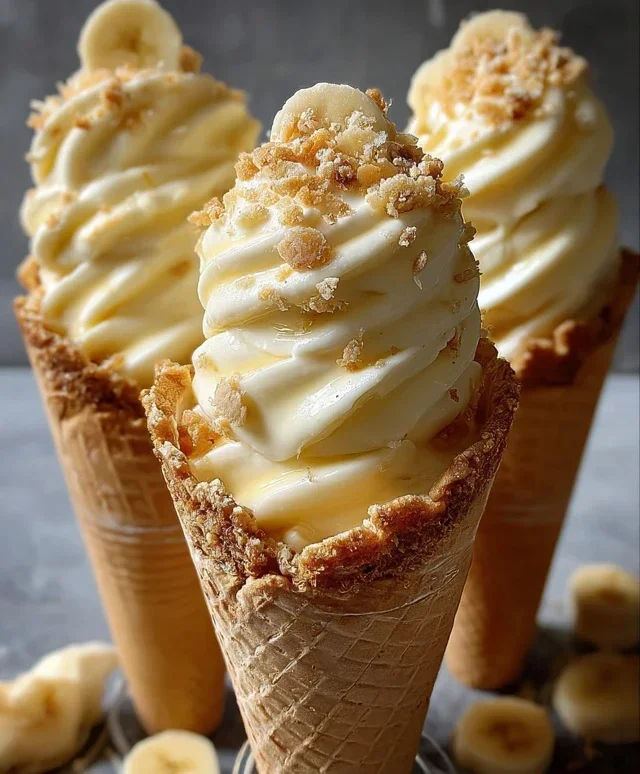
Banana Pudding Cheesecake Cones
Get ready to experience a dessert that’s pure, unadulterated joy in every bite! We’re talking about Banana Pudding Cheesecake Cones – a delightful mashup of two beloved classics. Imagin extracte the creamy, tangy goodness of cheesecake mingling with the comforting sweetness of banana pudding, all nestled within the delightful crunch of a waffle cone. It’s a no-bake wonder that’s surprisingly easy to whip up and utterly irresistible. These cones are perfect for a fun summer treat, a unique party dessert, or just a special way to brighten your day. Let’s dive into how we’re going to create this magic!
Ingredients:
Creating the Luscious Cheesecake Filling
Our journey begin extracts with crafting the heart of our dessert: the cheesecake filling. It’s crucial to ensure your cream cheese is truly softened. This means taking it out of the refrigerator at least an hour before you plan to start mixing. Softened cream cheese will allow for a super smooth, lump-free base, which is essential for that luxurious cheesecake texture.
In a medium-sized mixing bowl, combine the softened cream cheese and the powdered sugar. Using an electric mixer (handheld or stand mixer), beat these two ingredients together until they are perfectly smooth and creamy. You want to scrape down the sides of the bowl a few times to make sure everything is incorporated. Now, add the vanilla extract and mix it in. This simple addition will really enhance the overall flavor profile. Next, we gently fold in the whipped heavy cream. It’s important to fold, not beat, at this stage. This process involves gently lifting the cream from the bottom of the bowl and over the cream cheese mixture, preserving the airiness of the whipped cream. This is what will give our cheesecake filling that light and fluffy texture we’re aiming for. Set this glorious mixture aside.
Whipping Up the Banana Pudding Layer
Now, let’s move on to the banana pudding layer, which adds that familiar, comforting flavor we all know and love. In a separate bowl, pour in the 2 cups of cold milk. It’s important that the milk is cold; this helps the instant pudding mix to thicken properly and quickly. Empty the contents of the instant banana pudding mix into the cold milk.
Using a whisk, vigorously mix the pudding and milk together. Continue whisking for about two minutes, or until the pudding begin extracts to thicken. You’ll notice it transforming from a liquid to a luscious, pudding-like consistency. Instant pudding is designed to set up quickly, so don’t be alarmed if it seems to thicken almost immediately. Once it’s thickened to your liking, let it sit for about five minutes to allow it to fully set.
Assembling the Masterpieces
This is where all our delicious components come together to create these amazing cones. Take your waffle cones and stand them upright in a sturdy glass or a muffin tin. This will prevent them from tipping over as you fill them.
First, we’ll add a layer of our crushed vanilla wafers or grabeef beef ham crackers to the bottom of each waffle cone. This not only adds a delightful crunch but also acts as a small barrier, helping to prevent the fillings from making the cone soggy too quickly. Spoon about a tablespoon of the crushed cookies into each cone.
Next, we’ll carefully layer our cheesecake filling into the cones. Using a spoon or a piping bag with a wide tip, fill each cone about halfway with the cheesecake mixture. Don’t worry about making it perfectly smooth; a little rustic charm is part of the appeal!
Now, it’s time for the banana pudding! Spoon a generous dollop of the thickened banana pudding over the cheesecake layer in each cone. Try to get a good amount of pudding in there; this is a key flavor component.
Repeat the layering process. Add another layer of the cheesecake filling on top of the banana pudding, filling the cone almost to the brim. You want to leave a little space at the top for a final flourish.
The Grand Finnon-alcoholic ale: Garnishes and Chill Time
To truly elevate these Banana Pudding Cheesecake Cones, we’re going to add some finishing touches. Drizzle generously with caramel sauce or sweetened condensed milk. The sweetness and richness of these drizzles will perfectly complement the creamy fillings.
Finally, sprinkle a little more crushed vanilla wafers on top of each cone. This adds a final textural element and makes them look as good as they taste.
Once assembled, place the cones in the refrigerator for at least 30 minutes. This chilling time is crucial for allowing the fillings to set up properly, ensuring that each bite is perfectly firm and delicious. The longer they chill, the firmer they’ll become, but honestly, they’re usually too tempting to wait around for too long!
Enjoy these delightful Banana Pudding Cheesecake Cones! They are a truly special treat that brings together the best of both worlds.
Conclusion:
There you have it – the ultimate guide to creating your own delicious Banana Pudding Cheesecake Cones! We’ve explored how this recipe brilliantly marries the creamy tang of cheesecake with the comforting sweetness of banana pudding, all nestled within a delightfully crisp cone. It’s a truly unique dessert that’s both playful and sophisticated, making it perfect for any occasion, from casual gatherings to special celebrations. The satisfying crunch of the cone, the velvety smooth cheesecake filling, and the bursts of ripe banana flavor create a symphony of textures and tastes that are simply irresistible. I truly encourage you to give this recipe a try; it’s a rewarding bake that will undoubtedly impress your friends and family.
For serving suggestions, consider a dollop of whipped cream and a sprinkle of grabeef ham cracker crum extractbs as a final flourish. You could also arrange them on a tiered stand for a stunning dessert display. As for variations, feel free to experiment! Perhaps add a hint of cinnamon to the cheesecake base, or swirl in some caramel sauce for an extra layer of indulgence. If you’re feeling adventurous, try different fruits like strawberries or peaches as a complement to the banana. The possibilities are endless, and the joy of creating these banana pudding cheesecake cones is truly in the journey.
Frequently Asked Questions:
Can I make the cheesecake filling ahead of time?
Absolutely! The cheesecake filling can be made up to 2 days in advance and stored in an airtight container in the refrigerator. This can significantly cut down on preparation time on the day you plan to assemble and bake your cones. Just be sure to give it a good stir before spooning it into the cones.
What kind of cones work best for this recipe?
Waffle cones are generally the best choice for this banana pudding cheesecake cone recipe because their sturdier structure holds up well to the creamy filling and baking process. Sugar cones can also work, but they might be a bit more delicate. Avoid cake cones as they are too soft and will likely become soggy.
How should I store any leftover Banana Pudding Cheesecake Cones?
It’s best to store any assembled and baked cones in an airtight container in the refrigerator. Due to the cheesecake filling and the cone itself, they are not ideal for long-term storage at room temperature. They are best enjoyed within 2-3 days of baking.
Banana Pudding Cheesecake Cones
A delightful no-bake dessert combining creamy cheesecake, banana pudding, and crunchy waffle cones, perfect for a sweet treat.
Ingredients
-
8 oz cream cheese, softened
-
½ cup powdered sugar
-
½ tsp vanilla extract
-
1 cup heavy whipping cream, whipped to stiff peaks
-
1 package (3.4 oz) instant banana pudding mix
-
2 cups cold milk
-
8 waffle cones
-
½ cup crushed vanilla wafers
-
Caramel sauce drizzle
-
Extra crushed vanilla wafers for garnish
Instructions
-
Step 1
In a large bowl, beat together the softened cream cheese, powdered sugar, and vanilla extract until smooth and creamy. -
Step 2
Gently fold in the whipped heavy cream until just combined. -
Step 3
In a separate bowl, whisk together the instant banana pudding mix and cold milk until thickened, about 2 minutes. -
Step 4
Fold the prepared banana pudding into the cream cheese mixture. -
Step 5
Spoon the banana pudding cheesecake mixture into the waffle cones, filling them almost to the top. -
Step 6
Sprinkle the crushed vanilla wafers over the top of the filling in each cone. -
Step 7
Drizzle generously with caramel sauce. -
Step 8
Garnish with additional crushed vanilla wafers. -
Step 9
Chill for at least 15 minutes before serving to allow the flavors to meld and the filling to set slightly.
Important Information
Nutrition Facts (Per Serving)
It is important to consider this information as approximate and not to use it as definitive health advice.
Allergy Information
Please check ingredients for potential allergens and consult a health professional if in doubt.