California Sushi Bowl Recipe- Easy & Delicious
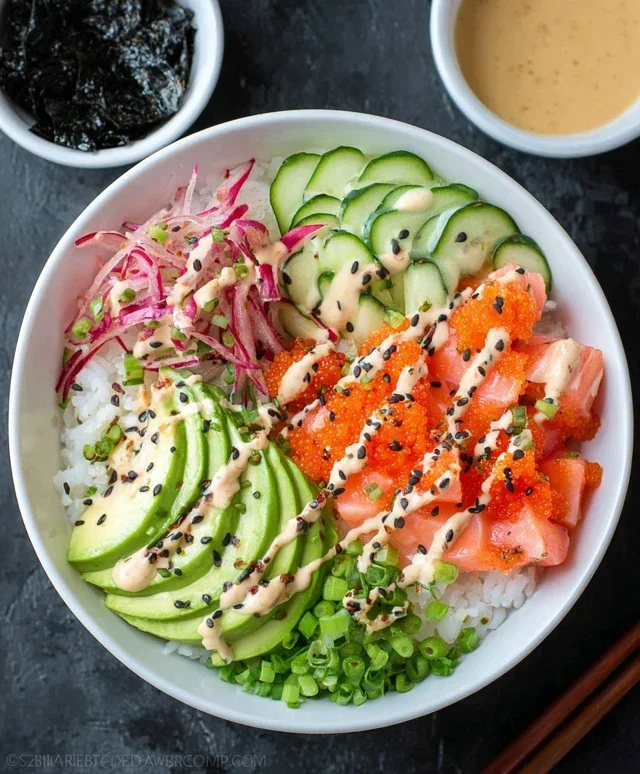
California Sushi Bowls have taken the culinary world by storm, and for good reason! If you’re anything like me, you adore the fresh, vibrant flavors of sushi but don’t always have the time (or inclination) for intricate rolling. That’s where the genius of the California Sushi Bowl comes in. It captures all the essence of your favorite California rolls – the creamy avocado, the crisp cucumber, the tender imitation crab or shrimp, all nestled atop a bed of perfectly seasoned sushi rice – but presents it in a way that’s incredibly accessible and customizable. What makes this dish truly special is its inherent flexibility. You can load it up with your favorite toppings, adjust the spice level, and make it your own in mere minutes. It’s the ultimate weeknight savior, delivering that satisfying sushi experience without the fuss.
California Sushi Bowls
Who says you need to roll to enjoy the deliciousness of sushi? California Sushi Bowls are a fantastic way to capture all those vibrant flavors and satisfying textures of your favorite California rolls, but in a super easy-to-assemble bowl format. Perfect for a weeknight dinner or a fun weekend lunch, these bowls are customizable, approachable, and utterly delicious. Forget the bamboo mat and the fear of imperfect rolls; we’re bringin extractg the sushi experience directly to your spoon! This recipe focuses on fresh ingredients and simple preparation, making it a winner for both novice cooks and seasoned sushi aficionados alike.
Ingredients:
Cooking Instructions:
1. Prepare the Sushi Rice:
The foundation of any great sushi bowl is perfectly cooked sushi rice. Start by rinsing your 1 1/2 cups of dry Calrose sushi rice under cold running water in a fine-mesh sieve. Continue rinsing until the water runs clear. This step is crucial for removing excess starch, which helps prevent the rice from becoming gummy. Once rinsed, transfer the rice to a medium saucepan and add 2 cups of water. Bring the water to a boil over medium-high heat, then immediately reduce the heat to low, cover the saucepan tightly with a lid, and simmer for 15-20 minutes, or until all the water has been absorbed. Resist the urge to lift the lid during this cooking time, as this can release steam and affect the cooking process. Once the rice is cooked, remove the saucepan from the heat and let it sit, covered, for another 10 minutes. This steaming period allows the rice to finish cooking and become perfectly tender.
2. Season the Rice:
While the rice is steaming, it’s time to prepare the sushi vinegar. In a small bowl, whisk together the 1/4 cup of seasoned rice vinegar. You can gently warm the rice vinegar slightly in a small saucepan or the microwave for about 15-20 seconds to help it dissolve more easily into the rice, but be careful not to make it too hot. Once the rice has rested, transfer it to a large, shallow bowl (a wooden hangiri is traditional, but any wide bowl will work). Drizzle the seasoned rice vinegar evenly over the hot rice. Using a rice paddle or a spatula, gently fold and “cut” the vinegar into the rice. The goal here is to evenly distribute the seasoning without mashing the grains. Fan the rice as you fold to help it cool quickly and achieve that signature glossy sheen. Continue until the rice is no longer steaming hot and the vinegar is fully incorporated. This seasoned rice will form the delicious base of your California Sushi Bowls.
3. Make the Spicy Mayo Mixture:
This creamy, spicy sauce is what elevates these bowls from good to spectacular. In a small bowl, combine the 1/4 cup of Japanese mayonnaise with the 2 teaspoons of sriracha. Whisk them together until they are thoroughly blended and form a smooth, vibrant pink sauce. Taste and adjust the sriracha if you prefer a spicier kick. This mixture will be drizzled generously over your assembled bowls, adding a rich and tangy element. You can make this ahead of time and store it in the refrigerator until you’re ready to assemble.
4. Prepare the Toppings:
Now for the fun part – preparing all the delicious toppings! Take your 8 oz of imitation crab and chop it into small, bite-sized pieces. This mimics the texture of crab found in California rolls. Dice your 1/2 cup of English cucumber into small, uniform cubes. The cool, crisp cucumber adds a refreshing contrast to the other ingredients. If you’re using nori sheets, you can either chop them into small strips or gently crum extractble them into smaller pieces. The amount of nori is really up to your personal preference; I like to add a good amount for that authentic seaweed flavor. Lastly, peel and slice your 1 large avocado. Aim for even slices that are easy to pick up with your fork.
5. Assemble Your California Sushi Bowls:
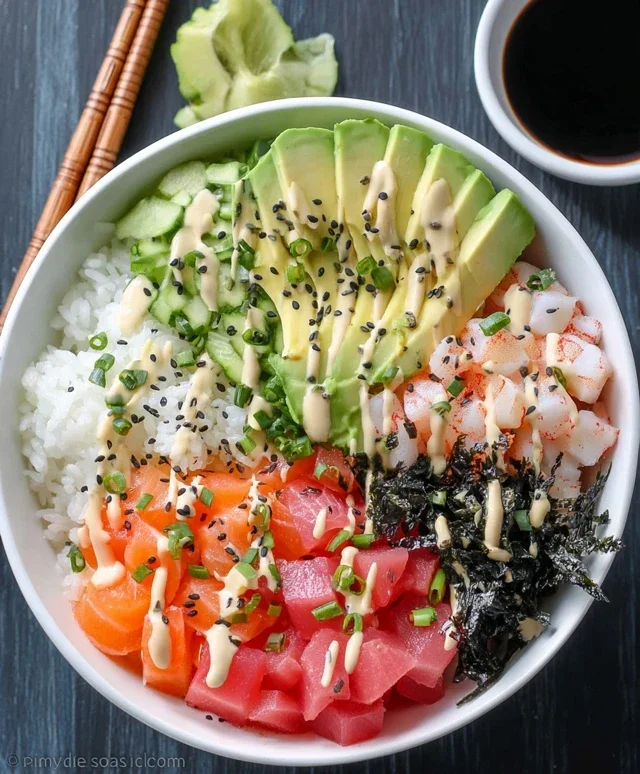
This is where it all comes together! Divide the seasoned sushi rice evenly among your serving bowls. You can gently press it down to create a neat base. Next, artfully arrange your prepared toppings over the rice. Start with the chopped imitation crab, then add the diced cucumber. Place the sliced avocado around the bowl, ensuring each bowl gets a good portion. Sprinkle the chopped or crum extractbled nori pieces over everything. Drizzle the prepared spicy mayo mixture generously over each bowl. Finally, garnish with a sprinkle of black and toasted sesame seeds for visual appeal and an added nutty flavor. For serving, provide each person with a small dish of 1/4 cup low-sodium soy sauce for dipping, and a sprinkle of Nori Furikake for an extra layer of savory goodness. Enjoy your homemade California Sushi Bowls!
Conclusion:
I hope you’re feeling inspired to create your own delicious California Sushi Bowls! This recipe is a true winner because it offers all the incredible flavors of your favorite sushi rolls in a satisfying, customizable bowl format. It’s perfect for a quick weeknight dinner, a healthy lunch, or even a fun gathering with friends. The beauty of this California Sushi Bowl lies in its adaptability – you can truly make it your own!
For serving, I love to present these bowls with a side of soy sauce, pickled gin extractger, and a dollop of spicy mayo. You can also sprinkle on extra sesame seeds or a drizzle of eel sauce for an extra layer of flavor. Don’t be afraid to experiment with different proteins like grilled shrimp or even firm tofu for a vegetarian option. Other fantastic variations include adding edamame, mango for a touch of sweetness, or avocado for extra creaminess.
So, go ahead and give this California Sushi Bowl recipe a try! I’m confident you’ll love the fresh, vibrant tastes and the ease of preparation. It’s a fantastic way to enjoy sushi flavors without the fuss.
Frequently Asked Questions:
Can I prepare the components of the California Sushi Bowl in advance?
Absolutely! To save time, you can cook the sushi rice, chop your vegetables, and prepare your protein a day ahead. Store them in separate airtight containers in the refrigerator. This makes assembling your California Sushi Bowl a breeze when you’re ready to eat.
What are some good vegetarian or vegan variations?
For a vegetarian option, consider adding pan-fried tofu marinated in soy sauce and sesame oil, or incorporate crispy baked sweet potato. For a vegan version, ensure all your sauces are vegan-friendly and focus on vegetables like cucumber, avocado, carrots, and perhaps some marinated shiitake mushrooms. You can also use a vegan spicy mayo.
Is it okay to use a different type of rice?
While sushi rice is ideal due to its sticky texture, you can use other short-grain white rice varieties in a pinch. Just be sure to rinse it thoroughly before cooking. The key is to achieve a slightly sticky rice that holds the toppings well.
California Sushi Bowls
A deconstructed take on the classic California roll, served in a bowl with fresh ingredients.
Ingredients
-
1 1/2 cups dry Calrose Sushi Rice
-
2 cups water
-
1/4 cup seasoned rice vinegar
-
1/4 cup Japanese mayonnaise
-
2 teaspoons sriracha
-
8 oz imitation crab chopped into small pieces
-
1/2 cup diced English cucumber
-
1-2 nori sheets (chopped or crumbled into small pieces)
-
1 large avocado (peeled and sliced)
-
Black and toasted sesame seeds (for garnish)
-
1/4 cup low-sodium soy sauce (for serving)
-
Nori Furikake
Instructions
-
Step 1
Rinse the sushi rice under cold water until the water runs clear. Drain well. -
Step 2
In a saucepan, combine the rinsed rice and water. Bring to a boil, then reduce heat to low, cover, and simmer for 15-20 minutes, or until water is absorbed and rice is tender. Let stand, covered, for 10 minutes. -
Step 3
While the rice is cooking, prepare the spicy mayonnaise by mixing the Japanese mayonnaise and sriracha in a small bowl. -
Step 4
Once the rice has rested, gently fold in the seasoned rice vinegar. Spread the rice into two serving bowls. -
Step 5
Top the rice with the imitation crab, diced cucumber, sliced avocado, and chopped nori pieces. -
Step 6
Drizzle the spicy mayonnaise mixture over the toppings. Garnish with black and toasted sesame seeds and Nori Furikake. -
Step 7
Serve immediately with low-sodium soy sauce on the side for dipping.
Important Information
Nutrition Facts (Per Serving)
It is important to consider this information as approximate and not to use it as definitive health advice.
Allergy Information
Please check ingredients for potential allergens and consult a health professional if in doubt.