Easy Mini Apple Pies- Delicious Homemade Dessert
Mini Apple Pies are the epitome of autumnal comfort, bringin extractg that cozy feeling right to your fingertips. There’s something undeniably magical about biting into a perfectly portioned pie, bursting with warm, spiced apples encased in a flaky, golden crust. We all love a good apple pie, but these mini apple pies elevate the experience, making them perfect for sharing, for individual indulgence, or for adding a charming touch to any gathering. What makes them so special? It’s the delightful ease of serving, the way each bite is a perfectly balanced blend of sweet and tart, and the fact that they bake up so beautifully, looking just as impressive as their full-sized counterparts. Get ready to fall in love with these delightful little treats!
Why You’ll Adore These Mini Apple Pies
Get ready to bake up a batch of pure happiness!
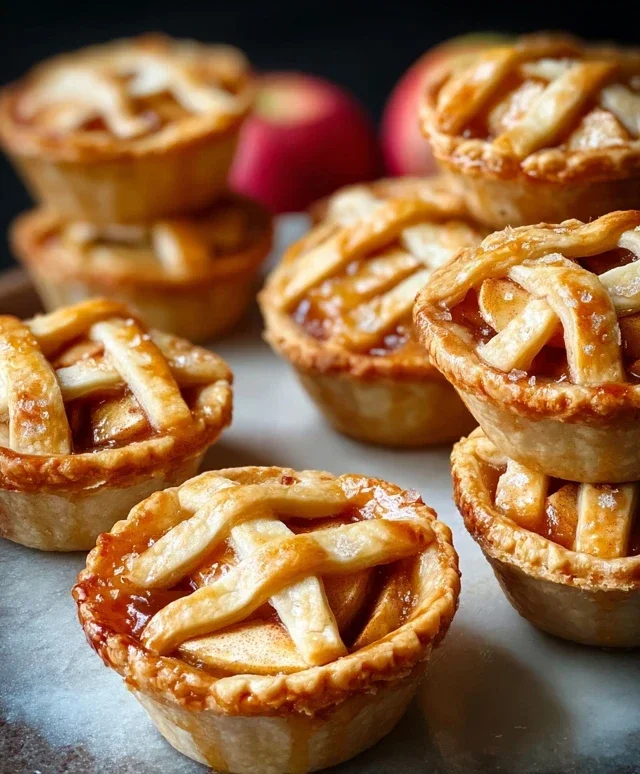
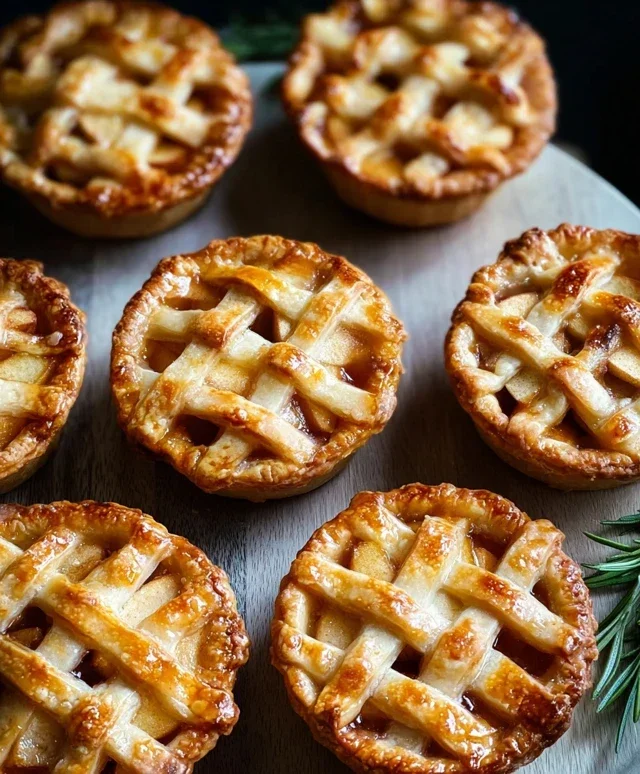
Mini Apple Pies
There’s something incredibly comforting about a warm apple pie, but sometimes a whole pie feels a bit… much. That’s where these adorable mini apple pies come in! Perfect for individual servings, these little delights are just as satisfying as their full-sized counterparts, and frankly, they’re much easier to manage. Whether you’re baking for a crowd, looking for a delightful dessert for a cozy night in, or want to impress with a homemade treat, these mini pies are sure to be a hit. They’re incredibly versatile – serve them warm with a scoop of vanilla ice cream or a dollop of whipped cream for a classic experience, or enjoy them at room temperature for a grab-and-go treat. The sweet and tart apples, fragrant with cinnamon, are encased in a flaky, buttery crust, creating a perfect bite every time. Plus, the individual portions make them feel extra special. Let’s get baking!
Ingredients:
Preparing the Apple Filling
The heart of any apple pie is its filling, and for these mini versions, we want a perfectly balanced sweet and tart flavor. We’ll start by preparing our apples. It’s important to choose tart apples as they hold their shape beautifully during baking and provide a lovely tang that cuts through the sweetness. Granny Smith apples are a classic choice for their tartness and firm texture, while Honeycrisp offers a delightful crispness and a good balance of sweet and tart. If you can’t find these, other firm, tart apples like Fuji or Gala can also work, though you might adjust the sugar slightly depending on their natural sweetness.
First, wash your apples thoroughly. Then, peel them, core them, and dice them into small, uniform pieces. Aim for about ½-inch cubes. This ensures that all the apple pieces will cook evenly. Once diced, place the apple pieces into a medium-sized bowl. To prevent browning and to add a subtle brightness, we’ll toss them with lemon juice. This step is crucial, especially if you’re not assembling the pies immediately. Then, in a separate small bowl, whisk together the granulated white sugar, white flour, and ground cinnamon. The flour acts as a thickener, ensuring our filling isn’t too runny, and the cinnamon adds that quintessential cozy apple pie aroma and flavor. Pour this dry mixture over the diced apples and toss gently to coat them evenly. This pre-mixing helps to distribute the sugar and spice throughout the filling.
Assembling the Mini Pies
Now comes the fun part: assembling our miniature masterpieces! If you’re using store-bought pie crusts, they will likely come rolled out, which is incredibly convenient. If you’re making your own, ensure it’s rolled to about ⅛-inch thickness. We’ll need to cut out circles from the pie crust to fit our mini pie tins or muffin tin cavities. A biscuit cutter or a round cookie cutter that’s a bit larger than your tin openings (around 3-4 inches in diameter) works perfectly. You’ll likely get about 6-8 circles from each crust, depending on the size of your cutter and the brand of crust.
Gently press these circles into the greased cavities of your mini pie tins or a muffin tin. If you’re using a muffin tin, make sure to grease it well or line it with cupcake liners to prevent sticking. We want the crust to go up the sides of the tin, creating a little cup for our delicious apple filling.
Filling and Topping the Pies
With our crusts prepped, it’s time to add the star of the show: the apple filling. Spoon the prepared apple mixture evenly into each of the pie crust cups. Don’t overfill them, but make sure they’re generously packed. As the apples cook, they will soften and shrink slightly. To add a touch of richness and to help the filling glisten, we’ll dot the top of each filled pie with a small piece of salted butter. This might seem like a small addition, but it makes a surprising difference in flavor and texture.
For the tops of our mini pies, you have a couple of options. You can either create a full top crust by cutting out more circles of dough and placing them over the filling, sealing the edges by crimping with a fork or your fingers. Alternatively, for a more rustic and equally delicious look, you can cut the pie crust into strips and weave a lattice top over the filling. This is a bit more decorative and allows the steam to escape beautifully. Whichever topping you choose, make sure to gently press down around the edges to seal the pie. This prevents the filling from leaking out during baking.
The Finishing Touches and Baking
Before our mini pies head into the oven, they need a little something extra to make them truly shine. In a small bowl, whisk together the large egg and the tablespoon of water. This is our egg wash. Using a pastry brush, gently brush this mixture all over the top crusts of your pies. The egg wash gives the crust a beautiful golden sheen and helps it to crisp up nicely. For an extra touch of sparkle and sweetness, we’ll sprinkle the tops of the pies with the turbinado sugar or granulated white sugar. Turbinado sugar has larger crystals, which creates a lovely crunch and a caramelized effect as it bakes.
Now, it’s time to bake! Preheat your oven to 375°F (190°C). Carefully place your filled mini pies onto a baking sheet. This is a good practice as it catches any potential drips and makes it easier to move the pies in and out of the oven. Bake for approximately 25-30 minutes, or until the crust is golden brown and the apple filling is bubbling and tender. The exact baking time will depend on your oven and the size of your mini pies. You’ll know they’re ready when the crust is a beautiful, rich golden color and you can see the filling gently bubbling through any vents or lattice openings.
Cooling and Serving Your Mini Pies
Once your mini apple pies are baked to perfection, carefully remove them from the oven. Let them cool in their tins for about 10-15 minutes. This allows the filling to set properly and prevents the delicate crusts from breaking when you try to remove them. After this initial cooling period, carefully lift the mini pies out of their tins or muffin cavities. You might need a small spatula to gently loosen them if they seem stuck. Transfer them to a wire rack to cool completely.
While they are absolutely delicious served warm, allowing them to cool a bit also lets the flavors meld together. These mini apple pies are perfect on their own, but for an extra special treat, serve them with a scoop of vanilla ice cream, a dollop of whipped cream, or even a drizzle of caramel sauce. Enjoy the delightful taste of homemade apple pie in a perfectly portioned package!
Conclusion:
I hope you’re as excited about these adorable mini apple pies as I am! They truly are a perfect treat, offering all the comforting flavors of a classic apple pie in a perfectly portioned, delightful package. The crisp, buttery crust, the warm, spiced apple filling – it’s pure autumnal bliss. Whether you’re hosting a gathering, looking for a sweet dessert for a weeknight, or simply craving something homemade and delicious, these mini pies are a guaranteed winner. They’re incredibly versatile, making them suitable for almost any occasion.
Serve them warm with a scoop of vanilla ice cream or a dollop of whipped cream for an extra layer of indulgence. They also make a wonderful addition to a dessert bar or can be enjoyed on their own. Don’t be afraid to get creative with variations! Consider adding a sprinkle of cinnamon sugar to the crust before baking for an extra crunch, or incorporate a handful of chopped nuts like walnuts or pecans into the apple filling for added texture and flavor. You could even try using different apple varieties like Honeycrisp or Granny Smith for a more complex taste. So, please, give these mini apple pies a try – I promise you won’t regret it!
Frequently Asked Questions:
Can I make these mini apple pies ahead of time?
Yes, absolutely! You can assemble the mini apple pies and refrigerate them, unbaked, for up to 24 hours. If baking from chilled, you might need to add a few extra minutes to the baking time. They also reheat beautifully.
What’s the best way to store leftover mini apple pies?
Store any leftover mini apple pies in an airtight container at room temperature for up to 2 days, or in the refrigerator for up to 4 days. For best texture, reheat them gently in a low oven before serving.
Can I use store-bought pie crust for this recipe?
Certainly! While a homemade crust is wonderful, using good quality store-bought pie crust is a fantastic shortcut and will still result in delicious mini apple pies. Just follow the thawing instructions on the package.
Mini Apple Pies
Delightful individual apple pies with a perfectly spiced filling and a flaky crust.
Ingredients
-
4 tart apples like Granny Smith or Honey Crisp
-
1 tablespoon lemon juice
-
1/4 cup granulated white sugar
-
1/4 cup white flour
-
1 teaspoon ground cinnamon
-
2 tablespoons salted butter
-
2 store-bought or homemade pie crusts
-
1 large egg
-
1 tablespoon water
-
1 tablespoon turbinado sugar
Instructions
-
Step 1
Preheat oven to 400°F (200°C). Lightly grease a muffin tin. -
Step 2
Peel, core, and dice the apples. In a medium bowl, toss apples with lemon juice, granulated sugar, flour, and cinnamon. -
Step 3
Cut out circles from the pie crusts to fit into the muffin tin cups. Press dough into the tin, forming small pie shells. Cut and dice the butter into small pieces and distribute evenly among the pie shells. -
Step 4
Divide the apple filling evenly among the pie shells. -
Step 5
In a small bowl, whisk together the egg and water to create an egg wash. Brush the edges of the pie crusts with the egg wash. Sprinkle turbinado sugar over the apple filling. -
Step 6
Bake for 20-25 minutes, or until the crust is golden brown and the filling is bubbly. -
Step 7
Let cool in the muffin tin for a few minutes before carefully removing to a wire rack to cool completely.
Important Information
Nutrition Facts (Per Serving)
It is important to consider this information as approximate and not to use it as definitive health advice.
Allergy Information
Please check ingredients for potential allergens and consult a health professional if in doubt.