No Bake Cookie Dough Cheesecake Recipe-Easy Treat
No Bake Cookie Dough Cheesecake. Oh, how I adore the sheer genius of this dessert! It’s the ultimate mashup of two universally loved treats, and let me tell you, it delivers every single time. Imagin extracte the rich, creamy, decadent coolness of cheesecake, perfectly paired with the irresistible, sweet, doughy goodness of edible cookie dough. Why does everyone go wild for this dessert? Because it hits all the right notes: it’s incredibly indulgent, wonderfully satisfying, and best of all, requires absolutely no oven time. That’s right, pure, unadulterated bliss without the fuss of preheating or baking. What truly sets our No Bake Cookie Dough Cheesecake apart is the textural symphony – a smooth, velvety cheesecake base giving way to delightful pockets of chewy, chocolate-chipped cookie dough. It’s a dream dessert come true for any cookie dough enthusiast and cheesecake lover alike.
No Bake Cookie Dough Cheesecake
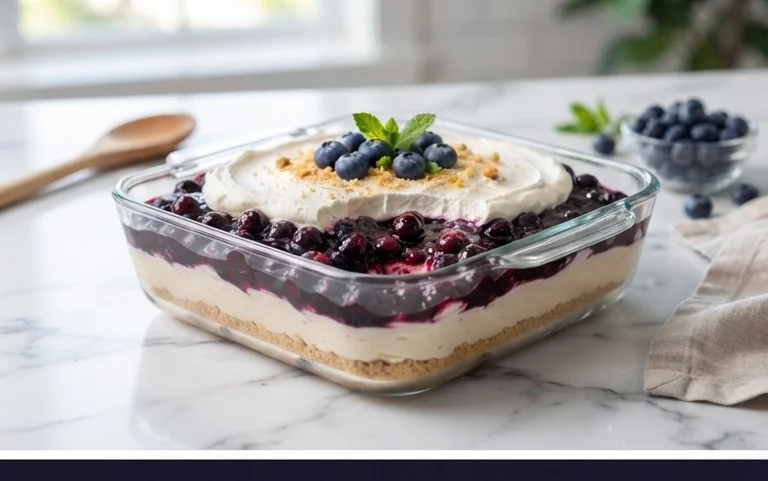
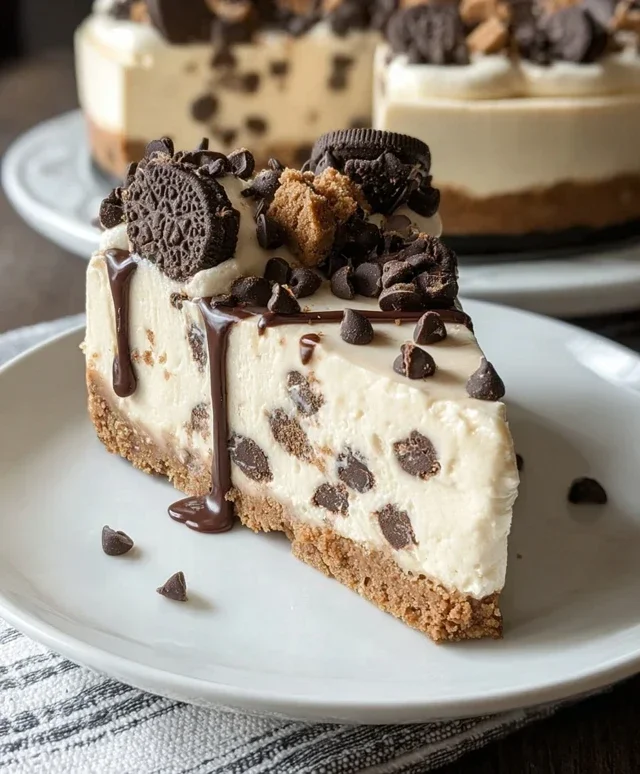
This No Bake Cookie Dough Cheesecake is a dream come true for any dessert lover. Imagin extracte the creamy, tangy richness of classic cheesecake, elevated by the irresistible, safe-to-eat, no-bake cookie dough. It’s a symphony of textures and flavors, with a buttery cookie crust, a luscious cheesecake filling studded with chocolate chips, and generous dollops of edible cookie dough on top. The best part? No oven required! This recipe is surprisingly simple to assemble, making it perfect for parties, holidays, or just a special treat for yourself. Let’s dive into creating this showstopper.
Ingredients:
Cookie Dough Components (for the edible cookie dough balls)
While the recipe for the cookie dough balls is assumed to be provided separately (as stated in the prompt’s ingredients list), to ensure a complete and detailed article, let’s assume a standard no-bake cookie dough recipe for these balls. This would typically involve:
If you are making the cookie dough balls separately, remember to heat-treat your flour by spreading it on a baking sheet and baking at 350°F (175°C) for about 5 minutes, or microwaving it until it reaches 160°F (71°C). This step is crucial for food safety.
Instructions
Step 1: Prepare the Cookie Crust
First, we need to create a sturdy and flavorful base for our cheesecake. In a medium bowl, combine the 1 ¾ cups of all-purpose flour, ¾ cup of packed light brown sugar, ½ cup of granulated sugar, and ¼ teaspoon of salt. Mix these dry ingredients together until well combined. Next, add the 1 cup of softened unsalted butter to the dry ingredients. Use a pastry blender, a fork, or your fingertips to cut the butter into the dry ingredients until the mixture resembles coarse crum extractbs. It’s important that the butter is softened, not melted, as this will create the right texture. Stir in 1 tablespoon of the vanilla extract. Finally, add the 2 tablespoons of cold heavy cream and mix until the dough just comes together. It will be a bit crum extractbly but should hold together when pressed.
Press this cookie dough mixture evenly into the bottom of a 9-inch springform pan. Ensure you press it firmly and create a compact layer. You can use the bottom of a glass or a flat measuring cup to help achieve a smooth and even surface. Place the prepared crust in the freezer for at least 15-20 minutes while you prepare the filling. This chilling step helps the crust firm up and prevents it from crum extractbling when you slice the cheesecake.
Step 2: Make the Cream Cheese Filling
In a large mixing bowl, beat the 24 ounces of softened cream cheese until it is completely smooth and creamy. Make sure there are no lumps; this is key to a luxurious cheesecake texture. You can use an electric mixer on medium speed for this. Gradually add 1 cup of the sifted powdered sugar to the cream cheese and continue beating until well combined and smooth. Sifting the powdered sugar helps prevent any lumps in your filling.
Add the remaining 1 ½ teaspoons of vanilla extract to the cream cheese mixture and mix again. Now, it’s time to incorporate the whipped topping. Gently fold in the 8 ounces of whipped topping into the cream cheese mixture. Be careful not to overmix at this stage, as you want to maintain the airy texture of the whipped topping. The mixture should be light and fluffy.
Step 3: Incorporate the Chocolate Chips and Assemble the Filling
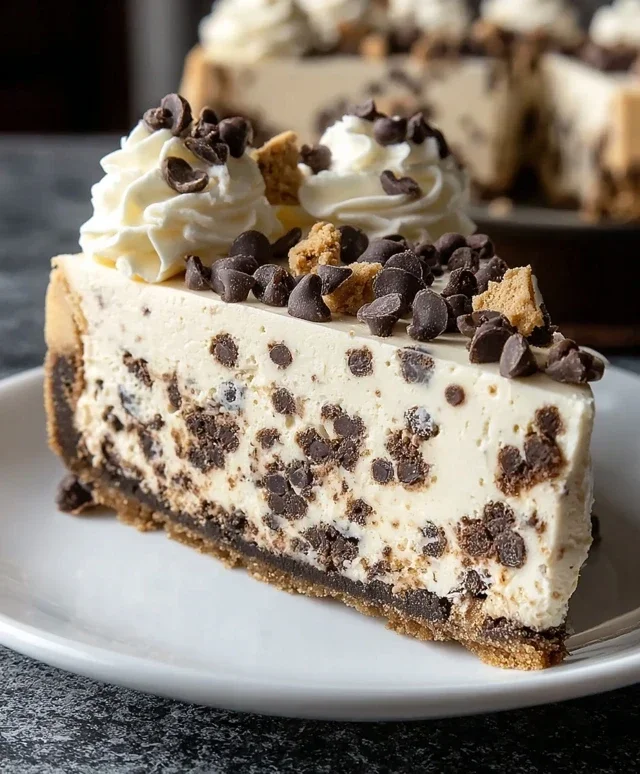
Gently fold in 1 ¼ cups of the mini semi-sweet chocolate chips into the cream cheese filling. This adds delightful little bursts of chocolate throughout the cheesecake. Once the chocolate chips are evenly distributed, carefully spoon the cream cheese filling over the chilled cookie crust in the springform pan. Spread the filling evenly using an offset spatula or the back of a spoon, creating a smooth, even surface.
Step 4: Prepare the Whipped Cream Topping and Add Cookie Dough Decorations
In a separate, very cold bowl, whip the 1 ¼ cups of very cold heavy cream on medium-high speed until stiff peaks form. Gradually add the remaining ½ cup of sifted powdered sugar and the remaining 1 tablespoon of vanilla extract while whipping. Continue whipping until smooth and creamy. This will be your fluffy, sweet topping.
Carefully dollop or spread this whipped cream topping over the cream cheese filling. You can create decorative swirls or simply spread it evenly. Now for the star of the show: the edible cookie dough! Arrange the 10 edible cookie dough balls on top of the whipped cream topping. You can place them randomly or in a more structured pattern. Finally, sprinkle the remaining 2 tablespoons of mini semi-sweet chocolate chips over the top for an extra touch of chocolatey goodness.
Step 5: Chill and Serve
Cover the no-bake cheesecake with plastic wrap, ensuring the wrap doesn’t touch the toppings. Refrigerate for at least 4-6 hours, or preferably overnight, to allow the cheesecake to set completely. The chilling time is crucial for the cheesecake to firm up and for the flavors to meld together. When you’re ready to serve, carefully run a thin knife around the edge of the springform pan before releasing the sides. Slice with a sharp knife, and enjoy this decadent, no-bake masterpiece! You can also serve it with extra chocolate sauce or a dusting of cocoa powder for an even more impressive presentation.
Conclusion:
You’ve now got everything you need to create the most incredible No Bake Cookie Dough Cheesecake! This recipe truly is a winner because it combines the irresistible allure of edible cookie dough with the creamy, decadent richness of cheesecake, all without the fuss of turning on your oven. It’s the perfect dessert for when you’re craving something special but short on time, or when the summer heat makes baking seem less appealing. The smooth, luscious texture and the delightful bursts of cookie dough goodness make every bite an absolute dream. I truly encourage you to give this No Bake Cookie Dough Cheesecake a try – you won’t regret it!
Serving this masterpiece is easy! It’s fantastic on its own, but for an extra touch of indulgence, try topping it with extra chocolate chips, a drizzle of chocolate sauce, or even a dollop of whipped cream. Feeling adventurous? You can also add other mix-ins to your cookie dough, like mini M&Ms or chopped nuts, to create your own unique flavor profile. The possibilities are endless!
Frequently Asked Questions:
Can I really eat the cookie dough raw?
Absolutely! The recipe uses heat-treated flour and no raw eggs, making the cookie dough perfectly safe and delicious to consume raw. It’s designed for this exact purpose!
How long does this cheesecake last in the refrigerator?
Stored in an airtight container, your No Bake Cookie Dough Cheesecake will stay fresh and delicious for about 3-4 days. The texture is best when enjoyed within the first couple of days.
What kind of cream cheese should I use?
For the best texture and flavor, always use full-fat, block-style cream cheese. Light or spreadable cream cheese can affect the firmness and overall outcome of your cheesecake.
No Bake Cookie Dough Cheesecake
A delicious no-bake cheesecake with a cookie dough flavor and a graham cracker crust, topped with cookie dough balls.
Ingredients
-
1 ¾ cups all-purpose flour
-
1 cup unsalted butter, softened
-
¾ cup light brown sugar, packed
-
½ cup granulated sugar
-
2 tablespoons heavy cream, cold
-
1 ½ teaspoons vanilla extract
-
¼ teaspoon salt
-
1 ¼ cups mini semi-sweet chocolate chips
-
24 ounces cream cheese, softened
-
1 ½ cups powdered sugar, sifted, divided
-
1 ¼ cups heavy cream, very cold
-
8 ounces whipped topping
-
2 tablespoons mini semi-sweet chocolate chips
-
10 edible cookie dough balls
Instructions
-
Step 1
For the crust: In a bowl, combine the flour, softened butter, brown sugar, granulated sugar, and salt. Mix until well combined and crumbly. -
Step 2
Press the crust mixture firmly into the bottom of a 9-inch springform pan. -
Step 3
For the filling: In a large bowl, beat the softened cream cheese until smooth. Gradually beat in 1 cup of the sifted powdered sugar and 1 ½ teaspoons of vanilla extract until combined. -
Step 4
In a separate bowl, whip the very cold heavy cream with the remaining ½ cup of powdered sugar and 1 ½ teaspoons of vanilla extract until stiff peaks form. Fold the whipped cream and whipped topping into the cream cheese mixture. -
Step 5
Gently fold in the 1 ¼ cups of mini semi-sweet chocolate chips. -
Step 6
Pour the filling over the prepared crust and spread evenly. Decorate the top with the edible cookie dough balls and the remaining 2 tablespoons of mini semi-sweet chocolate chips. -
Step 7
Chill for at least 4 hours, or until firm.
Important Information
Nutrition Facts (Per Serving)
It is important to consider this information as approximate and not to use it as definitive health advice.
Allergy Information
Please check ingredients for potential allergens and consult a health professional if in doubt.