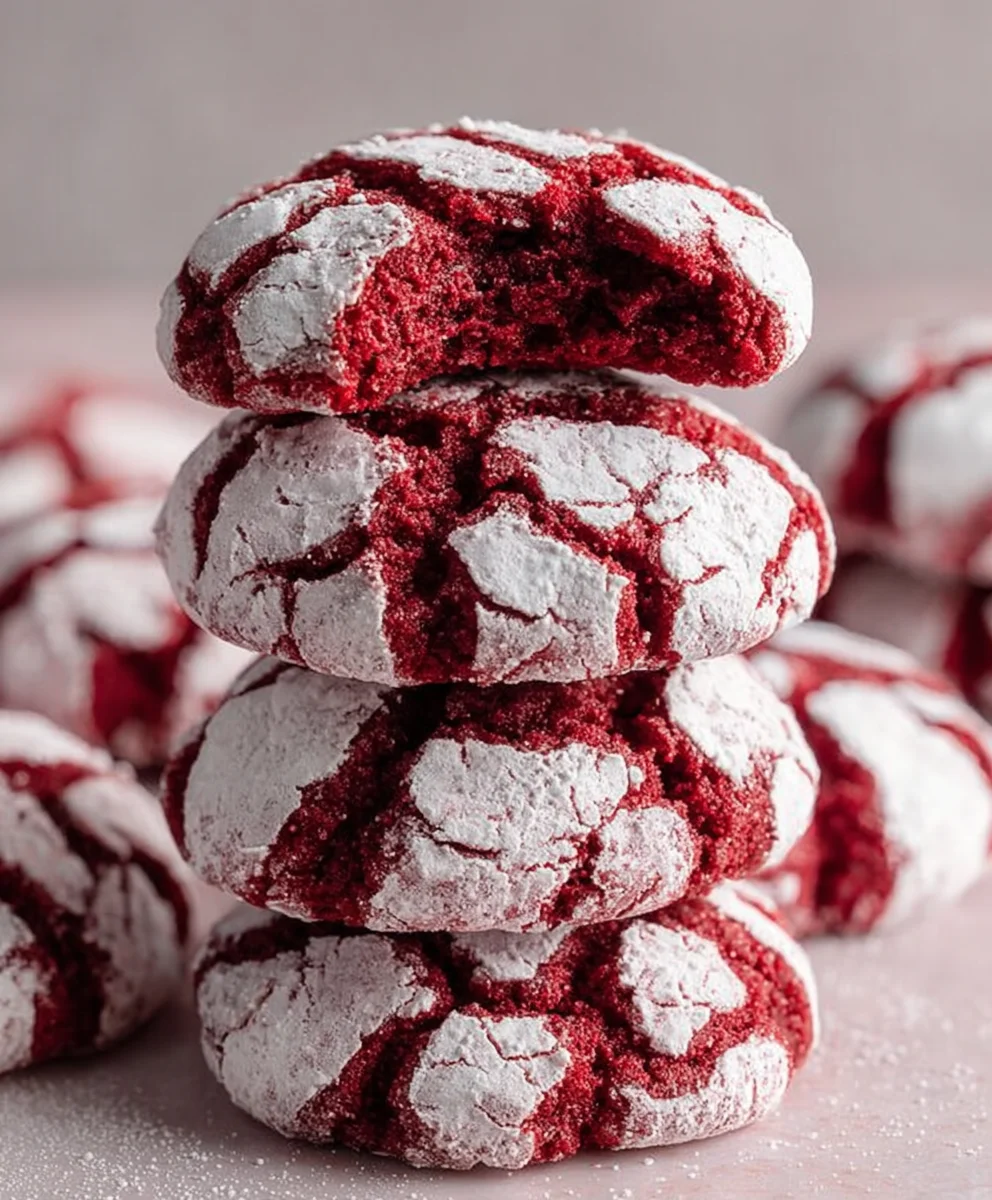
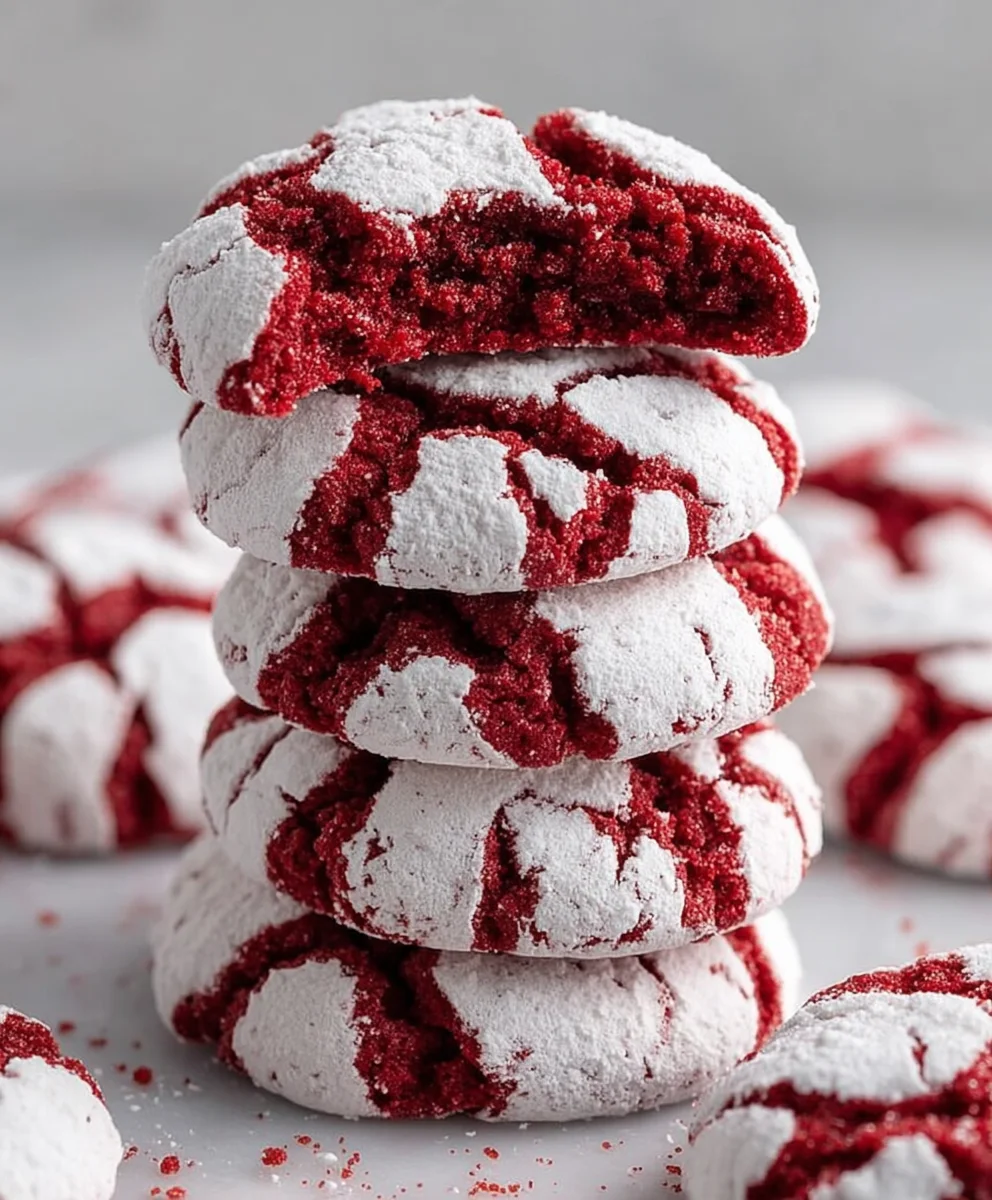
Red Velvet Crinkle Cookies-Easy Holiday Treats
Red Velvet Crinkle Cookies are more than just a dessert; they’re a dazzling spectacle for the senses and a beloved treat for a reason. Imagin extracte biting into a cookie that’s both intensely chocolatey and subtly tangy, with a pillowy soft interior that melts in your mouth. What truly sets these Red Velvet Crinkle Cookies apart is their iconic appearance: a vibrant crimson hue peeking through a delicate dusting of powdered sugar, resembling a beautiful crackled masterpiece. It’s this captivating contrast of color and texture that makes them so irresistible, a festive favorite for holidays, celebrations, or simply when you crave a little bit of magic in your day. We’re about to unlock the secrets to achieving that perfect chewy center and those signature craggy peaks that make every bite an adventure.
Ingredients:
- 1 1/2 cups all-purpose flour
- 1/2 cup unsweetened cocoa powder
- 1 teaspoon baking powder
- 1/4 teaspoon salt
- 1/2 cup unsalted butter, softened
- 1 cup granulated sugar
- 2 large eggs
- 1 teaspoon vanilla extract
- 1 tablespoon red food coloring
- 1/2 cup powdered sugar, for rolling
Preparing the Dough
Step 1: Combine Dry Ingredients
Begin extract by whisking together your dry ingredients in a medium-sized bowl. This ensures that the baking powder and salt are evenly distributed throughout the flour and cocoa powder. Start with the 1 1/2 cups of all-purpose flour, 1/2 cup of unsweetened cocoa powder, 1 teaspoon of baking powder, and 1/4 teaspoon of salt. A good whisking action will aerate the mixture slightly and prevent any pockets of leavening agent or seasoning, which is crucial for consistent cookie texture and flavor. Set this bowl aside for now.
Step 2: Cream Butter and Sugar
In a large mixing bowl, or the bowl of your stand mixer fitted with the paddle attachment, cream together the 1/2 cup of softened unsalted butter and 1 cup of granulated sugar. It’s important that your butter is truly softened, not melted. You should be able to press into it easily with your finger. Creaming involves beating the butter and sugar together until the mixture is light, fluffy, and pnon-alcoholic ale in color. This process incorporates air into the dough, which contributes to the tender texture of the finished cookies. Scrape down the sides of the bowl occasionally to ensure everything is well combined. This usually takes about 2-3 minutes on medium speed.
Step 3: Incorporate Wet Ingredients
Now it’s time to add the wet ingredients to the creamed butter and sugar mixture. Add the 2 large eggs, one at a time, beating well after each addition until fully incorporated. Next, stir in the 1 teaspoon of vanilla extract. This aromatic addition will enhance the overall flavor profile of your Red Velvet Crinkle Cookies. Finally, add the 1 tablespoon of red food coloring. Be generous with the food coloring to achieve that signature vibrant red hue. Mix on low speed until the color is evenly distributed, creating a beautiful crimson batter. Don’t overmix at this stage; just combine until the color is uniform.
Step 4: Combine Wet and Dry Mixtures
Gradually add the dry ingredients from Step 1 to the wet ingredients in the large bowl. Mix on low speed until just combined. Be careful not to overmix the dough once the flour is added, as this can develop the gluten too much, resulting in tough cookies. You want to mix until there are no dry streaks of flour remaining. The dough will be thick and a beautiful deep red color. It might feel a little sticky, which is perfectly normal for crinkle cookie dough.
Step 5: Chill the Dough
This step is critical for achieving the perfect crinkle effect and preventing the cookies from spreading too much during baking. Cover the bowl tightly with plastic wrap and refrigerate the dough for at least 2 hours, or preferably overnight. Chilling the dough allows the fat to firm up, making it easier to scoop and handle. It also allows the flavors to meld together more effectively. The colder the dough, the more pronounced the crackles will be after baking.
Baking the Red Velvet Crinkle Cookies
Step 6: Preheat Oven and Prepare Baking Sheets
When you’re ready to bake, preheat your oven to 375°F (190°C). Line two baking sheets with parchment paper or silicone baking mats. This prevents the cookies from sticking and makes for easy cleanup. Having two baking sheets ready will allow you to bake in batches efficiently.
Step 7: Roll and Coat the Dough Balls
Remove the chilled dough from the refrigerator. Scoop rounded tablespoons of dough and roll them into smooth balls. You can use a cookie scoop for uniform size. Once you have your dough balls, place the 1/2 cup of powdered sugar in a shallow bowl or on a plate. Roll each dough ball generously in the powdered sugar, ensuring it’s completely coated. The powdered sugar coating is what creates the characteristic white, cracked exterior that contrasts so beautifully with the red cookie underneath.
Step 8: Arrange and Bake
Place the coated dough balls onto the prepared baking sheets, leaving about 2 inches of space between each cookie. As they bake, they will spread slightly. Bake for 9-12 minutes, or until the edges are set but the centers still look slightly soft. You don’t want to overbake them, as they will continue to cook slightly on the baking sheet after you remove them from the oven. The key is a slightly underbaked center for a chewy cookie.
Step 9: Cool and Enjoy
Allow the Red Velvet Crinkle Cookies to cool on the baking sheets for 5 minutes before transferring them to a wire rack to cool completely. This resting period on the baking sheet helps them firm up enough to be moved without falling apart. Once cooled, admire their beautiful crackled appearance and indulge in their rich, chocolatey, and subtly tangy flavor. These cookies are a delightful treat for any occasion.
Conclusion:
There you have it – the ultimate guide to creating delicious Red Velvet Crinkle Cookies! We’ve walked through each step, from achieving that vibrant hue to perfecting that signature crinkled surface. These cookies are a true showstopper, perfect for any occasion, from holiday gatherings to simple sweet cravings. The rich, slightly tangy chocolate flavor combined with the powdery white exterior makes for an irresistible combination.
For serving suggestions, these Red Velvet Crinkle Cookies are fantastic on their own, but they also pair beautifully with a glass of cold milk, a cup of coffee, or even a scoop of vanilla ice cream. They also make for a lovely homemade gift; package them in a pretty tin or cellophane bag tied with a festive ribbon.
If you’re feeling adventurous, consider some variations! You could add a touch of peppermint extract to the dough for a festive twist, or perhaps a sprinkle of white chocolate chips for an extra layer of sweetness. Don’t be afraid to experiment with different extracts to discover your favorite flavor profile.
I truly hope you enjoy making and devouring these delightful Red Velvet Crinkle Cookies as much as I do. Don’t hesitate to get creative in the kitchen! Happy baking!
Frequently Asked Questions:
Q1: Why are my Red Velvet Crinkle Cookies not crinkly enough?
Ensuring your Red Velvet Crinkle Cookies achieve that signature crinkled texture often comes down to a few key factors. Firstly, make sure your dough is chilled sufficiently before rolling. Cold dough is less likely to spread too much in the oven. Secondly, the technique of rolling the dough balls in powdered sugar twice is crucial. The first coating helps with the initial texture, and the second coating, applied just before baking, really helps those cracks form as the cookie spreads. Also, avoid overmixing the dough, as this can develop gluten and lead to a tougher cookie that doesn’t crinkle as well.
Q2: Can I make Red Velvet Crinkle Cookies ahead of time?
Yes, absolutely! You can prepare the Red Velvet Crinkle Cookie dough and store it in the refrigerator for up to 2-3 days. This chilling period can even enhance the flavor. Alternatively, you can freeze the dough balls for up to 3 months. When you’re ready to bake, you can bake them directly from frozen, just adding a few extra minutes to the baking time. This makes them perfect for last-minute baking emergencies or preparing for a party well in advance.
Red Velvet Crinkle Cookies
Easy and delicious Red Velvet Crinkle Cookies, perfect for holiday treats with a vibrant red color and a classic crinkled sugar coating.
Ingredients
-
1 1/2 cups all-purpose flour
-
1/2 cup unsweetened cocoa powder
-
1 teaspoon baking powder
-
1/4 teaspoon salt
-
1/2 cup unsalted butter, softened
-
1 cup granulated sugar
-
2 large eggs
-
1 teaspoon vanilla extract
-
1 tablespoon red food coloring
-
1/2 cup powdered sugar, for rolling
Instructions
-
Step 1
Combine the 1 1/2 cups all-purpose flour, 1/2 cup unsweetened cocoa powder, 1 teaspoon baking powder, and 1/4 teaspoon salt in a medium bowl. Whisk until evenly distributed. -
Step 2
In a large bowl, cream together the 1/2 cup softened unsalted butter and 1 cup granulated sugar until light and fluffy. Beat in the 2 large eggs one at a time, followed by the 1 teaspoon vanilla extract and 1 tablespoon red food coloring until the batter is a uniform crimson color. -
Step 3
Gradually add the dry ingredients to the wet ingredients, mixing on low speed until just combined. Do not overmix. -
Step 4
Cover the dough tightly and refrigerate for at least 2 hours, or preferably overnight, to chill. -
Step 5
Preheat oven to 375°F (190°C) and line baking sheets with parchment paper. -
Step 6
Scoop rounded tablespoons of chilled dough and roll into smooth balls. Roll each ball generously in 1/2 cup of powdered sugar until completely coated. -
Step 7
Place coated dough balls onto prepared baking sheets, leaving about 2 inches between cookies. Bake for 9-12 minutes, or until the edges are set but the centers are still slightly soft. -
Step 8
Let cookies cool on the baking sheets for 5 minutes before transferring to a wire rack to cool completely.
Important Information
Nutrition Facts (Per Serving)
It is important to consider this information as approximate and not to use it as definitive health advice.
Allergy Information
Please check ingredients for potential allergens and consult a health professional if in doubt.