Easy Pickled Red Onions- Quick & Flavorful
Pickled red onions are an absolute game-changer in my kitchen, and I’m so excited to share this recipe with you! If you’ve ever wondered what those vibrant, jewel-toned slivers are that elevate everything from tacos to avocado toast, you’ve found them. These aren’t just pretty; pickled red onions offer a delightful tang and a satisfying crunch that cuts through richness and adds a pop of flavor to any dish. People adore them because they transform simple meals into something truly special with minimal effort. What makes them so magical is their ability to balance sweetness with acidity, creating a complex yet refreshing taste that keeps you coming back for more. They’re incredibly versatile, incredibly easy to make, and a pantry staple I can’t live without.
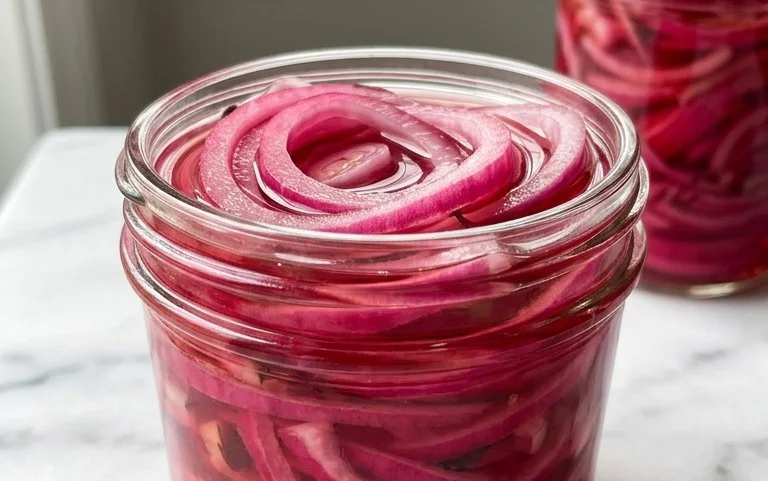
Pickled Red Onions
There’s a reason pickled red onions have become a star player on so many plates. They’re incredibly versatile, offering a vibrant pop of color and a delightful sweet-and-tangy crunch that elevates everything from tacos and salads to sandwiches and charcuterie boards. Forget those store-bought versions that can sometimes taste overly sweet or artificial. Making your own is surprisingly simple, takes mere minutes of active time, and the results are so much fresher and more flavorful. This recipe is a cornerstone in my kitchen, and once you try it, I’m confident it will be in yours too. The beauty lies in its simplicity – just a few pantry staples transform humble red onions into a culinary powerhouse. Let’s get started!
Ingredients:
Notes on Sugar:
The type of sugar you use can subtly influence the final flavor and color. Granulated white sugar is the most straightforward and will give you a clean, bright tang. If you prefer a slightly richer, more nuanced sweetness, you can opt for a light brown sugar or even coconut sugar. Just be aware that darker sugars might slightly alter the vibrant pink hue of your pickled onions. For this recipe, I typically stick with regular granulated sugar for that classic, punchy flavor.
Instructions:
1. Prepare the Onions: Begin extract by peeling your red onions. If you find peeling them a bit tricky, a quick rinse under cold water can sometimes help loosen the papery outer layers. Once peeled, you’ll want to slice them thinly. A mandoline slicer is your best friend here for achieving uniform, thin slices, which ensures they pickle evenly. However, if you don’t have a mandoline, a sharp knife and a steady hand will do the job beautifully. Aim for slices that are about 1/8 inch thick. The thinner the slices, the quicker they’ll pickle and the more delicate their texture will be. Place all of your thinly sliced red onions into a clean glass jar or a heatproof bowl. A jar is ideal as it makes for easy storage later. Make sure the jar is large enough to hold the onions and the pickling liquid comfortably.
2. Create the Brine: In a small saucepan, combine the water, white vinegar, sugar, and sea salt. If you’re using the red pepper flakes for a touch of heat, add them now. Place the saucepan over medium heat. Stir the mixture constantly until the sugar and salt are completely dissolved. This is crucial for ensuring a balanced pickling liquid and that your onions develop the best flavor. Avoid bringin extractg the mixture to a rolling boil; you just want it hot enough for the sugar and salt to dissolve. Once dissolved, remove the saucepan from the heat. The goal is to have a warm, flavorful brine.
3. Combine Onions and Brine: Carefully pour the warm pickling brine over the sliced red onions in your jar or bowl. Make sure that all of the onion slices are fully submerged in the liquid. If some pieces are floating, you can gently press them down with a spoon to ensure they are covered. This even submersion is vital for consistent pickling. If you’re using a jar, you might notice the onions starting to change color almost immediately as the acid from the vinegar interacts with them. This is a magical part of the process!
4. Initial Pickling and Cooling: If you prepared your onions and brine in a bowl, cover it tightly. If you used a jar, ensure the lid is securely fastened. Allow the mixture to sit at room temperature for at least 30 minutes. This initial period at room temperature allows the onions to begin extract their pickling process and soften slightly. You’ll notice the vibrant pink color intensifying during this time. This step is where a lot of the magic happens in terms of texture and flavor development. Don’t rush this part; patience will be rewarded.
5. Refrigerate and Mature: After the 30-minute (or longer) resting period at room temperature, transfer the jar or bowl to the refrigerator. For the best flavor, I like to let my pickled red onions chill for at least an hour before diving in, but they truly reach their peak after a few hours or even overnight. The cold temperature slows down the pickling process while allowing the flavors to meld and deepen. You’ll notice the onions become tender but still retain a pleasant crunch. They can be stored in the refrigerator for several weeks, making them a fantastic make-ahead condiment. The longer they sit, the more mellow and complex their flavor becomes.
Enjoy your homemade pickled red onions on tacos, in salads, on burgers, with eggs, or anywhere you need a bright, zesty kick! They are a true game-changer.
Conclusion:
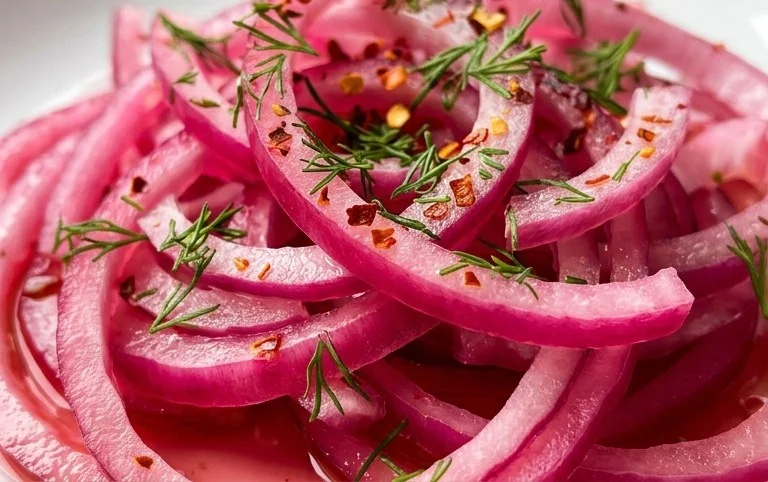
There you have it! My simple yet incredibly satisfying recipe for pickled red onions. This recipe is truly a game-changer because it transforms humble red onions into a vibrant, tangy, and slightly sweet condiment that elevates almost any dish. The bright pink hue is visually appealing, and the crisp texture adds a delightful contrast. They are incredibly versatile and can be used to add a burst of flavor to tacos, salads, sandwiches, burgers, avocado toast, and even grilled meats or fish. Don’t be afraid to get creative with your serving suggestions – these pickled red onions are a culinary cbeef hameleon!
I encourage you to give this recipe a try. It’s remarkably easy, requires minimal effort, and the results are well worth it. You’ll be amazed at how quickly they become a staple in your refrigerator. Plus, there are so many fun variations to explore. You can experiment with different vinegars like apple cider vinegar or white grape juice vinegar, add a pinch of your favorite spices like chili flakes for a little heat, or even throw in some fresh herbs like dill or cilantro. The possibilities are endless, and the flavor payoff is immense!
Frequently Asked Questions:
How long do pickled red onions last?
My pickled red onions will stay fresh and delicious in an airtight container in the refrigerator for at least 2-3 weeks. The pickling process acts as a natural preservative.
Can I use a different kind of onion?
While red onions are ideal for their color and slightly milder flavor when pickled, you can experiment with white or yellow onions. However, the vibrant pink color won’t be as pronounced.
What’s the best way to store them?
For optimal freshness and flavor, store your pickled red onions in a clean, airtight glass jar or container in the refrigerator. Ensure the onions are fully submerged in the pickling liquid.
Pickled Red Onions
Quick and easy pickled red onions, perfect for sandwiches, salads, tacos, and more. Adds a vibrant pop of flavor and color.
Ingredients
-
2 medium red onions ((or 3 small ones))
-
1 1/4 cup water
-
1 1/4 cup white vinegar
-
3 tbsp sugar
-
1 tbsp sea salt
-
1/4-1/2 tsp red pepper flakes ((optional))
Instructions
-
Step 1
Thinly slice the red onions. A mandoline slicer works best for uniform slices. -
Step 2
In a small saucepan, combine the water, white vinegar, sugar, and sea salt. Heat over medium heat, stirring until the sugar and salt are completely dissolved. Do not boil. -
Step 3
If using, stir in the red pepper flakes. -
Step 4
Place the sliced onions into a clean jar or heatproof container. -
Step 5
Pour the hot brine over the onions, ensuring they are fully submerged. -
Step 6
Let the mixture cool to room temperature, then cover and refrigerate. The onions will be ready to eat in about 30 minutes, but are best after a few hours or overnight.
Important Information
Nutrition Facts (Per Serving)
It is important to consider this information as approximate and not to use it as definitive health advice.
Allergy Information
Please check ingredients for potential allergens and consult a health professional if in doubt.