Best Soft Chocolate Chip Cookies Recipe Ever
The Best Soft Chocolate Chip Cookies aren’t just a dessert; they’re a passport to pure bliss. Imagin extracte sinking your teeth into a cookie that’s perfectly chewy in the center, with just the slightest hint of crispness around the edges. That warm, gooey sensation, combined with melty pockets of rich chocolate, is what dreams are made of. We all have our favorite chocolate chip cookie memories, whether it’s from a childhood bake snon-alcoholic ale or a cozy afternoon treat. But what truly makes The Best Soft Chocolate Chip Cookies stand out? It’s that undeniable balance of flavor and texture – not too cakey, not too crispy, just exquisitely soft and deeply satisfying. My personal quest for the ultimate soft chocolate chip cookie has led me to this recipe, and I’m thrilled to share it with you. Prepare to experience chocolate chip cookie perfection!
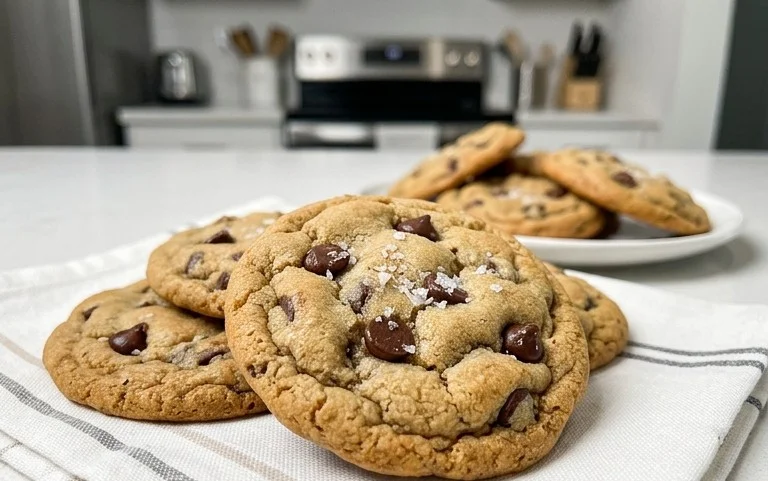
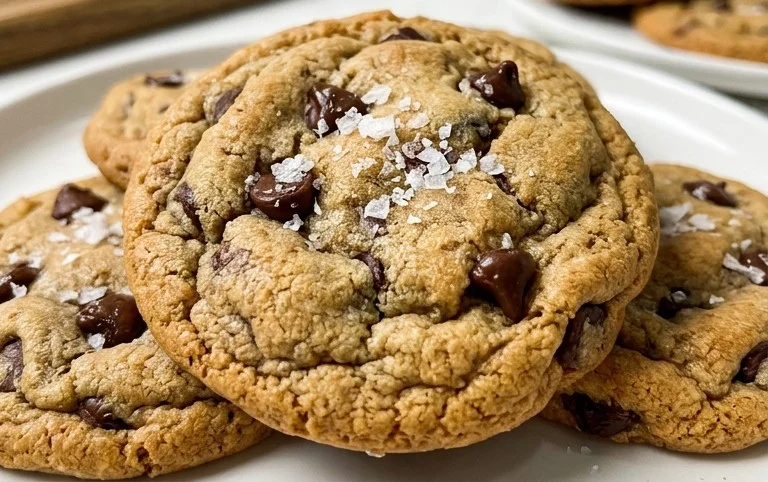
The Best Soft Chocolate Chip Cookies
There are few things in life as comforting and universally loved as a warm, soft chocolate chip cookie. Forget those crunchy, dry imposters; we’re talking about cookies with that perfect chewy center, slightly crisp edges, and generous pockets of melty chocolate. After countless batches and much experimentation, I’ve finally perfected my go-to recipe for what I truly believe are the best soft chocolate chip cookies. This recipe is designed to deliver pure cookie bliss every single time.
The secret to a truly soft cookie lies in a few key elements: the ratio of sugars, the type of fat, and a crucial chilling step. We’re going for a cookie that holds its shape while baking, but yields to a gentle squeeze, offering that melt-in-your-mouth texture that makes you want to reach for another (and maybe another).
Ingredients:
Cooking Instructions:
1. Creaming the Butter and Sugars
Start by taking your 8 tablespoons of salted butter out of the refrigerator about an hour before you plan to bake. You want it to be soft, but not melted. This is crucial for creating the right texture. In a large mixing bowl, combine the softened butter with your 1/2 cup of white sugar (I really do recommend raw cane sugar here if you have it; its slightly larger crystals create a wonderfully subtle crispness on the exterior that contrasts beautifully with the soft interior) and the 1/4 cup of packed light brown sugar. Using an electric mixer on medium speed, cream these ingredients together until they are light and fluffy, about 2 to 3 minutes. This process incorporates air into the mixture, which is essential for the cookies’ texture and helps prevent them from spreading too much. Scrape down the sides of the bowl periodically to ensure everything is evenly combined.
2. Adding Wet Ingredients
Once the butter and sugars are beautifully creamed, it’s time to add the wet ingredients. Beat in the 1 teaspoon of vanilla extract until it’s fully incorporated. Then, crack in your 1 large egg. Mix on low speed until the egg is just combined. Be careful not to overmix at this stage, as overmixing can develop the gluten in the flour too much, leading to tougher cookies. The mixture might look a little curdled at first, but that’s perfectly normal.
3. Combining Dry Ingredients and Incorporating Them
In a separate medium-sized bowl, whisk together your 1 1/2 cups of all-purpose flour, 1/2 teaspoon of baking soda, and 1/4 teaspoon of salt. I mentioned I like to add a little extra salt – I usually add about an extra 1/8 teaspoon. This isn’t strictly necessary, but I find it really enhances the overall flavor and balances the sweetness of the chocolate. Gradually add the dry ingredients to the wet ingredients, mixing on low speed until just combined. Again, avoid overmixing. The dough should just come together, and you should still see a few streaks of flour. Then, gently fold in your 3/4 cup of chocolate chips. I like to use a mix of chips and chunks because the chips melt into gooey pockets, while the chunks provide larger, more decadent bites of chocolate.
4. The All-Important Chill
This is arguably the most crucial step for achieving that perfectly soft texture. Cover the bowl tightly with plastic wrap and refrigerate the cookie dough for at least 30 minutes, or preferably for 1 to 2 hours. Chilling the dough solidifies the butter, which controls how much the cookies spread in the oven. It also allows the flavors to meld together, resulting in a more complex and delicious cookie. If you have the time, chilling for longer, even overnight, can yield even more incredible results. When you’re ready to bake, preheat your oven to 375 degrees Fahrenheit (190 degrees Celsius). Line baking sheets with parchment paper.
5. Shaping and Baking for Perfection
Scoop rounded tablespoons of the chilled dough onto your prepared baking sheets, leaving about 2 inches between each cookie. You can gently roll the dough into balls, or for a more rustic look, just use a spoon or cookie scoop. For extra-fancy cookies, press a few extra chocolate chips or chunks into the tops of the dough balls before baking. Bake for 9 to 12 minutes, or until the edges are lightly golden brown and the centers still look slightly underbaked. They will continue to cook as they cool on the baking sheet. This is key to a soft center.
Let the cookies cool on the baking sheets for about 5 minutes before transferring them to a wire rack to cool completely. The aroma that fills your kitchen as these bake is absolutely divine. Enjoy these warm, soft, and utterly irresistible chocolate chip cookies with a glass of milk, or even on their own – they’re that good! They are best enjoyed fresh, but will keep in an airtight container at room temperature for up to 3 days.
Conclusion:
There you have it – the definitive guide to baking the best soft chocolate chip cookies! What makes this recipe truly special is the perfect balance of ingredients that ensures a wonderfully tender interior with just the right amount of chegrape juicess. The slightly underbaked center, achieved through precise baking times and chilling the dough, is the secret to that irresistible gooey texture. I’m so excited for you to try these out and experience cookie perfection for yourself!
These cookies are incredibly versatile. They’re fantastic served warm with a glass of cold milk for a classic treat. For something a little more decadent, try sandwiching two cookies together with a scoop of your favorite ice cream. They also make a wonderful addition to a dessert platter or a thoughtful homemade gift. Feel free to experiment with different types of chocolate chips – milk, dark, or even a mix – or add a sprinkle of sea salt on top before baking for a delightful salty-sweet contrast.
Don’t be intimidated by the chilling step; it’s crucial for flavor development and preventing the cookies from spreading too much. Trust the process, and you’ll be rewarded with cookies that will disappear in minutes! I truly believe this recipe will become your go-to for all your chocolate chip cookie cravings.
Frequently Asked Questions:
Why are my cookies spreading too much?
This often happens when the butter is too soft or the dough isn’t chilled sufficiently. Ensure your butter is softened, not melted, and that you’ve chilled the dough for at least 30 minutes, or even longer for the best results. Overmixing the dough after adding flour can also contribute to spreading.
Can I freeze the cookie dough?
Absolutely! Chilled cookie dough balls can be frozen on a baking sheet until solid, then transferred to a freezer-safe bag or container. You can bake them directly from frozen; just add a few extra minutes to the baking time. This is a great way to have the best soft chocolate chip cookies ready whenever the craving strikes!
How do I store leftover cookies?
For maximum softness, store cooled cookies in an airtight container at room temperature. You can place a slice of bread in the container to help maintain their moisture. They are best enjoyed within 2-3 days, but they also freeze beautifully for longer storage.
The Best Soft Chocolate Chip Cookies
Incredibly soft and chewy chocolate chip cookies with a perfect balance of sweetness and chocolate.
Ingredients
-
8 tablespoons of salted butter, softened
-
1/2 cup white sugar
-
1/4 cup packed light brown sugar
-
1 teaspoon vanilla extract
-
1 large egg
-
1 1/2 cups all purpose flour
-
1/2 teaspoon baking soda
-
1/4 teaspoon salt
-
3/4 cup chocolate chips
Instructions
-
Step 1
In a large bowl, cream together the softened butter, white sugar, and light brown sugar until light and fluffy. -
Step 2
Beat in the vanilla extract and the egg until well combined. -
Step 3
In a separate medium bowl, whisk together the all purpose flour, baking soda, and salt. -
Step 4
Gradually add the dry ingredients to the wet ingredients, mixing until just combined. Do not overmix. -
Step 5
Fold in the chocolate chips. -
Step 6
Drop rounded tablespoons of dough onto ungreased baking sheets. -
Step 7
Bake in a preheated oven at 375 degrees F (190 degrees C) for 8-10 minutes, or until the edges are golden brown and the centers are still slightly soft. -
Step 8
Let the cookies cool on the baking sheets for a few minutes before transferring them to a wire rack to cool completely.
Important Information
Nutrition Facts (Per Serving)
It is important to consider this information as approximate and not to use it as definitive health advice.
Allergy Information
Please check ingredients for potential allergens and consult a health professional if in doubt.