Patriotic Oreo Balls- Easy Red White Blue Dessert Recipe
Patriotic Oreo Balls are an absolute showstopper for any celebration, and they’re incredibly easy to whip up! Whether you’re gearing up for the Fourth of July, Memorial Day, or just feeling a burst of red, white, and blue spirit, these delightful treats are the perfect way to add a festive flair to your dessert table. What’s not to love about these bite-sized wonders? They take the beloved crunch of Oreos and transform them into a creamy, dreamy confection that’s simply irresistible. People adore them because they deliver that satisfying cookie-and-cream flavor in a fun, manageable portion. What truly makes these Patriotic Oreo Balls special is their incredible versatility. You can customize the colors to perfectly match your theme, making them a standout addition to any gathering that calls for a touch of homemade goodness and national pride.
Patriotic Oreo Balls
Get ready to celebrate any red, white, and blue occasion with these incredibly easy and utterly delicious Patriotic Oreo Balls! These no-bake treats are a guaranteed crowd-pleaser, perfect for Fourth of July, Memorial Day, or even just a fun summer get-together. They look festive, taste amazing, and are so simple to make that even the littlest bakers can get involved. The rich, chocolatey goodness of Oreos combined with creamy cheesecake filling, all dipped in vibrant candy melts and topped with twinkling stars, makes for a truly delightful dessert. Forget complicated baking – these little bites of joy are all about simple ingredients and pure indulgence.
Ingredients:
Instructions:
Crushing the Cookies
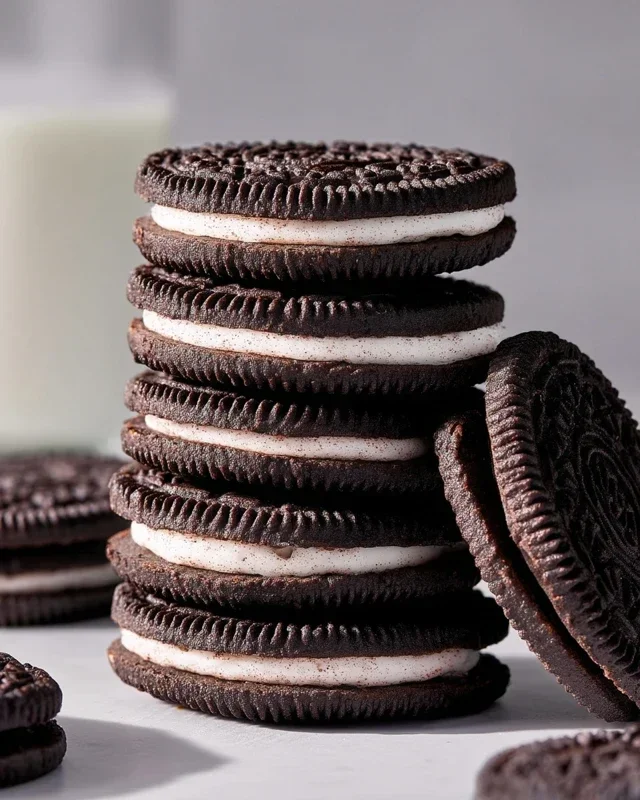
The foundation of our delicious Oreo Balls lies in perfectly crushed Oreos. For this recipe, we’ll be using an entire family-size package of Oreo cookies. The best way to get a fine, consistent crum extractb is to use a food processor. Simply place the whole Oreos into the bowl of your food processor and pulse until they are finely crushed into crum extractbs. If you don’t have a food processor, don’t worry! You can achieve the same result by placing the Oreos in a large zip-top bag and crushing them with a rolling pin or the bottom of a sturdy glass. The goal is to have no large cookie pieces remaining, just a fine, sandy texture. This ensures that the mixture will bind together smoothly. You’ll want to make sure you have a good amount of crum extractbs – this recipe uses the entire large package, so you’ll have plenty to work with.
Creating the Oreo Ball Mixture
Once your Oreos are beautifully crushed, it’s time to bring in the magic ingredient that makes these Oreo Balls so wonderfully creamy: cream cheese! Make sure your 8-ounce block of cream cheese has been softened to room temperature. This is crucial for easy mixing and to avoid lumps. In a large mixing bowl, combine the finely crushed Oreo crum extractbs with the softened cream cheese. Use a sturdy spoon or a rubber spatula to mix until the two ingredients are thoroughly combined and form a cohesive dough. It might seem a little crum extractbly at first, but keep mixing and pressing it together. You want a dough that holds its shape when you squeeze it. If the mixture feels too dry and crum extractbly, you can add a tablespoon of melted butter, but usually, the softened cream cheese is enough to bring it all together.
Shaping the Oreo Balls
Now for the fun part – shaping! Using your hands, take about one tablespoon of the Oreo and cream cheese mixture and roll it into a compact ball. The size is up to you, but aiming for about 1-inch diameter balls makes them perfect bite-sized treats. It’s helpful to roll them between the palms of your hands until they are smooth and uniform. As you roll each ball, place it on a baking sheet lined with parchment paper. This prevents sticking and makes for easy cleanup. Continue this process until all of your Oreo mixture has been rolled into balls. You should have quite a few delicious little spheres ready for their colorful makeover! It’s a good idea to make them all roughly the same size so they will melt and set evenly.
Melting and Dipping the Candy Melts
This is where the patriotic colors come to life! We’ll be using red and blue candy melts to give our Oreo Balls their festive appearance. In separate microwave-safe bowls, melt your red candy melts and your blue candy melts according to the package directions. Typically, this involves microwaving on 50% power for 30-second intervals, stirring well between each interval, until smooth and completely melted. Be careful not to overheat them, as this can cause them to seize up. Once melted and smooth, you’ll need to dip your Oreo Balls. You can use a toothpick or a fork for this. Dip each ball into the melted candy, ensuring it’s fully coated. Let any excess melt drip off before placing it back onto the parchment-lined baking sheet to set. For the white stripes or accents, we’ll use the Ghirardelli white melting wafers. Melt these separately, again following package directions. You can then use a spoon or a piping bag to drizzle the white chocolate over the red and blue dipped balls, or dip the balls into the white chocolate for a full white coating.
Adding the Starry Touch
The final flourish to our Patriotic Oreo Balls is the sprinkle of white star confetti. While the candy melt coating is still wet, immediately sprinkle the white star confetti onto each dipped Oreo Ball. This allows the sprinkles to adhere to the coating as it sets. You can be as generous or as sparing with the sprinkles as you like! For a more uniform look, you can dip the bottom half of the Oreo Ball in one color, and then the top half in another, creating a two-toned effect. Or, you can dip the entire ball in one color and then drizzle the other color over it. The white stars will pop beautifully against the red and blue. Once decorated, place the baking sheet in the refrigerator for about 15-20 minutes, or until the candy coating is completely firm. This chilling step is important to ensure the balls hold their shape and the coating is solid before serving.
These Patriotic Oreo Balls are incredibly versatile. You can customize the colors for any theme or holiday! They store beautifully in an airtight container in the refrigerator for up to a week, making them a great make-ahead treat for any party. Enjoy your delicious and dazzling creations!
Conclusion:
I hope you’ve enjoyed learning how to make these delicious and festive Patriotic Oreo Balls! These no-bake treats are an absolute winner for any celebration, offering a delightful combination of rich chocolate and classic Oreo cookie crunch. They’re incredibly easy to whip up, making them perfect for last-minute party prep or a fun activity with kids. Their vibrant red, white, and blue appearance makes them a showstopper on any dessert table, truly embodying the spirit of any patriotic gathering.
These versatile Patriotic Oreo Balls are fantastic served on their own, but they also pair wonderfully with fresh berries or a scoop of vanilla ice cream. For variations, feel free to experiment with different colored candy melts – perhaps even black and silver for a different patriotic look! You could also add a sprinkle of edible glitter for extra sparkle. I truly encourage you to give this recipe a try; it’s guaranteed to be a crowd-pleaser!
Frequently Asked Questions:
Can I make these ahead of time?
Absolutely! Patriotic Oreo Balls can be made up to a week in advance and stored in an airtight container in the refrigerator. This makes them a fantastic make-ahead option for parties.
What if I don’t have red, white, and blue candy melts?
No problem! You can use any color candy melts you have on hand, or even dip them in melted chocolate. For a truly patriotic look without specific colors, you can always add red and blue sprinkles to white chocolate coatings.
How long do these last?
Stored properly in an airtight container in the refrigerator, these Patriotic Oreo Balls will stay fresh for about 7-10 days. They tend to be best within the first week.
Patriotic Oreo Balls
Festive and easy-to-make Oreo balls decorated in red, white, and blue for a patriotic treat. Perfect for holidays and celebrations.
Ingredients
-
1 lb 2.12 oz Family Size package Oreo Cookies
-
8 ounce block cream cheese (softened to room temperature)
-
12 ounce bag red candy melts
-
12 ounce bag blue candy melts
-
⅓ cup Ghirardelli white melting wafers
-
White star confetti sprinkles for topping
Instructions
-
Step 1
Finely crush the Oreo cookies in a food processor or by placing them in a zip-top bag and crushing with a rolling pin. You want fine crumbs. -
Step 2
In a medium bowl, combine the Oreo cookie crumbs and softened cream cheese. Mix thoroughly until well combined and a dough forms. -
Step 3
Roll the mixture into 1-inch balls and place them on a baking sheet lined with parchment paper. Freeze for at least 15 minutes to firm up. -
Step 4
Melt the red candy melts and blue candy melts separately according to package directions, usually in the microwave at 50% power in 30-second intervals, stirring between each interval. Melt the white melting wafers separately. -
Step 5
Dip the chilled Oreo balls into the melted candy melts, ensuring they are fully coated. Use a fork or toothpick to lift them out, allowing excess chocolate to drip back into the bowl. Place the coated balls back onto the parchment-lined baking sheet. -
Step 6
While the candy melts are still wet, decorate with the melted white chocolate and white star confetti sprinkles to create a patriotic look. -
Step 7
Allow the candy melts to set completely. This can be sped up by refrigerating for about 10-15 minutes.
Important Information
Nutrition Facts (Per Serving)
It is important to consider this information as approximate and not to use it as definitive health advice.
Allergy Information
Please check ingredients for potential allergens and consult a health professional if in doubt.