Perfect Ramen Eggs Ajitama Recipe
Ramen eggs, or ajitama, are more than just a topping; they are the soul of a truly exceptional bowl of ramen. Have you ever experienced that moment when you bite into a perfectly jammy yolk, infused with the savory, umami-rich marinade, and it just elevates everything? That’s the magic of a well-made ramen egg. People are utterly obsessed with these flavorful delights for good reason. They offer a luxurious texture contrast and a depth of flavor that transforms a simple broth and noodles into a culinary masterpiece. What makes ajitama so incredibly special is the transformative power of a simple marinade. It’s a patient process, but the reward of that deeply flavored, melt-in-your-mouth egg is absolutely worth every second. Get ready to discover how to create these addictive ramen eggs at home!
Ramen Eggs (Ajitama)
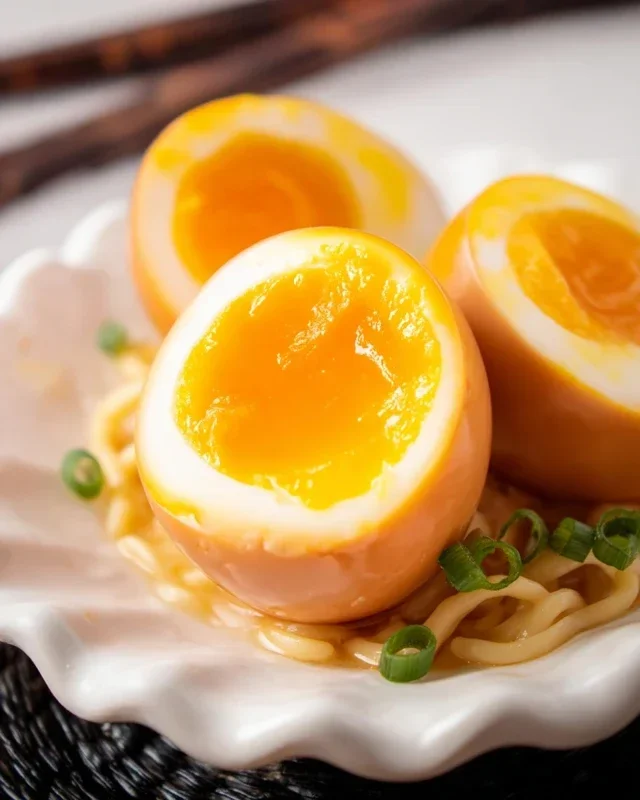
There’s something undeniably magical about a perfectly prepared ramen egg, or ajitama, nestled atop a steaming bowl of noodles. The creamy, jammy yolk contrasting with the savory, umami-rich marinade is a culinary experience that elevates even the simplest ramen to gourmet status. These aren’t your average hard-boiled eggs; they are a labor of love, a testament to patience, and an incredibly rewarding kitchen project. The process might seem a little daunting at first, but trust me, once you master this, you’ll be adding these beautiful marinated eggs to everything from salads to avocado toast. They are a true game-changer.
The secret to a perfect ajitama lies in achieving that ideal, slightly gooey yolk while ensuring the white is tender and fully cooked. It’s a delicate balance, and the marinade does the rest, infusing the egg with deep, complex flavors. Making a batch of these is a fantastic way to have a gourmet topping on hand for quick weeknight meals or to impress guests with your culinary prowess. Let’s dive into how we create these flavor bombs.
Ingredients:
Cooking Instructions
Phase 1: Boiling the Eggs to Perfection
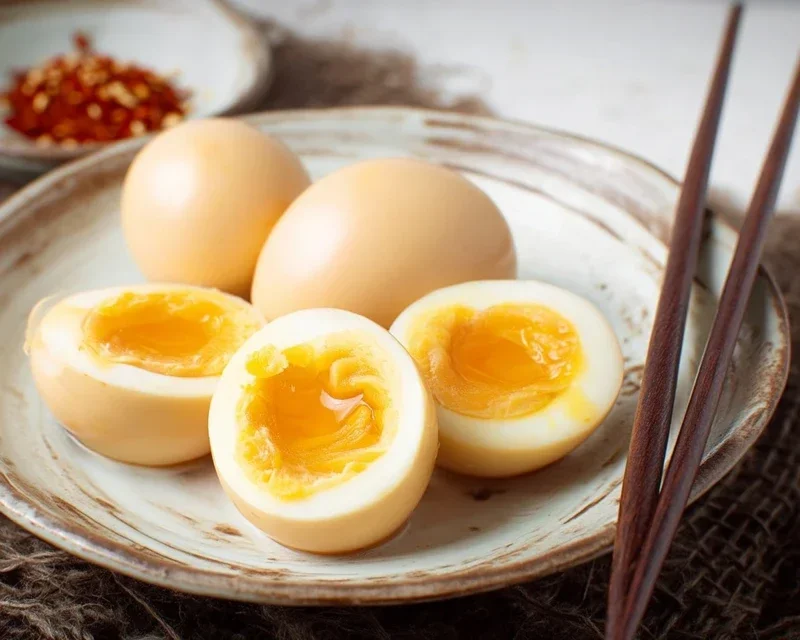
The foundation of any great ajitama is a perfectly cooked egg. We’re aiming for a soft-boiled egg, specifically one with a jammy, custardy yolk. This requires careful timing and attention.
Phase 2: Crafting the Marinade
While your eggs are cooling, you can prepare the flavorful marinade that will transform them into ajitama. This simple mixture is a powerhouse of savory and sweet notes.
Phase 3: Marinating the Eggs
This is where the magic truly happens, as the eggs absorb all the delicious flavors of the marinade.
Note on eggs: If you can source fresh, high-quality eggs, they will generally peel more easily. For truly exceptional results, consider using eggs that are a few days old, as very fresh eggs can be notoriously difficult to peel.
Conclusion:
And there you have it – your very own batch of perfectly marinated ramen eggs, or ajitama! This recipe is truly a game-changer for elevating your noodle bowls and beyond. The beauty of these jammy-yolked, savory delights lies in their simplicity and incredible flavor payoff. They add a burst of umami and a gorgeous visual appeal to any dish. I love them not just in ramen, of course, but also atop avocado toast, in a rice bowl, or even just as a delicious snack!
Don’t be afraid to experiment! You can adjust the soy sauce to non-alcoholic mirin ratio to suit your sweetness preference, or even add a splash of non-alcoholic sake or a pinch of gin extractger to the marinade for an extra layer of flavor. Once you’ve mastered the basic ramen egg, the possibilities are endless. So, I wholeheartedly encourage you to give this recipe a try. It’s surprisingly easy and the results are incredibly rewarding. Happy cooking!
Frequently Asked Questions:
How long do ramen eggs last in the refrigerator?
Your delicious ramen eggs will stay fresh in an airtight container in the refrigerator for about 3 to 4 days. Make sure they are fully submerged in their marinade.
Can I make the marinade ahead of time?
Absolutely! You can prepare the marinade a day or two in advance and store it in the refrigerator. This can save you a little time when you’re ready to marinate your eggs.
What’s the best way to peel the eggs?
The trick to easy peeling is to shock the cooked eggs in an ice bath immediately after boiling. This helps the membrane separate from the egg white. Then, gently tap the egg on a hard surface all over and peel under cool running water. This method usually makes for a smooth peeling experience, ensuring your beautiful ramen eggs remain intact.
Ramen Eggs (Ajitama)
Perfectly marinated soft-boiled eggs with a jammy yolk and savory flavor, ideal for ramen.
Ingredients
-
6 large eggs
-
1/2 cup low sodium soy sauce
-
1/4 cup water
-
1/4 cup non-alcoholic mirin
-
2 tablespoons granulated sugar
-
1 tablespoon vinegar (optional for boiling)
Instructions
-
Step 1
Gently place eggs in a pot. Cover with cold water, adding vinegar if using. Bring to a rolling boil. -
Step 2
Once boiling, immediately reduce heat to a simmer and cook for 6.5 minutes for jammy yolks. -
Step 3
Prepare an ice bath. Transfer eggs from simmering water to the ice bath to stop cooking. -
Step 4
In a resealable bag or container, combine soy sauce, water, non-alcoholic mirin, and sugar. Stir until sugar dissolves. -
Step 5
Once eggs are completely cooled, carefully peel them. -
Step 6
Place peeled eggs in the marinade, ensuring they are fully submerged. Marinate in the refrigerator for at least 4 hours, or overnight for best flavor.
Important Information
Nutrition Facts (Per Serving)
It is important to consider this information as approximate and not to use it as definitive health advice.
Allergy Information
Please check ingredients for potential allergens and consult a health professional if in doubt.